Introduction to Client Quoting in CareVision
In CareVision, new quotes and contracts are generated when adding a new client, updating a client’s package during reviews, or making significant package changes.
New potential clients are assigned the Lead status by default. When there is genuine interest and a possibility to deliver services, the client enters the Quoting Phase. This phase involves assessing the client’s needs, preparing a service quote, and determining eligibility.
This topic describes how to create and manage quotes and contracts in CareVision.
Keywords: quoting process, quoting, introduction to quoting, contracts, budgets, client onboarding, lead status, carevision quoting phase, funding types, hcp quotes, chsp quotes, ndis quotes, russel kennedy, service agreements
Step-by-step process for creating quotes
Step 1: Access Quotes & Contracts Window
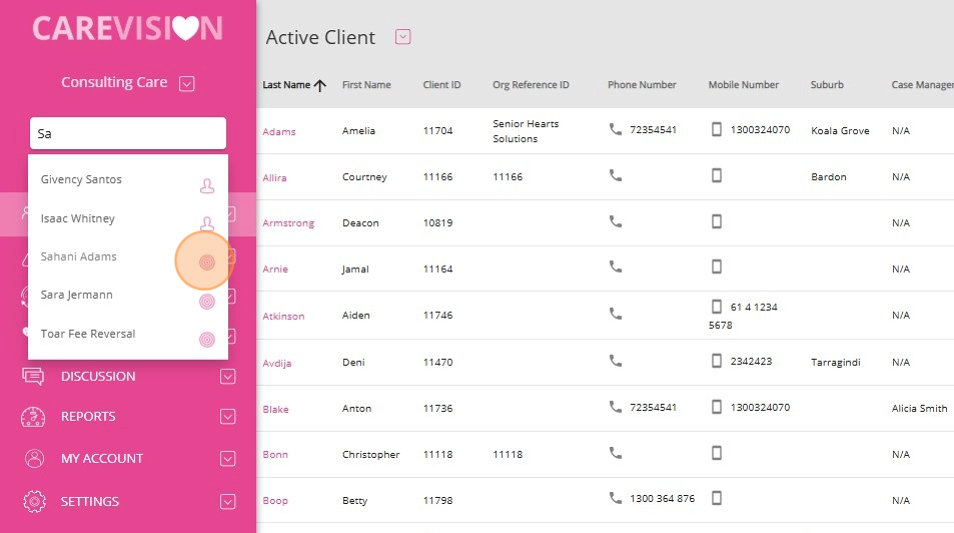
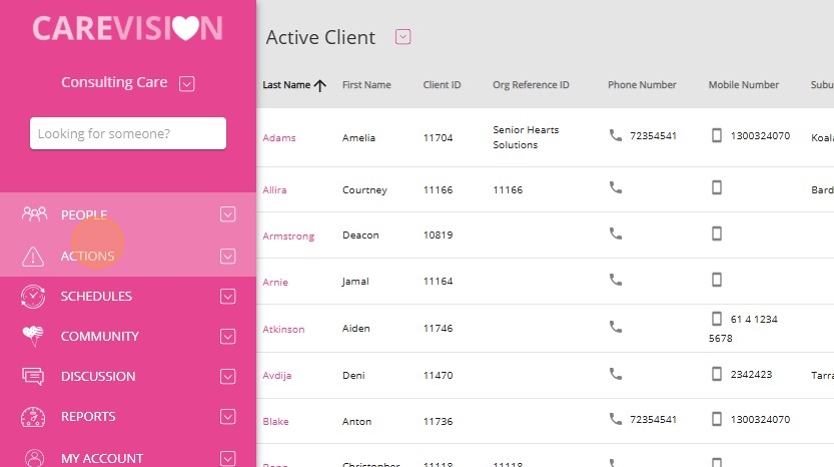
In the search bar, type the name of the lead or client.

2. From the search results, select the client you want to create a quote for. Clients are identified by a circle (target) icon.
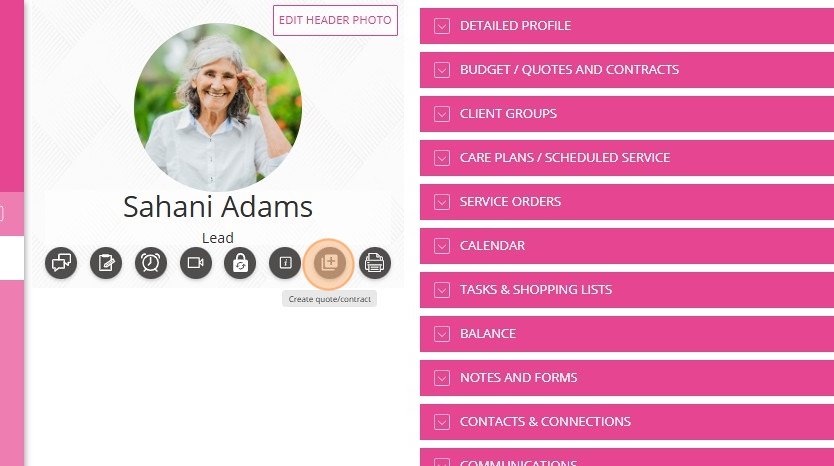
3. Below the client’s profile, click the plus icon, which represents Create Quote/Contract.

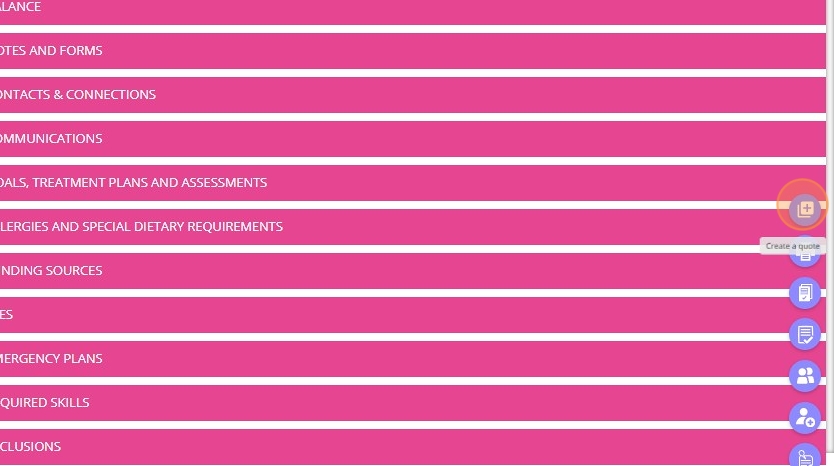
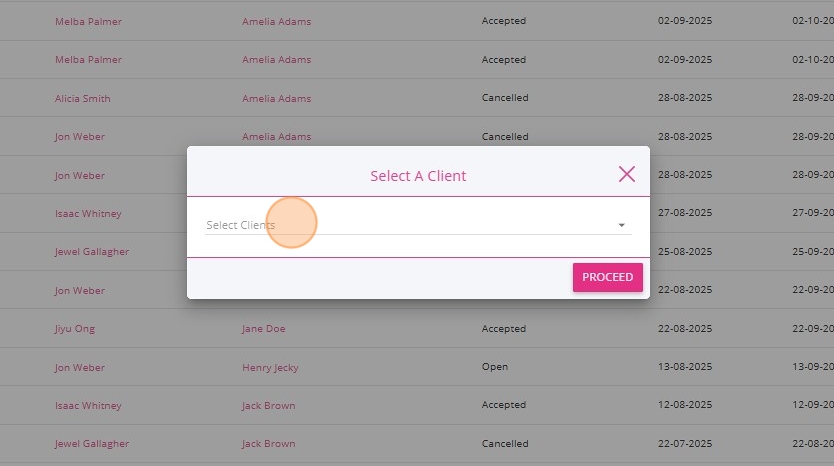
2. Click the topmost icon to Create a Quote.
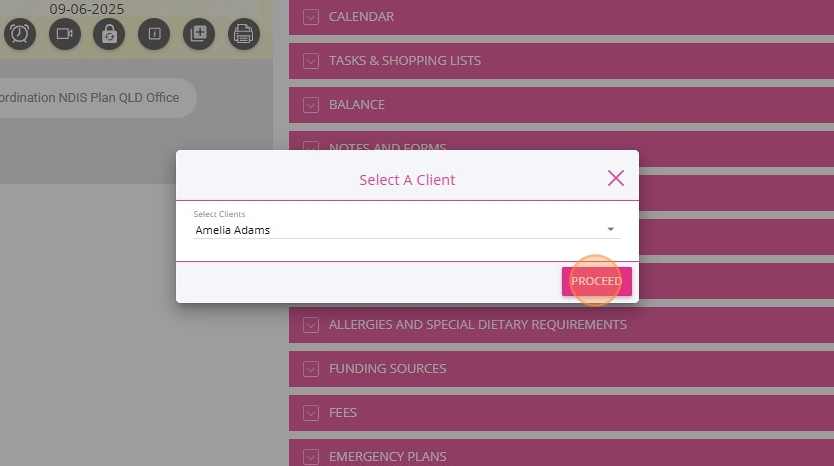
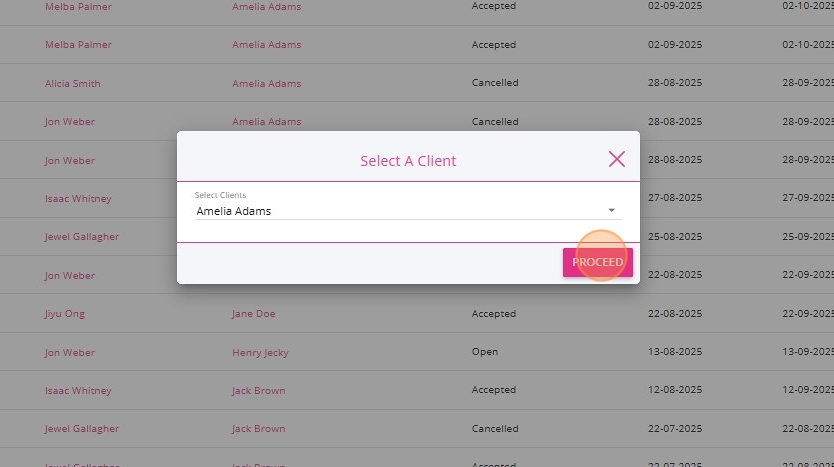
3. In the Select Clients field, either scroll to find the client or type the client’s name in the search bar.
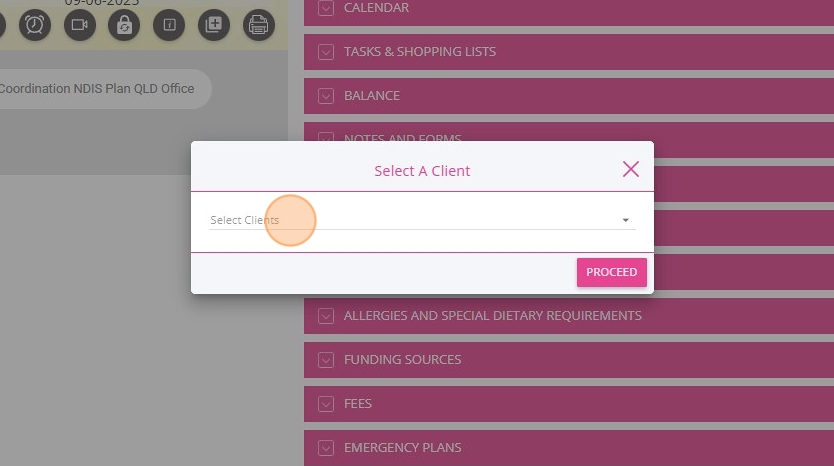
4. Click Proceed.

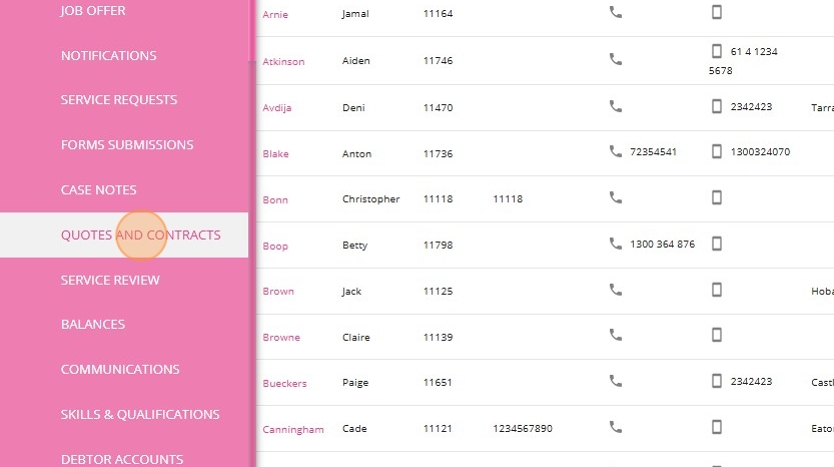
2. Select Quotes & Contracts.
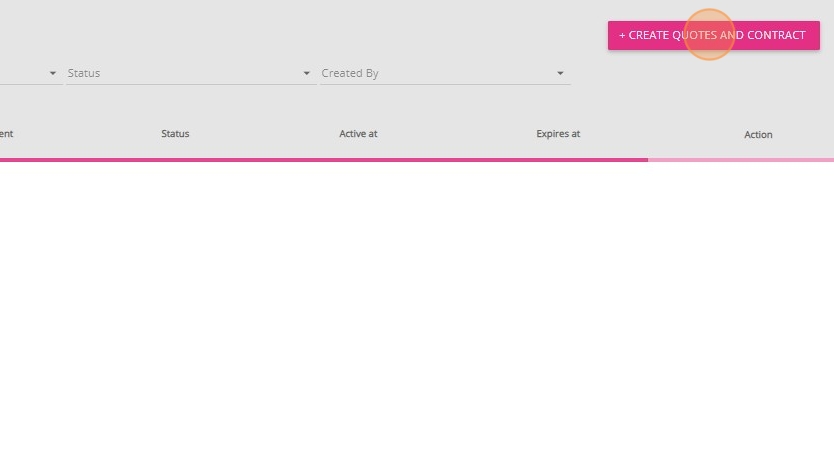
3. In the upper-right corner, click +Create Quotes and Contract.
4. In the Select Clients field, either scroll to find the client or type the client’s name in the search bar.
5. Click Proceed.
Step 2: Review Quote Header
Click here for detailed steps on how to Review the Quote Header
1. Set the Quote Type field to the appropriate print layout template for the quote (such as HCP or NDIS). Each funding stream has unique formats and requirements.
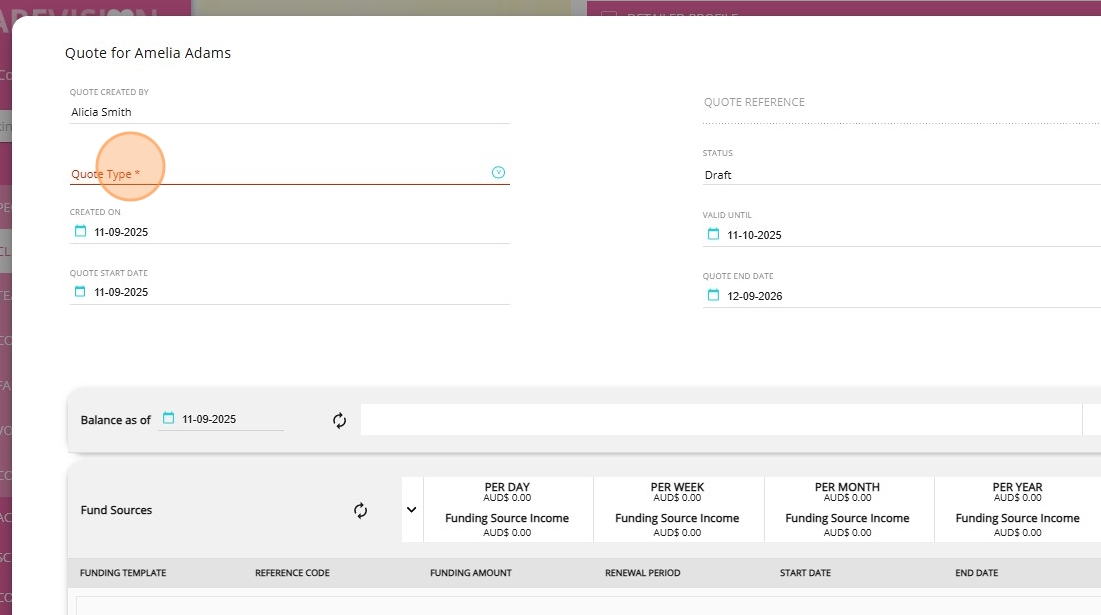
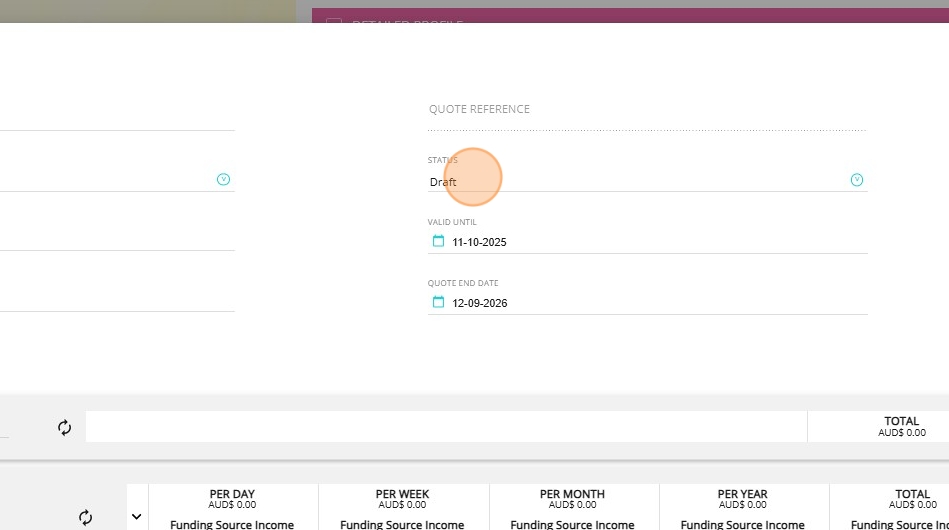
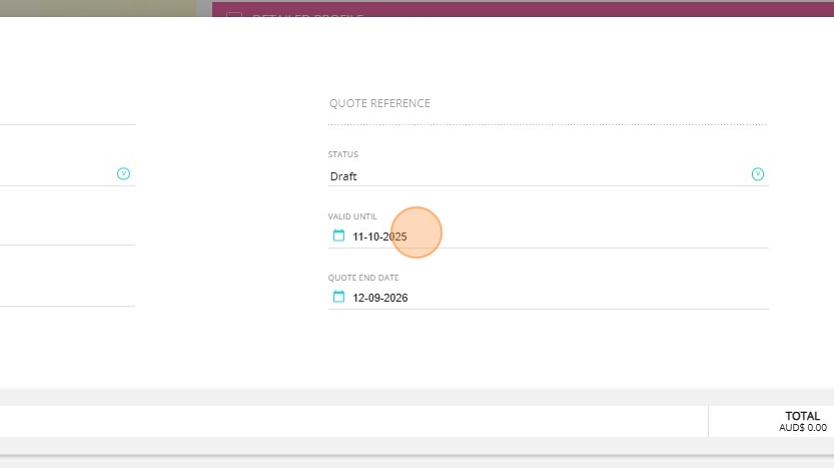
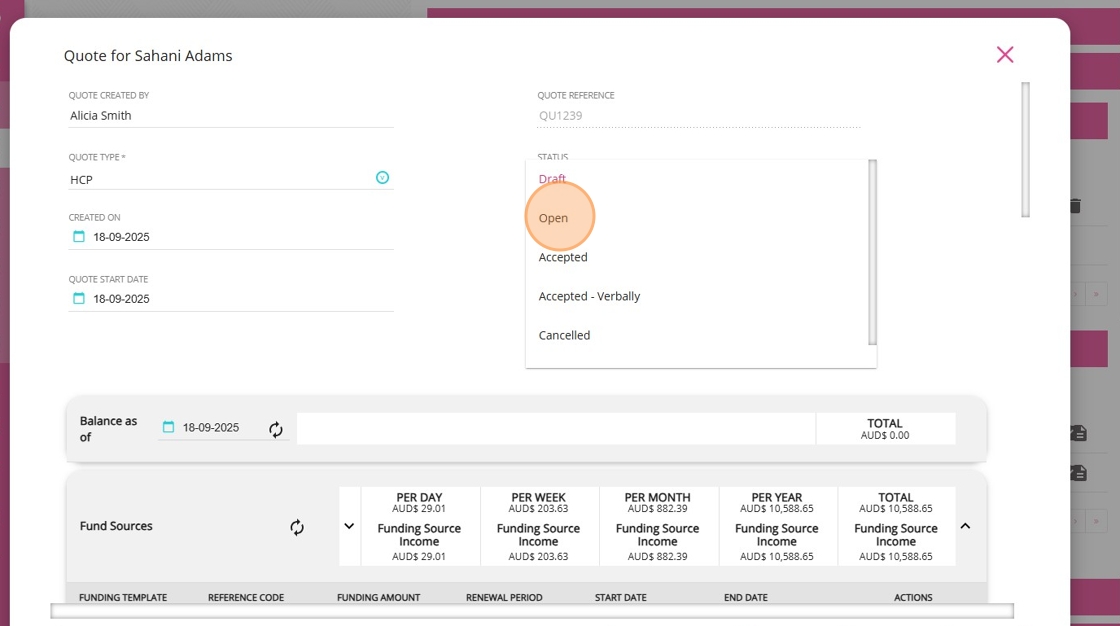
2. When you create a new quote, the default status is Draft. You can update the status as the quote progresses through different stages.
3. The Valid Until field is the expiry date for the quote, which defaults to one month from the creation date. If you want to set a different validity period, you can change the value of this field.
For a description of each field in the Quote Header, refer to the following table.
Quote Header | |
Field | Definition |
Quote Created By | Name of the person who generated the quote. This field is auto-populated. |
Quote Reference | An auto-generated quote number that increments per organisation branch. For quotes with status Draft, this field is blank. When the quote is saved, an auto-generated number is assigned. |
Quote Type | Determines the print layout template for the quote (such as HCP, NDIS). Select the appropriate quote type from the dropdown menu. |
Status | Indicates the current stage of the quote. Set the status of the quote as appropriate: Draft: Initial status when a quote is created. Used for preparation and internal review. Can be printed for internal purposes. Open: Indicates the quote is finalized and ready for the client. Allows generation and printing of the contract or agreement. Accepted: The client has formally accepted the quote or service agreement, based on the organization’s agreement policy and configuration. Accepted-Verbally: Client has provided verbal acceptance of the quote. Cancelled: Quote is void and no longer active. |
Created On | Date the quote was created. |
Valid Until | Expiry date for the quote, defaulting to 1 month from creation. Adjust this if a different validity period is needed. Otherwise, the default is applied. |
Quote Start Date | Date when the quoted service is scheduled to begin. |
Quote End Date | Date when the quoted service is scheduled to end. |
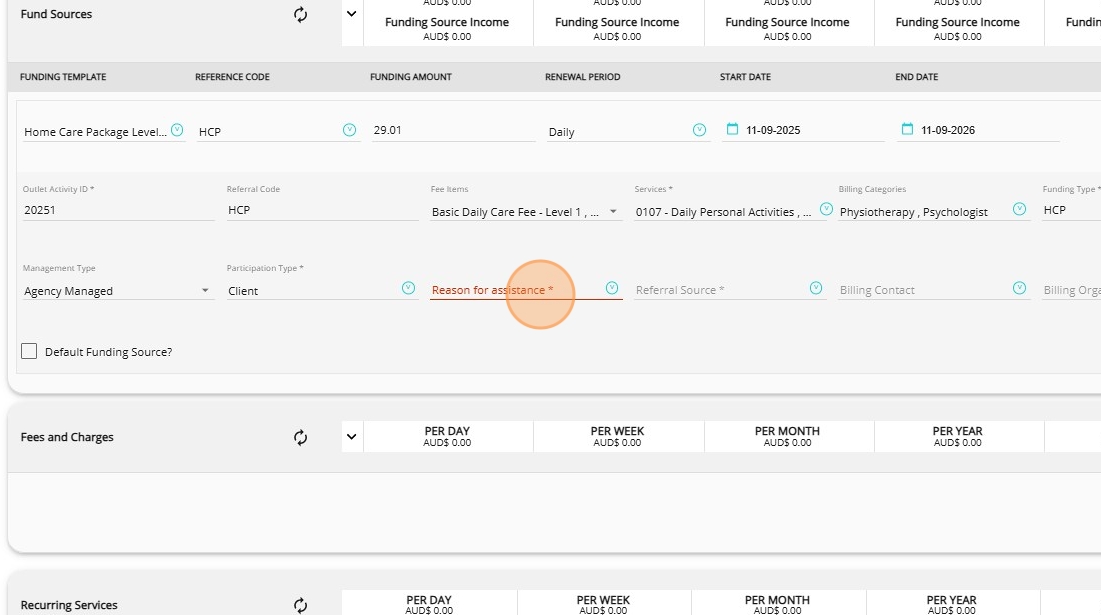
Step 3: Add Funding Source
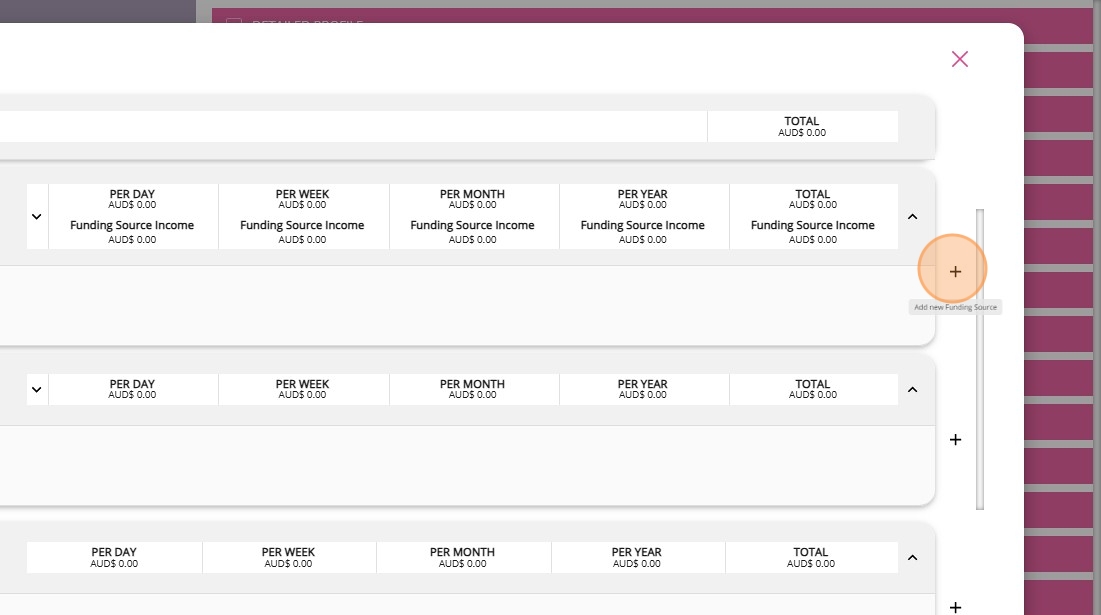
1. Click the plus sign (+) on the right side.
2. Specify the Funding Template field by selecting your preferred option from the dropdown menu.
 When a template is selected, most fields in the Fund Sources section are automatically filled based on your organisation’s Funding Source templates. You can update any remaining fields as needed. If funding source templates have not been set up for your organisation, please contact the CareVision Support Team for assistance.
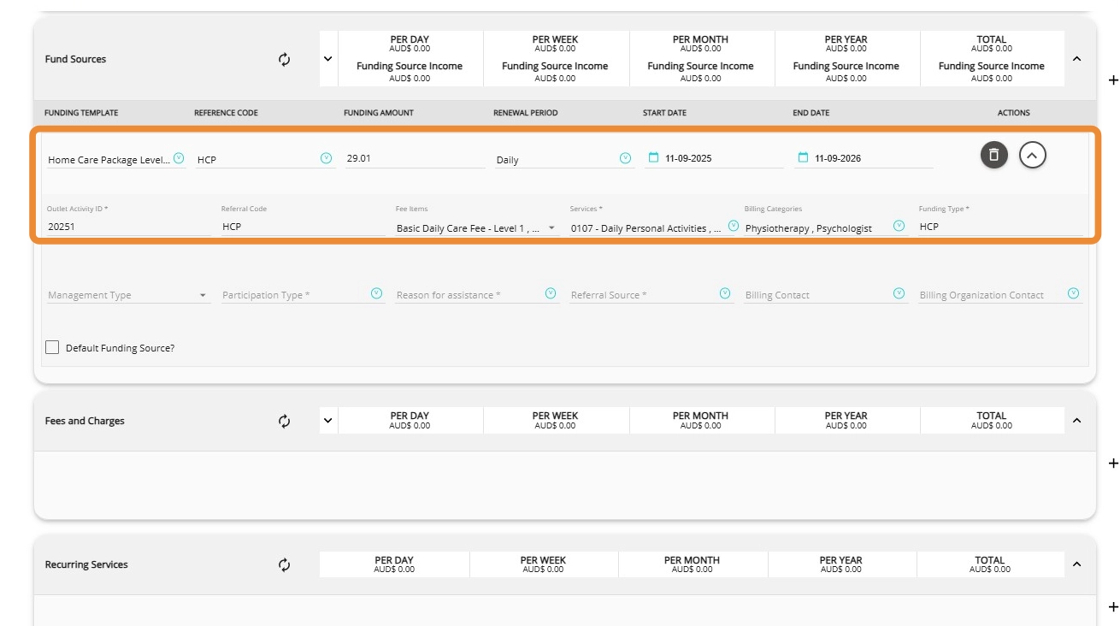
3. Set the Management Type to the option that best describes how the funding is managed. Select the appropriate choice from the dropdown menu: agency managed, plan managed, self managed, or another relevant type.
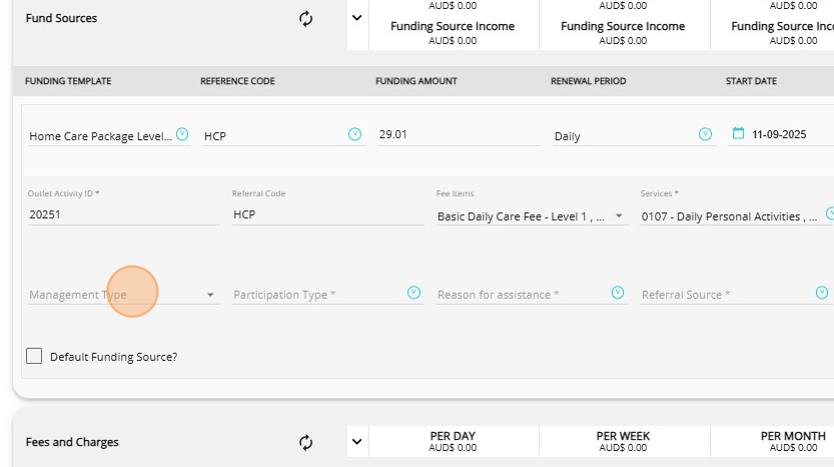
4. Set the Participation Type field to indicate whether the funding is for the client directly or for a support person. Select either Client or Support Person from the dropdown menu.

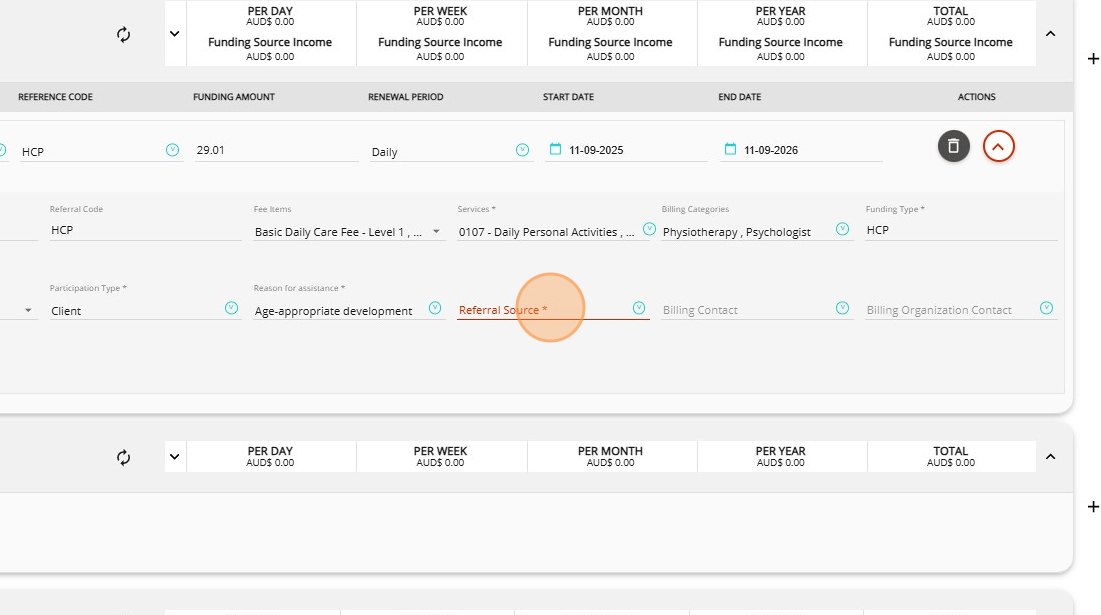
5. Set the Reason for Assistance field to the relevant option, such as personal and family safety, permanent and significant disability, or another relevant reason.
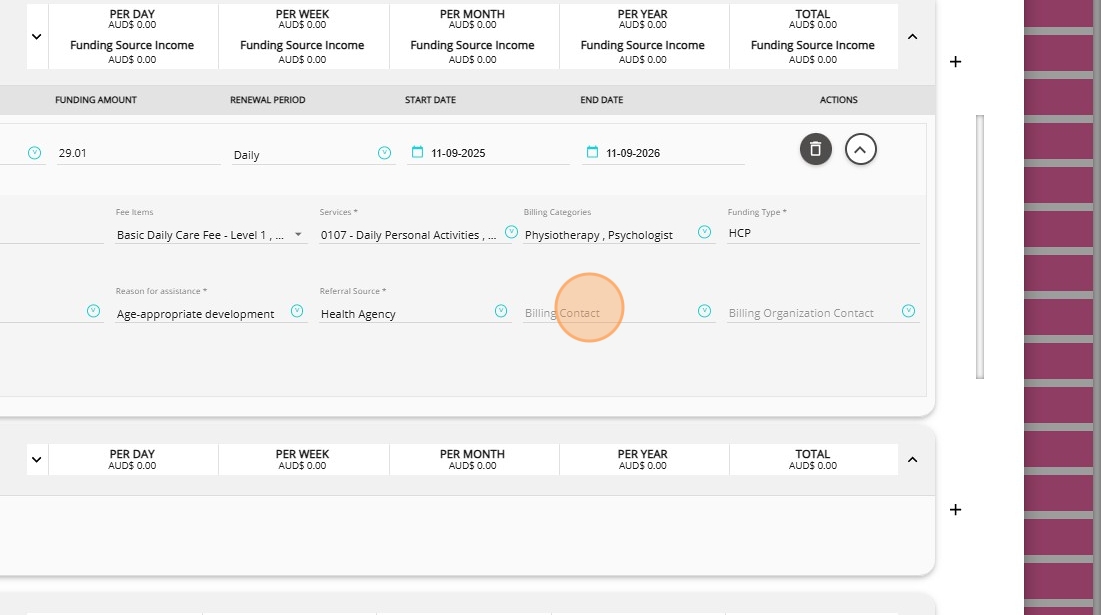
6. Set the Referral Source field to indicate the origin of the client referral. Select the appropriate option from the dropdown menu, such as hospital, agency, accommodation provider, or another relevant source.
7. Use the Billing Contact field to select the individual who should receive client invoices. For a billing contact to be selected, they must first be added as a finance billing contact on the client profile.
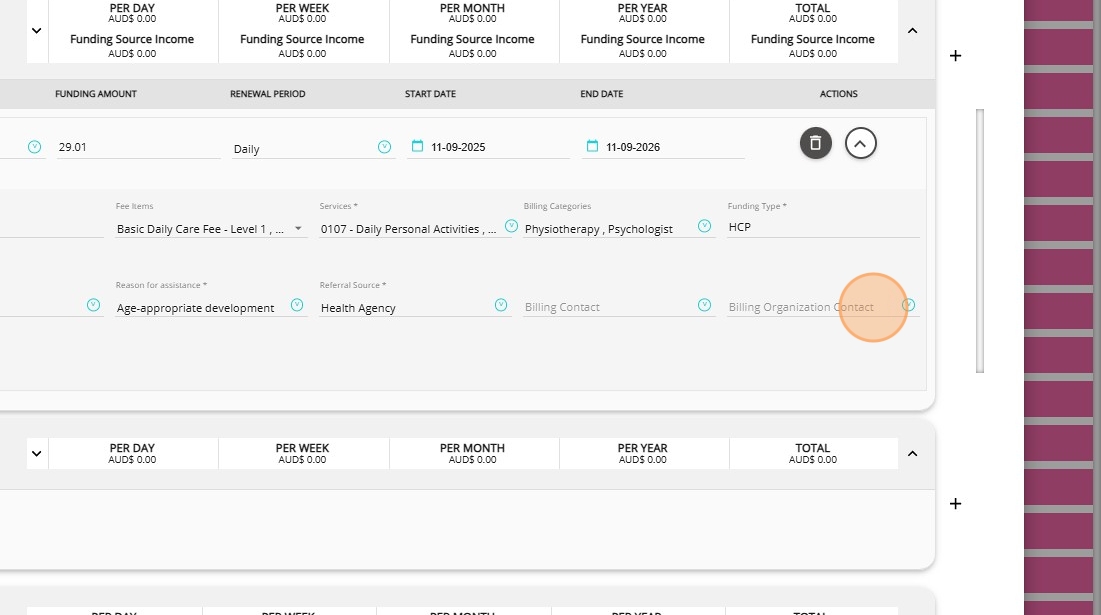
8. Specify the Billing Organisation Contact field. A billing organisation is an organisation that has been set up as an organisation contact.
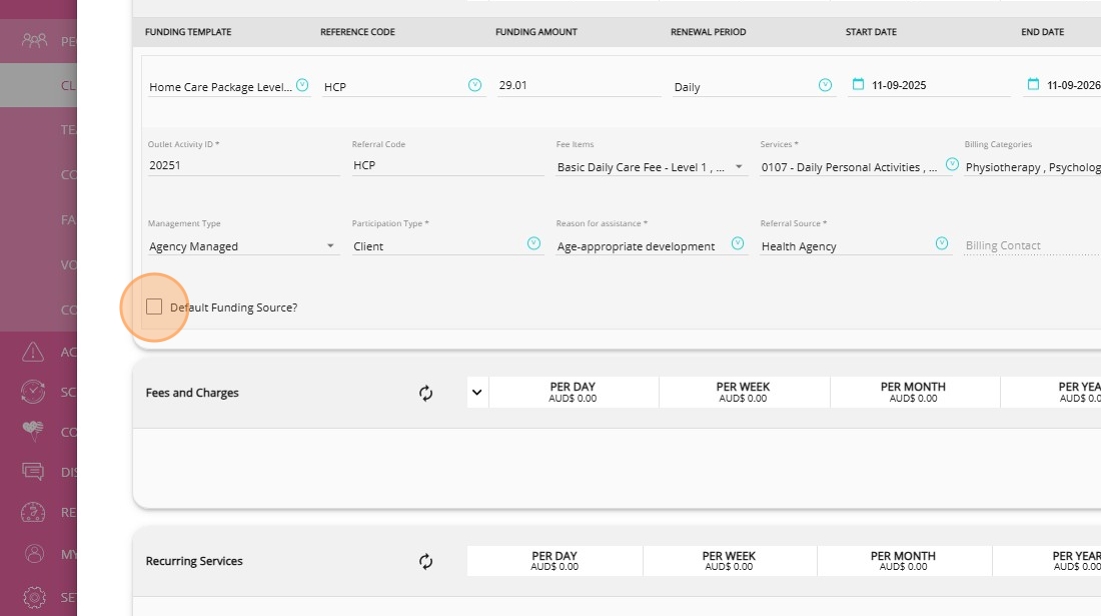
9. Specify the Default Funding Source? checkbox:
If you want the system to use your default funding source for the service, tick this box.
If you have multiple funding sources, leave the box unticked and select a funding source manually.
10. Review the Funding Summary at the top to see available funding by day, week, month, year, and in total. The fee summary shows Funds in Add to Funding and Funds in Deduct from Funding. These fee types help track any additional payments or charges for the client.
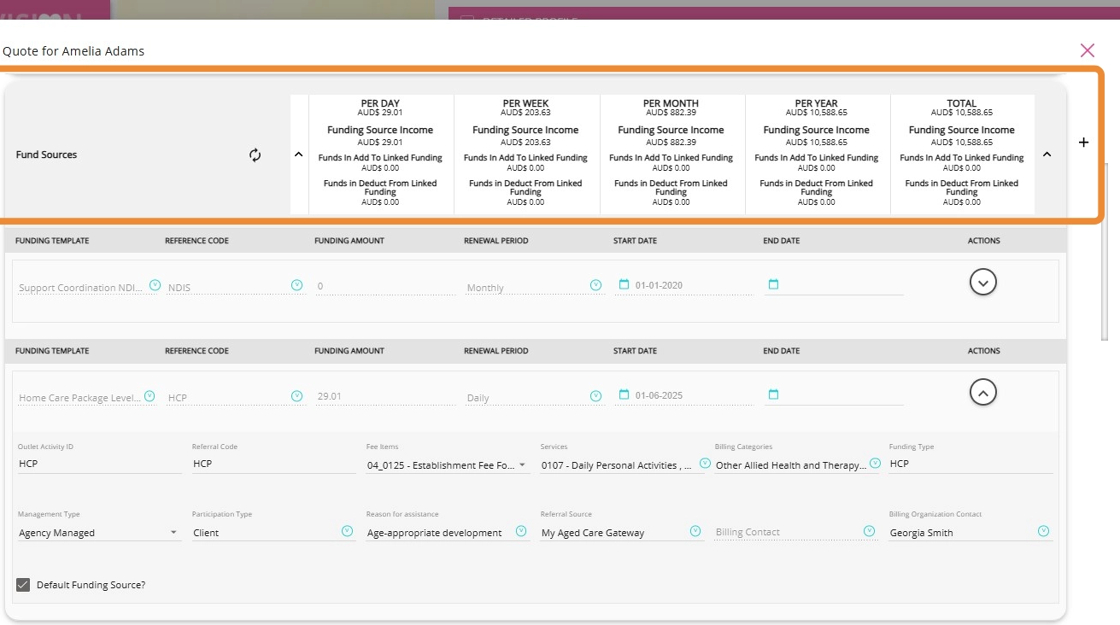
Funds in Add to Funding: This refers to additional amounts contributed to a client’s funding, such as top-up fees paid by the client on top of the main funding source. These added amounts increase the total available funding for the client.
Funds in Deduct from Funding: This refers to amounts that are deducted from the main funding source, such as income-tested fees or other charges. The total funding stays the same but is shared between the client and the funder. For more information, see this document.
For detailed description of each field in the Fund Sources section, see the following table.
Fund Sources | ||
Field | Definition | |
Funding Template | Standardizes funding details and reduces manual entry by applying preset values. Select the funding template from the dropdown menu. | |
Reference Code | Unique reference code assigned to the client and their eligible service. This can be auto-filled when using a funding template. Review or update as needed. | |
Funding Amount | The total amount of funding income allocated for the period. This value can be automatically filled when using a funding template. Enter or confirm the correct amount as needed. | |
Renewal Period | Defines how often the funding amount is renewed (Daily, Weekly, Monthly, Annually, Once Off) to match the client’s funding cycle. Daily is recommended for Home Care, whereas NDIS is usually once off or annual. This can be auto-filled with a funding template. Review or update as needed. | |
Start Date | Date when funding begins, defining when the client can start using the allocated funds. This can be auto-filled with a funding template. Review or update as needed. | |
End Date | Date when funding ends, ensuring services are billed within the valid funding period. This can be auto-filled with a funding template. Review or update as needed. | |
Outlet Activity ID | Outlet ID is a unique code that identifies and links specific transactions to a particular outlet location within your organization. Enter the Outlet Activity ID. | |
Referral Code | Unique reference code for the client and their eligible service. This can be auto-filled when using a funding template. Review or update as needed. | |
Fee Items | Types of fees covered by the funding source. Select one or more fee types from the dropdown to ensure only eligible costs are billed. | |
Services | Services or activities covered by the funding source. Select one or more services from the dropdown to define eligible supports. This can be auto-filled when using a funding template. Review or update as needed. | |
Billing Categories | Categories that determine the rate applied to each service or fee. This can be auto-filled when using a funding template. Review or update as needed. | |
Funding Type | Type of funding (HCP, NDIS, CHSP, COS, TACS, Private, Insurance, DVA) This can be auto-filled when using a funding template. Review or update as needed. | |
Management Type | Specifies how the funding is managed (agency managed, plan managed, or self managed). Select the appropriate option from the dropdown. This field is recommended for NDIS clients. | |
Participation Type | Indicates whether the funding is for the client directly or for a support person. Select the client’s participation type (Client or Support Person) from the dropdown menu. This is a required field. | |
Reason for Assistance | The main reason the client is seeking support or services. Set this field to the relevant option, such as personal and family safety, permanent and significant disability, or another relevant reason. This is a required field. | |
Referral Source | The origin of the client referral. Select the appropriate source, such as hospital, agency, accommodation provider etc. This is a required field. | |
Billing Contact | Use this field to select the individual who should receive client invoices. For a billing contact to be selected, they must first be added as a finance billing contact on the client profile. | |
Billing Organisation Contact | A billing organisation is an organisation that has been set up as an organisation contact. | |
Default Funding Source? box |
| |
Step 4: Complete Fees and Charges
Click here for detailed steps on how to Complete the Fees and Charges Section
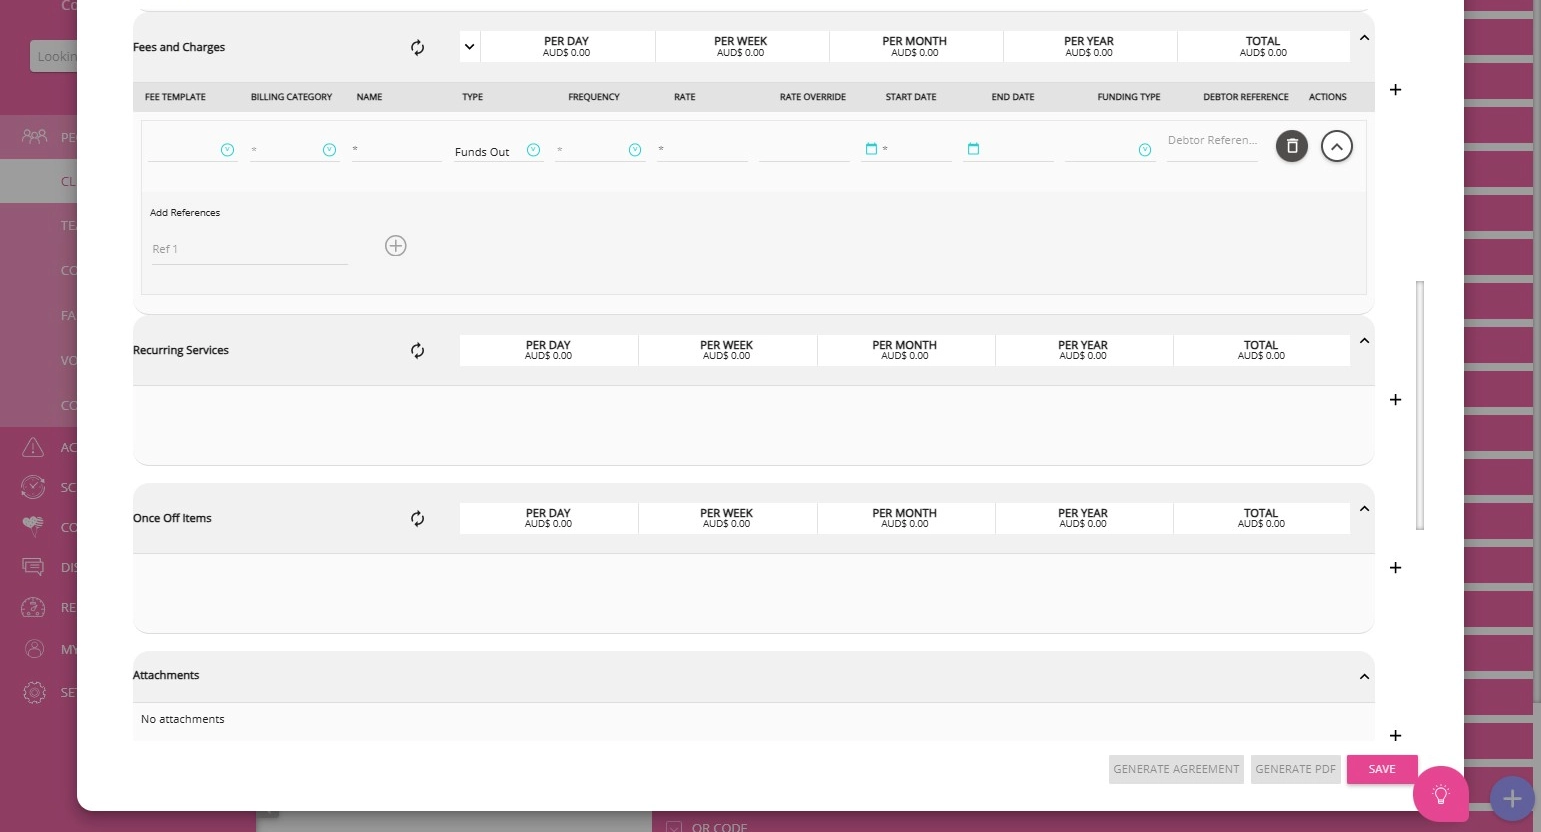 Note: When a template is selected, most fields in the Fees and Charges Section section are automatically filled based on your organisation’s Fee Items templates. You can update any remaining fields as needed. If no fee templates are available, refer to How to configure Fee Items? or contact the CareVision Support Team for assistance with setup.
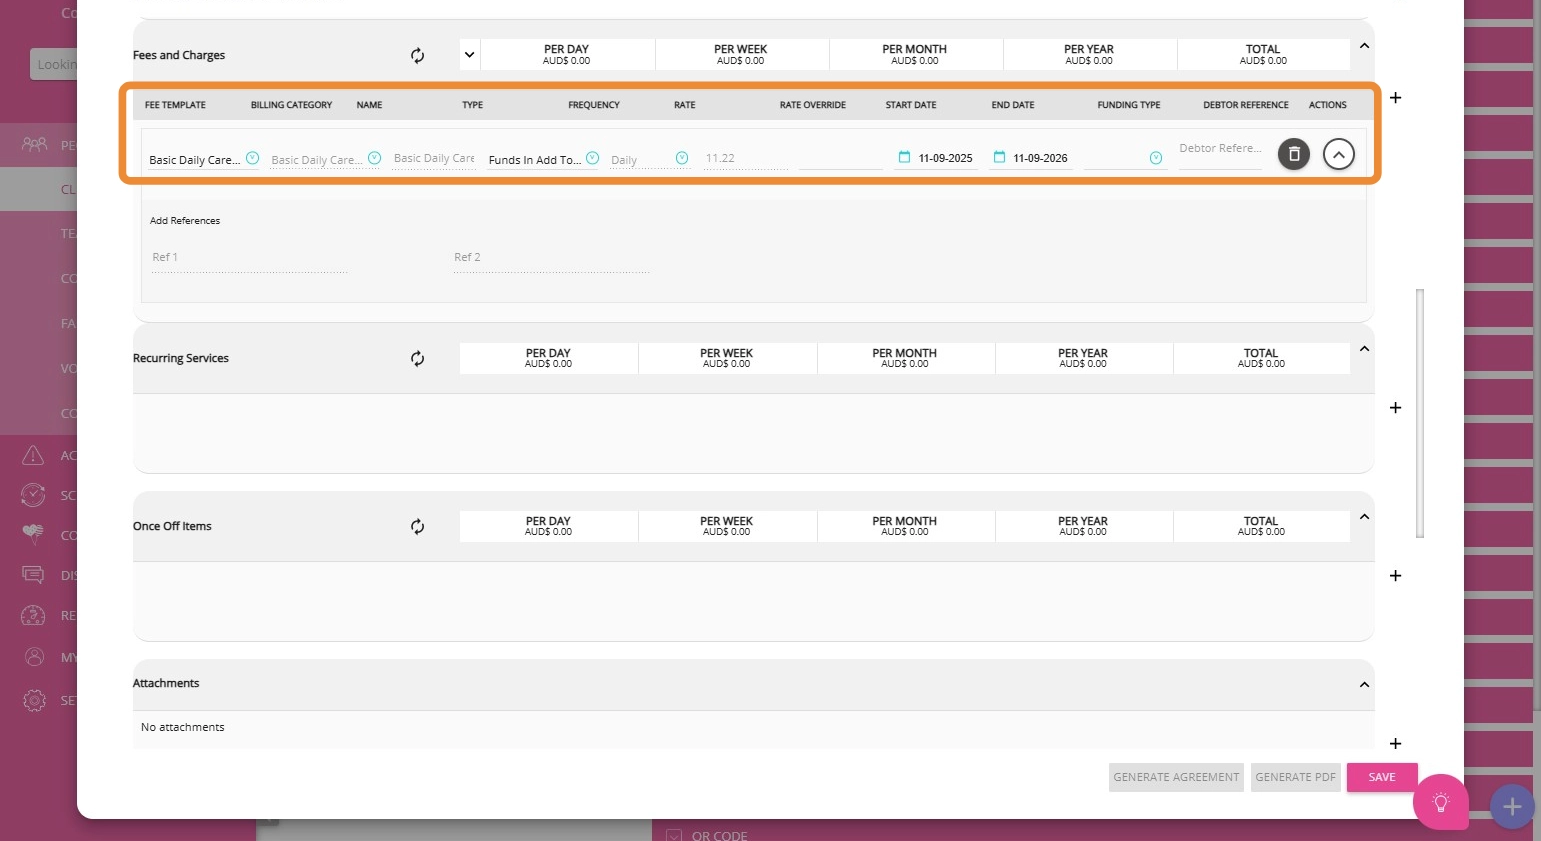
2. Billing categories determine the rate applied to each service or fee, and the available options depend on the service you selected. When you selected a fee items template, this field is automatically populated.
 If no fees billing categories are available, refer to How to configure Fees Billing Categories? or contact the CareVision Support Team for assistance with setup.
3. Use the Rate Override field to manually adjust the standard rate. Enter a new rate only if you need to override the default amount.
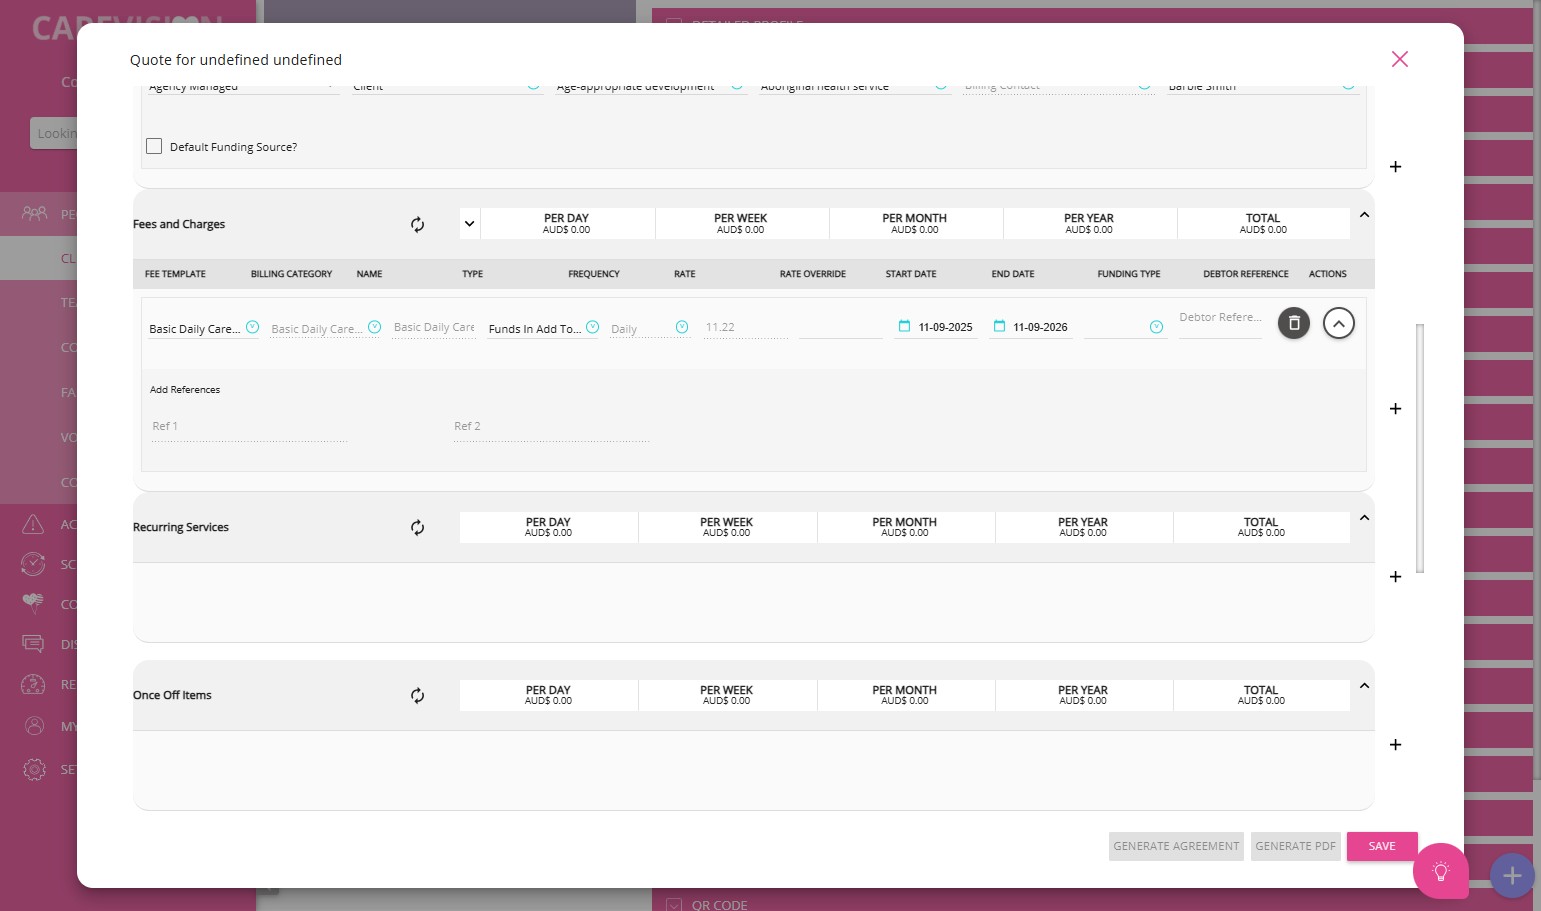
For detailed description of each field in the Fees and Charges section, see the corresponding table.
Fees and Charges | |
Field | Definition |
Fee Template | A fee template is a predefined set of charges based on the services requested and used by the client. Fees may be billed directly to the client or deducted from their available funding. Select a fee template from the dropdown menu. If no fee templates are set up, go to Settings > Fee Items. |
Billing Category | Select a billing category from the dropdown menu. Billing categories determine the rate applied to each service or fee, and the available options depend on the service you selected. This can be auto-filled when using a fee template. |
Name | The name of the fee. This can be auto-filled when using a fee billing category template. |
Type | Choose the fee type from the dropdown menu that matches how the fee will be handled for the client. There are three options:
This can be auto-filled when using a fee billing category template. |
Frequency | Indicates how often the fee is charged. This can be auto-filled when using a fee billing category template. |
Rate | Rate is the amount charged for the fee. This can be auto-filled when using a fee billing category template. |
Rate Override | Rate override allows you to manually adjust the standard rate if needed. Enter a new rate only if you need to override the default amount. |
Start Date | Start date is the date when the fee becomes effective. Enter the date the fee should begin to apply. |
End Date | End date is the date when the fee ends or is no longer applicable. Enter the date the fee should stop applying, if relevant. |
Funding Type | Funding type specifies the source of payment for the fee. Select the appropriate funding type. |
Debtor Reference | Debtor reference is used for billing or invoicing purposes. Enter the relevant reference code or number for tracking. |
Actions | Actions are options to update or remove fees as client needs change. Use actions such as edit or delete as required. |
Add References | The References field is used to add codes for reporting, billing, invoicing, payroll, and integration purposes. These codes help ensure correct rates for clients and accurate staff payments. For more information, see Carevision Reference Table. |
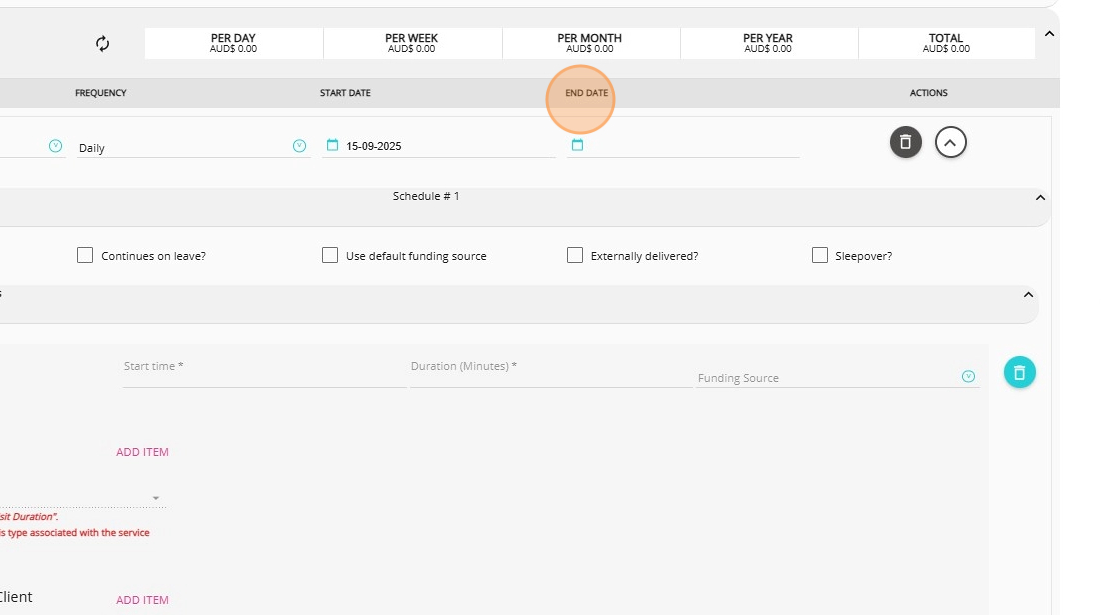
Step 5: Add Recurring Services
Add any recurring services that align with the client’s Goals, Treatment Plans, and Assessments. For new clients, you need to specify services when drafting a quote. At this stage, you might not have complete information about the client. However, we recommend collecting details about goals, conditions, and treatment plans early in your discussions and adding them to the client’s record.
You can update Goals, Conditions, and Treatment Plans during onboarding after the client has signed their contract, and it is also important to update this section whenever the client has new goals, experiences changes in their diagnosed medical condition, or during regular reviews and assessments.
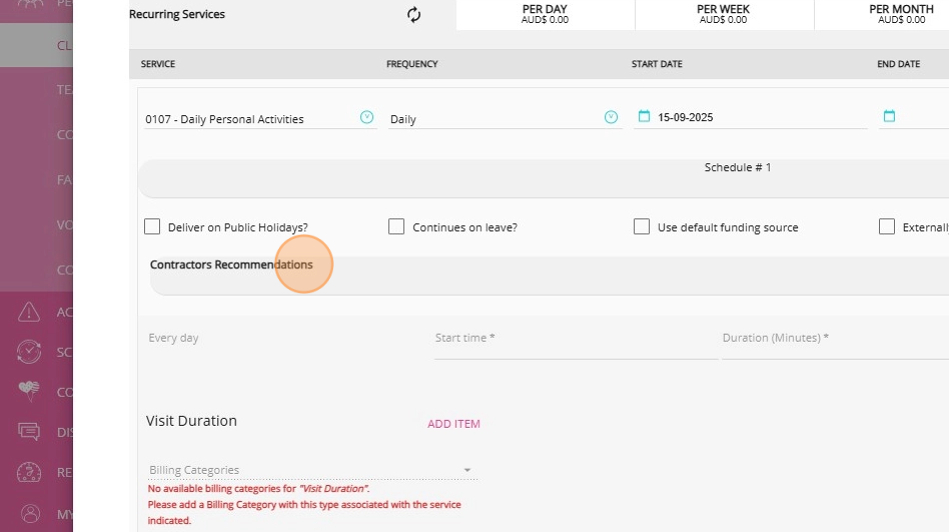
1. Select a recurring service from the dropdown menu, for example, Personal Care or Home Support.

2. Choose the appropriate frequency; the subsequent fields will adjust based on your selection.

3. Enter the date the recurring service should start.

4. Enter the end date if known, or leave blank if the service is ongoing.
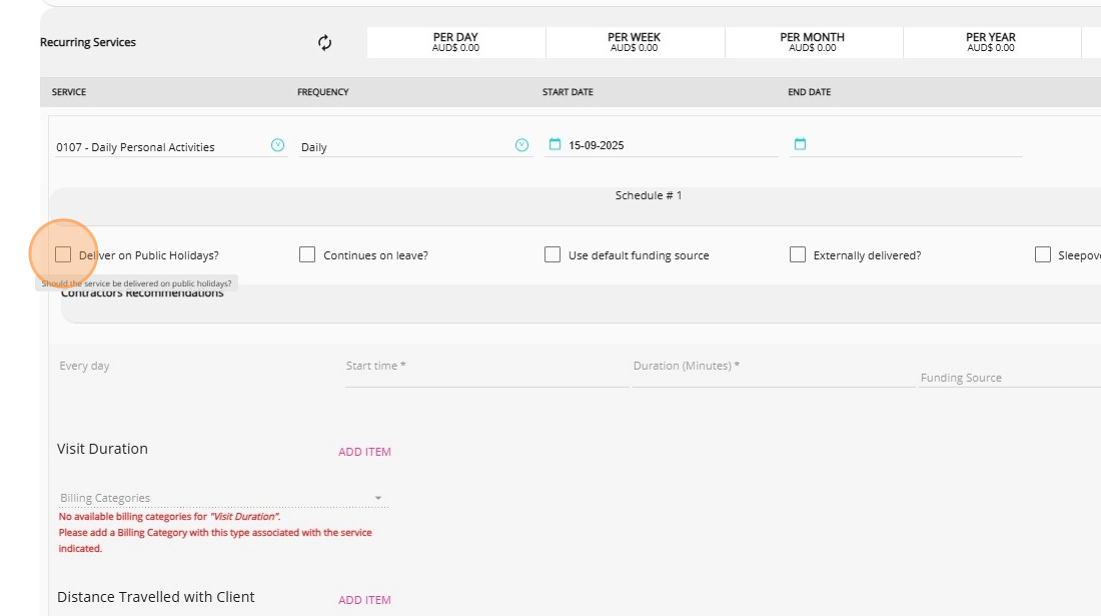
5. Tick the Deliver on Public Holidays? box if the service should be delivered on holidays.
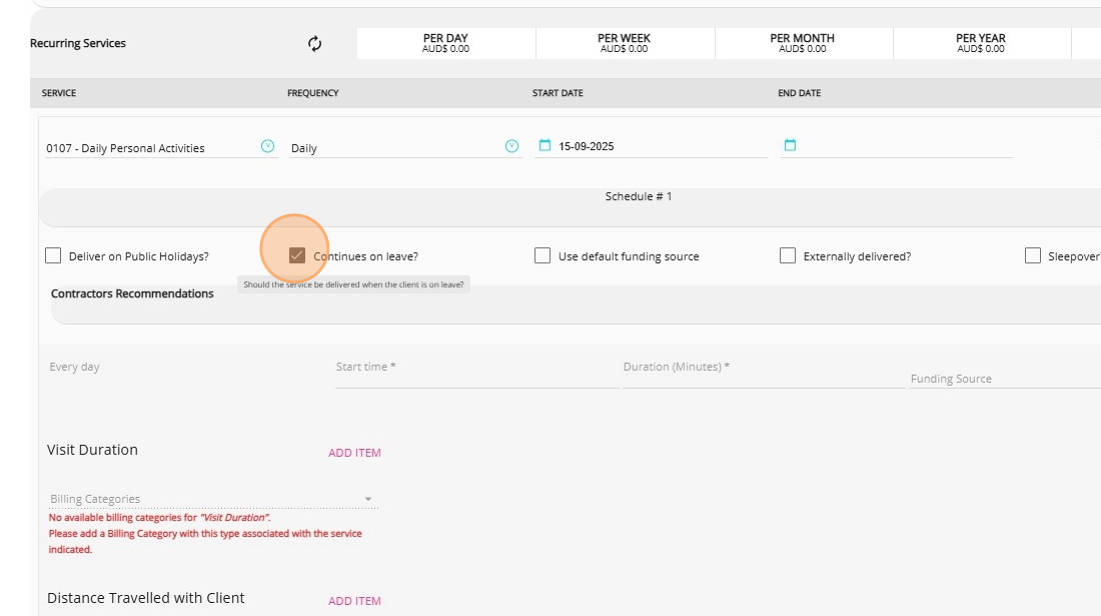
6. Tick the Continues on Leave? box if the service should continue during client leave.
7. Tick the Use Default Funding Source? box if you want the system to use client’s default funding source for the service. If you have multiple funding sources, leave the box unticked and select a funding source manually.
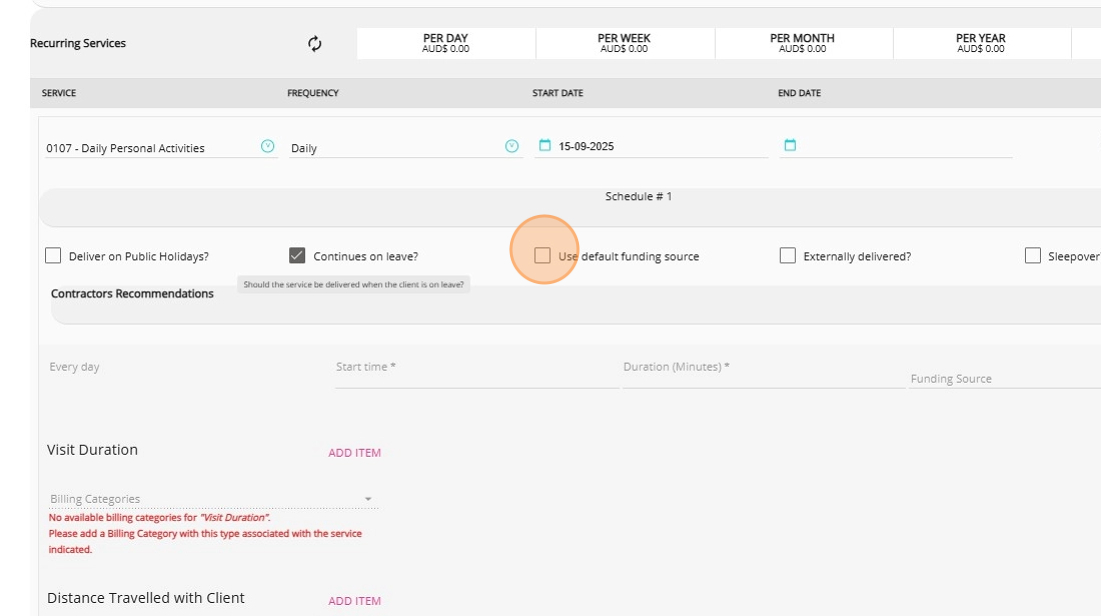
8. Tick the Sleepover? box if a staff sleepover is part of the service.
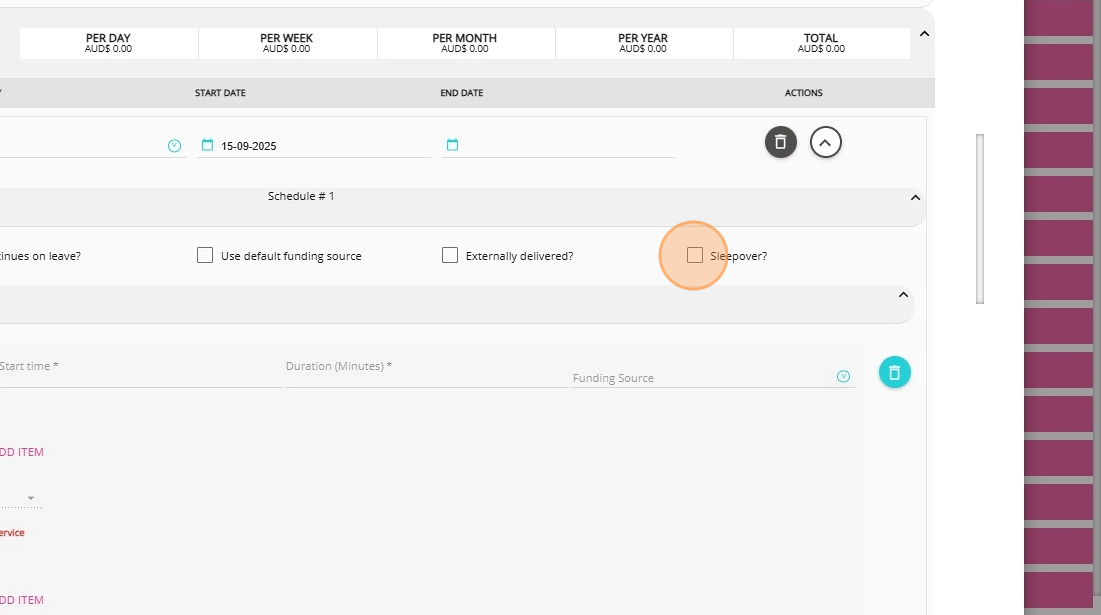
9. Review the list of recommended contractors if the service requires a contractor to perform the work. For more information, see the Contractor Add-On Module.
10. Choose the appropriate frequency. Frequency determines how often the service occurs (daily, weekly, fortnightly, monthly by date or week, yearly, or polyweekly). The subsequent fields will adjust based on your selection.

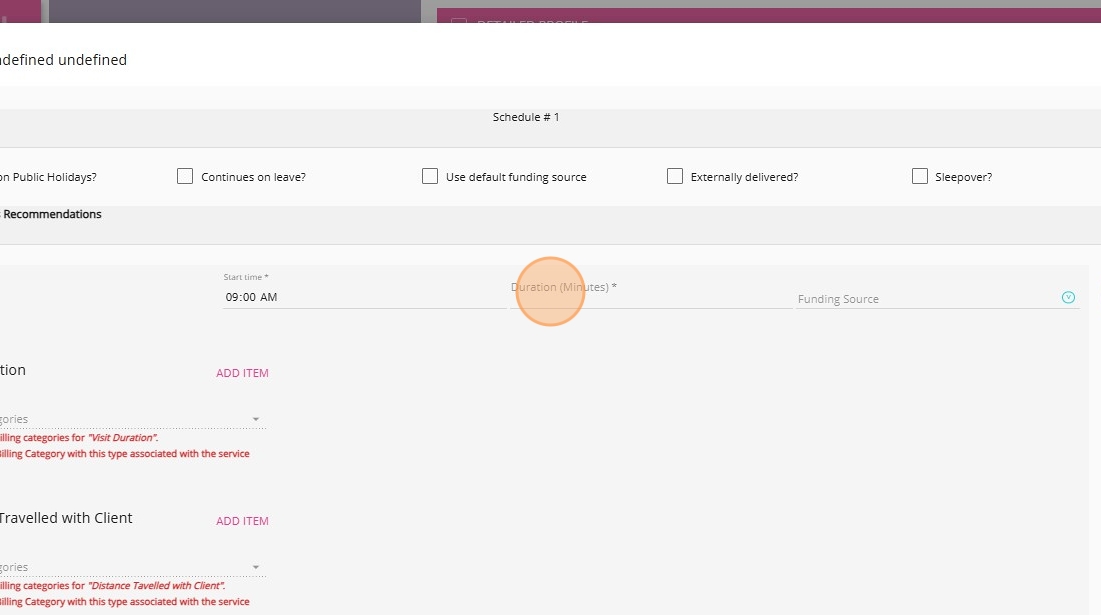
11. Enter the time the service should start.

12. Enter the number of minutes the service will last.
B. Specify Billing Categories for the Recurring Service
When setting up recurring services, it’s important to define how each service will be billed and how staff will be paid .The available billing categories help facilitate accurate client billing and appropriate staff compensation for each type of service provided. Note that the billing categories may vary depending on the funding template and your organization’s system configuration. Specify only the relevant billing category for each service the client needs in the quote.
Visit Duration
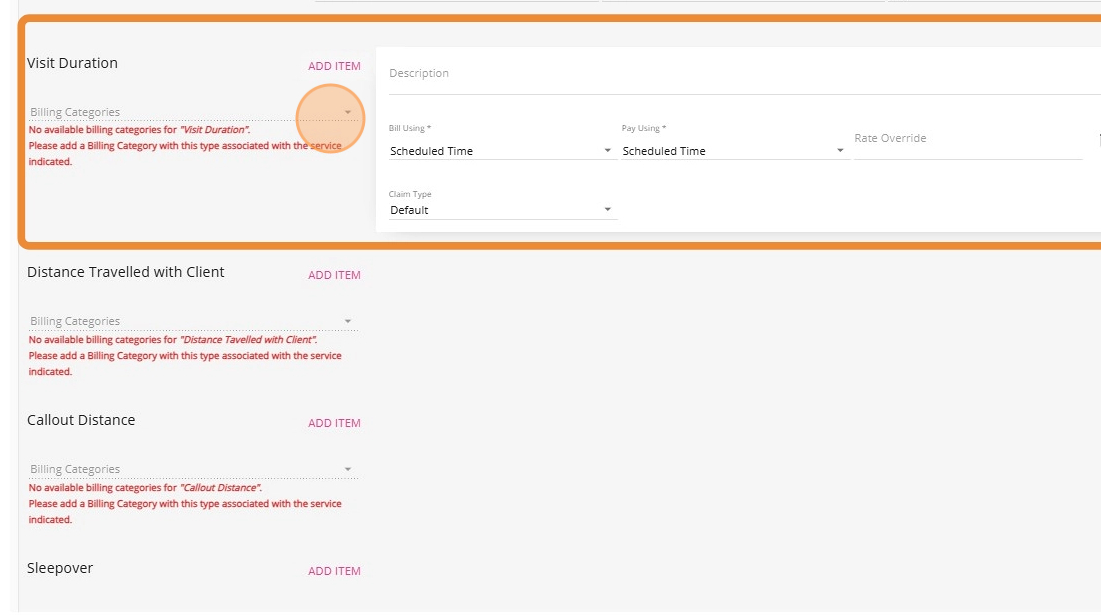
2. Click Add Item to display fields where you can set how the client will be charged and how the staff will be paid.
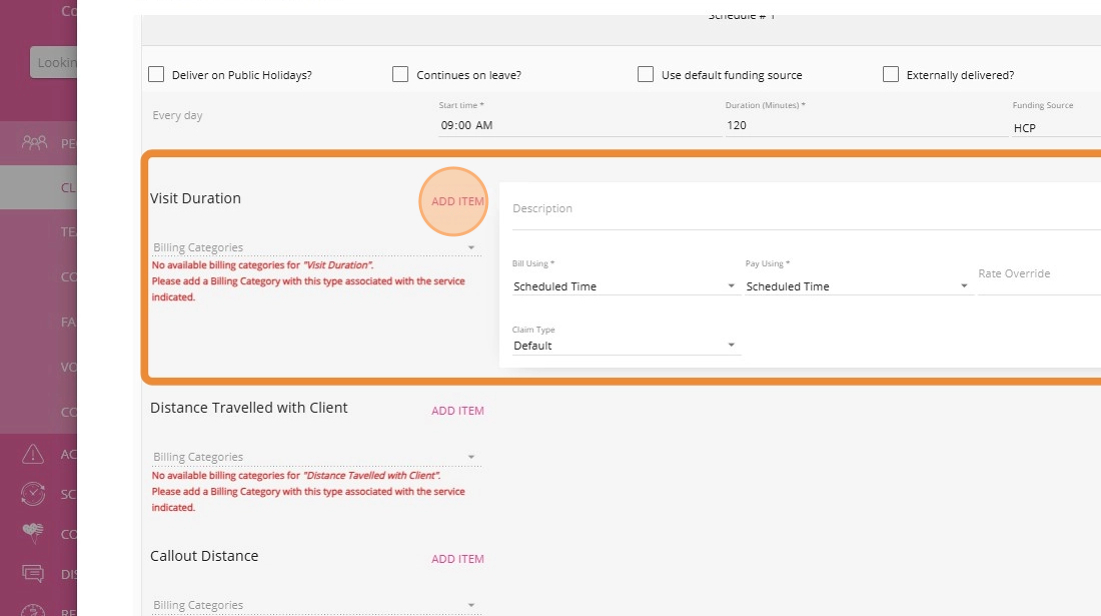
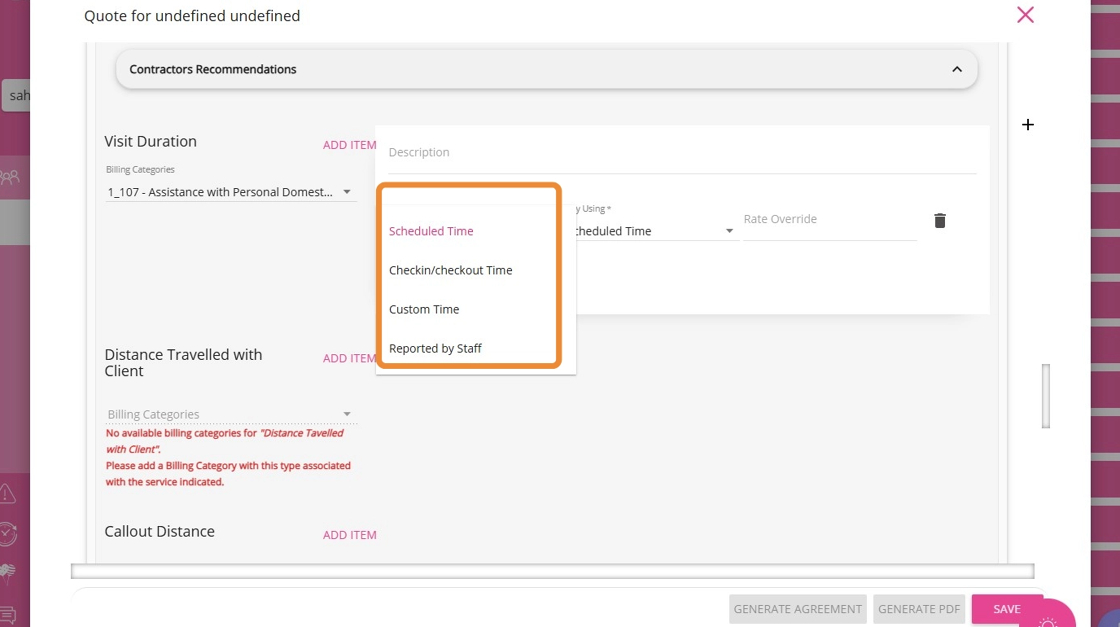
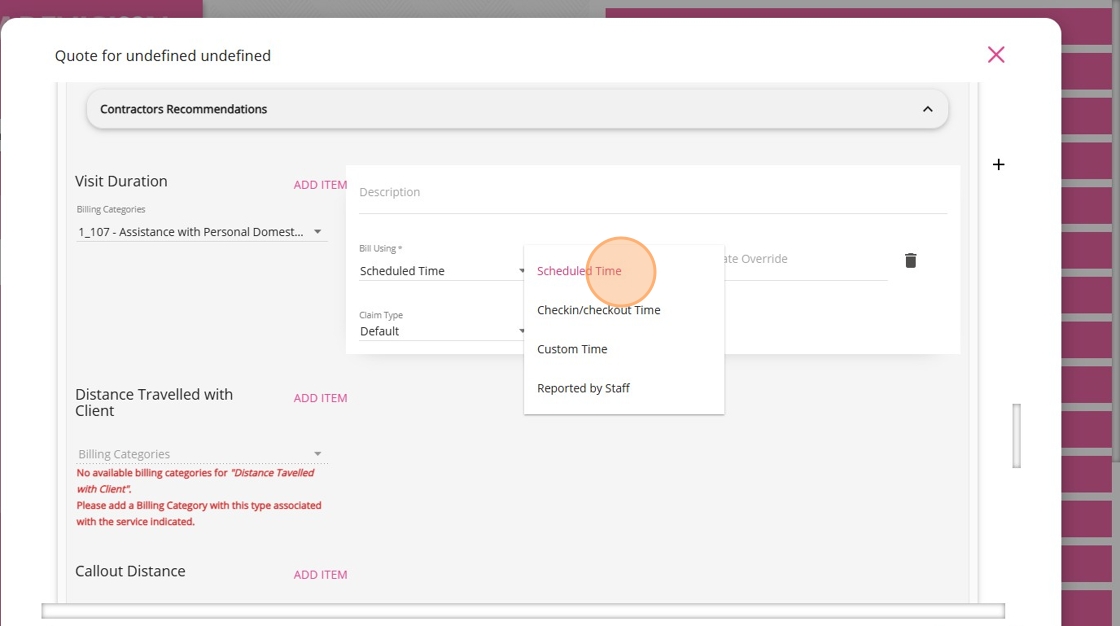
3. Specify the Bill Using field. Options include:
- Scheduled Time: Bill based on the scheduled appointment time.
Check-in/Checkout Time: Bill based on the actual check-in and check-out times.
Custom Time: Enter a custom duration for billing.
Reported by Staff: Bill according to the time reported by staff.
4. Specify the Pay Using field. Specify how staff will be paid, using the same options as above (Scheduled Time, Check-in/Checkout Time, Custom Time, or Reported by Staff).
5. If applicable, specify a rate override to use a different rate than the default.
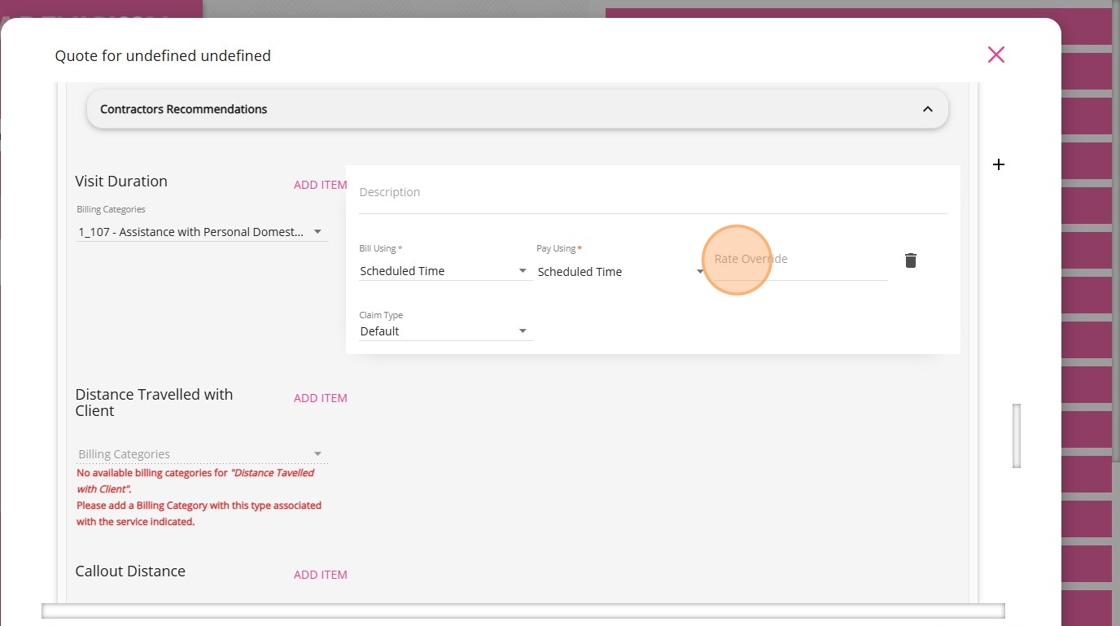
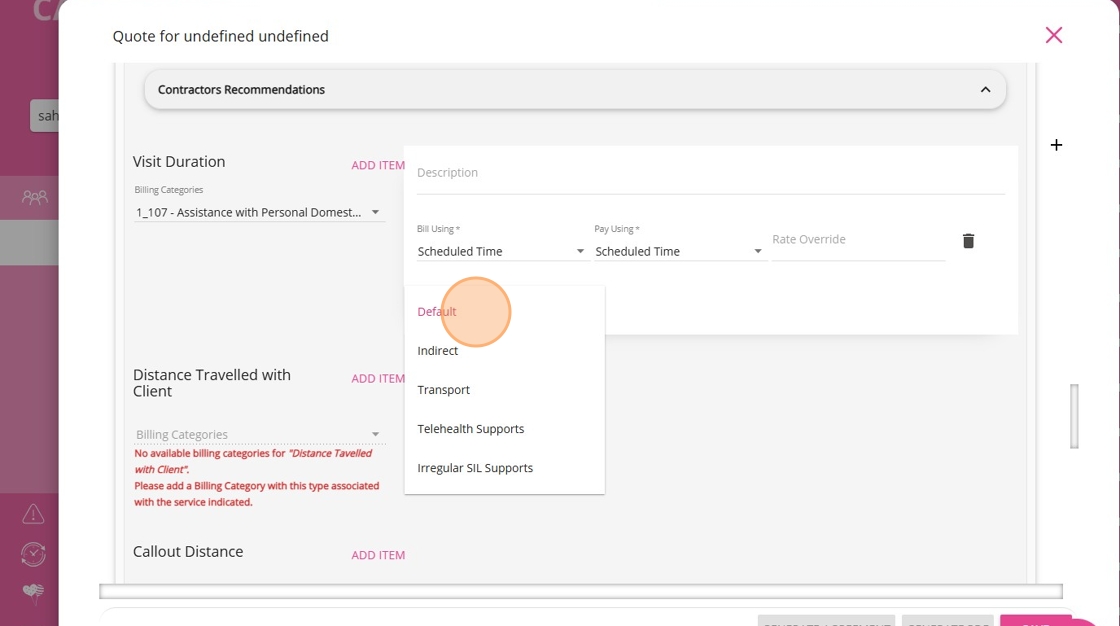
6. Select the appropriate claim type for the service.
Distance Travelled with Client
This refers to the total distance a staff member travels while accompanying a client during a service. This distance is used to determine both how the client will be billed for transportation and how the staff member will be paid for travel provided as part of the service.

2. Click Add Item to display fields where you can set how the client will be charged and how the staff will be paid.

3. To the right, specify how staff time and distance will be recorded for billing in the Bill Using field. Options include:
System Tracked Distance: The distance is automatically calculated by the system from the staff member’s device during the service.
Staff Reported/Adjusted Distance: The staff member manually enters or adjusts the distance travelled with the client, allowing for corrections or additional details not captured by the system.
Custom Distance: A specific distance value is entered manually to accommodate unique scenarios.
System Tracked Time: The time spent travelling is automatically recorded by the system using check-in and check-out data.
Staff Reported/Adjusted Time: The staff member manually enters or adjusts the time spent travelling, allowing for corrections or special cases.
Custom Distance: Both the distance (in kilometres) and the duration of travel are entered manually, providing full flexibility for unique billing and pay situations.

4. Specify the Pay Using field to determine how staff will be paid, using the same options as above.
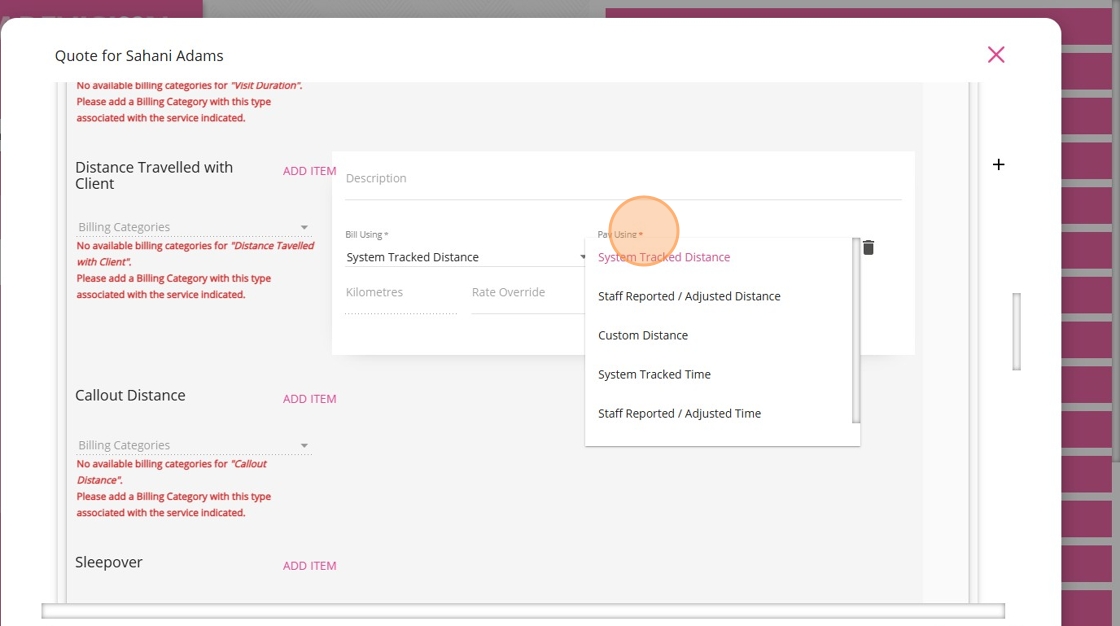
5. If applicable, specify a rate override to use a different rate than the default.

Callout Distance

2. Click Add Item to display fields where you can set how the client will be charged and how the staff will be paid.
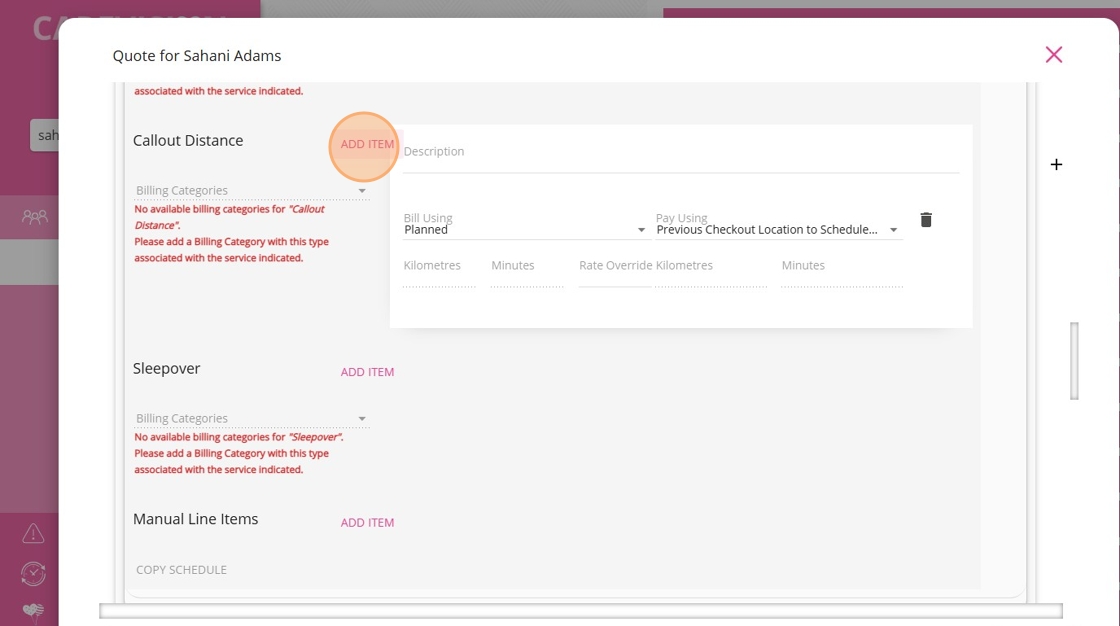
3. Specify the Bill Using field. Options include:
Planned: Uses the planned or scheduled route distance.
Check-in: Uses the actual distance based on staff check-in location.
Custom: Allows you to manually enter a specific distance in kilometers and minutes.

4. Specify the Pay Using field. Options include:
- Previous checkout location to scheduled start location: Calculates distance from the last checkout point to the next scheduled start location.
- Previous appointment’s scheduled end to check-in location: Uses the distance from the previous appointment’s end location to the current check-in location.
- Previous appointment’s scheduled end to scheduled start location: Calculates distance from the previous appointment’s end to the next scheduled start.
- Custom Distance: Manually enter a specific travel distance.
- Custom Minutes: Manually enter the travel time in minutes.

5. If applicable, specify a rate override to use a different rate than the default.

Sleepover
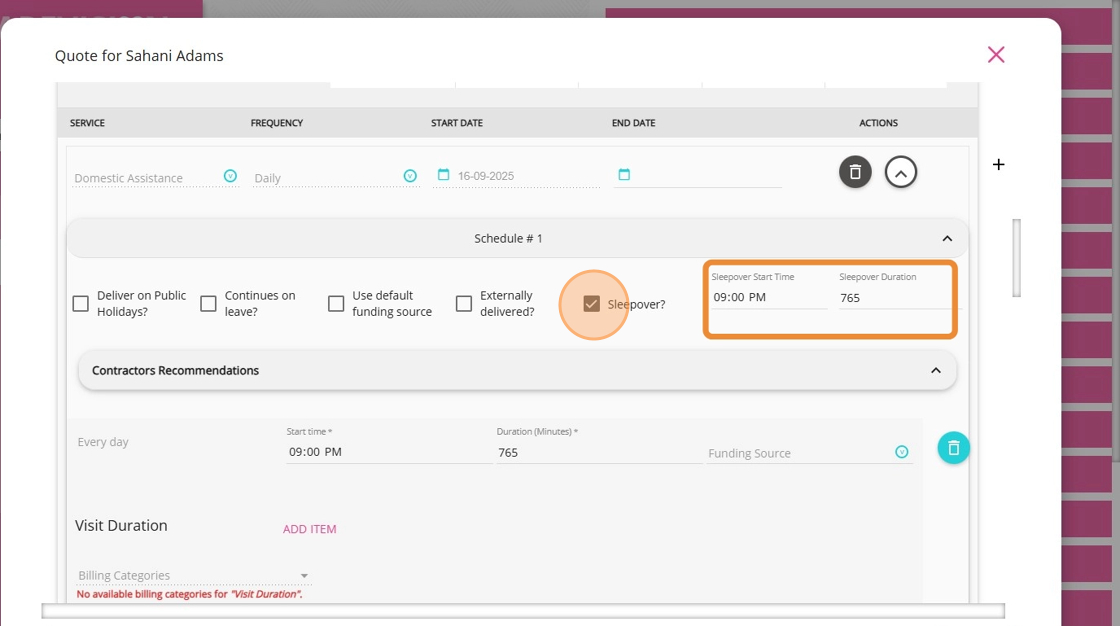
2. In the Billing Categories dropdown, select the appropriate option. The selected billing category will determine the rate the client is charged.

3. Click Add Item to display fields where you can set how the client will be charged and how the staff will be paid.
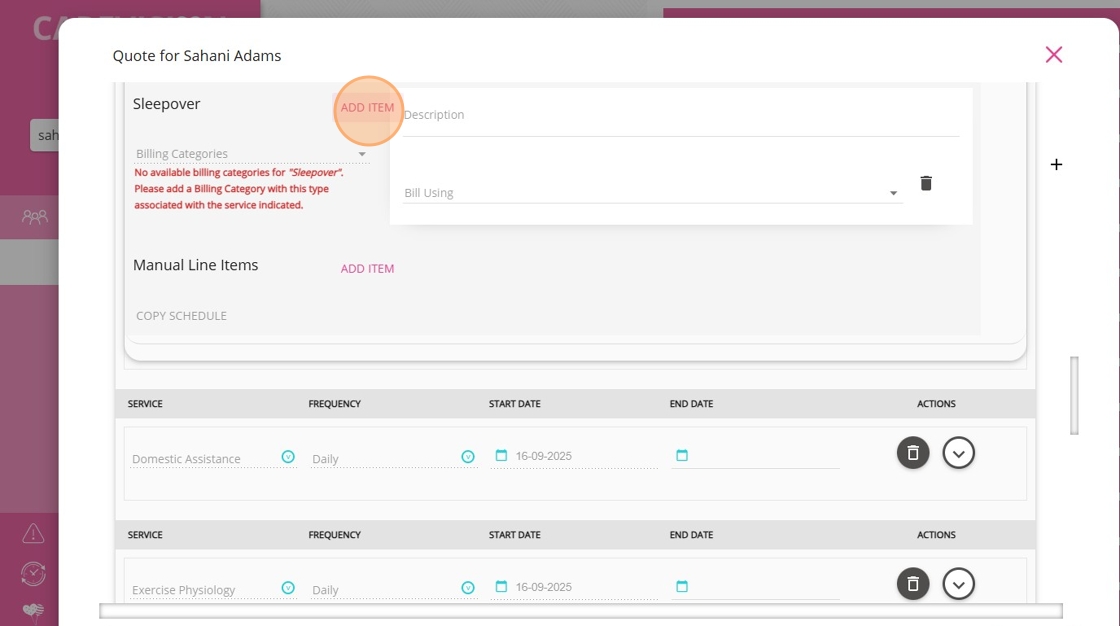
4. Specify the Bill Using field. Options include:
Scheduled Time: Bills based on the scheduled sleepover period.
Actual: Bills based on the actual time recorded during the sleepover.
Manual: Allows you to manually enter both the start time and duration.

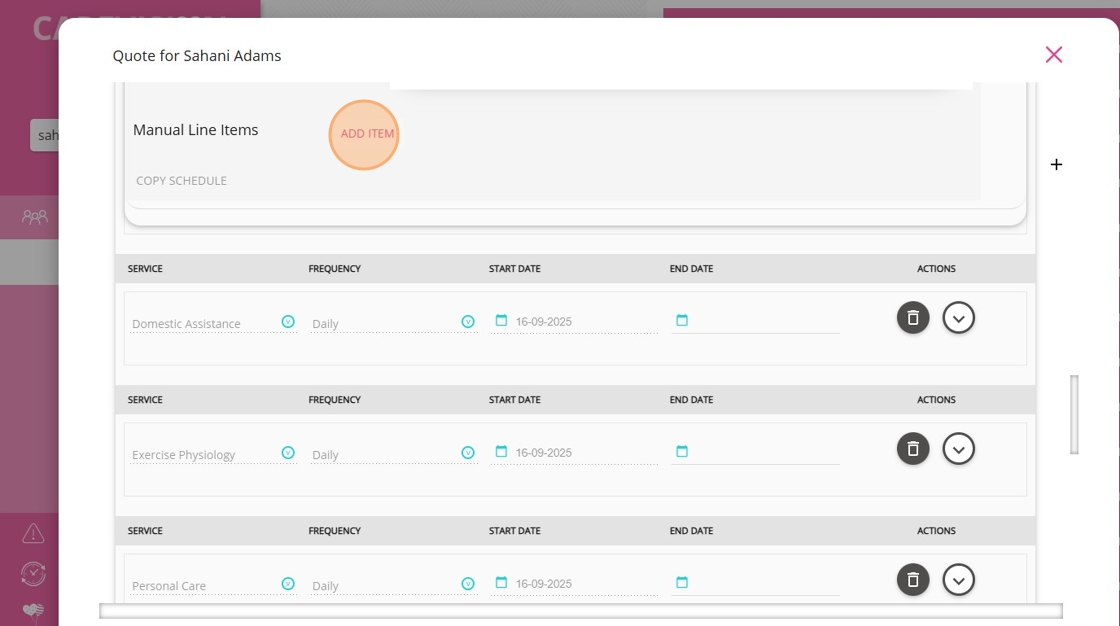
Manual Line Item
Manual Line Items are used to add extra charges to a client’s invoice, such as consumables, purchases, or additional service fees that are not automatically generated by the system. They can also be used for invoice adjustments or corrections.
2. You can enter the details manually or select a line item template (for example, for a taxi voucher) to auto-populate the fields.

5. Complete the required fields:
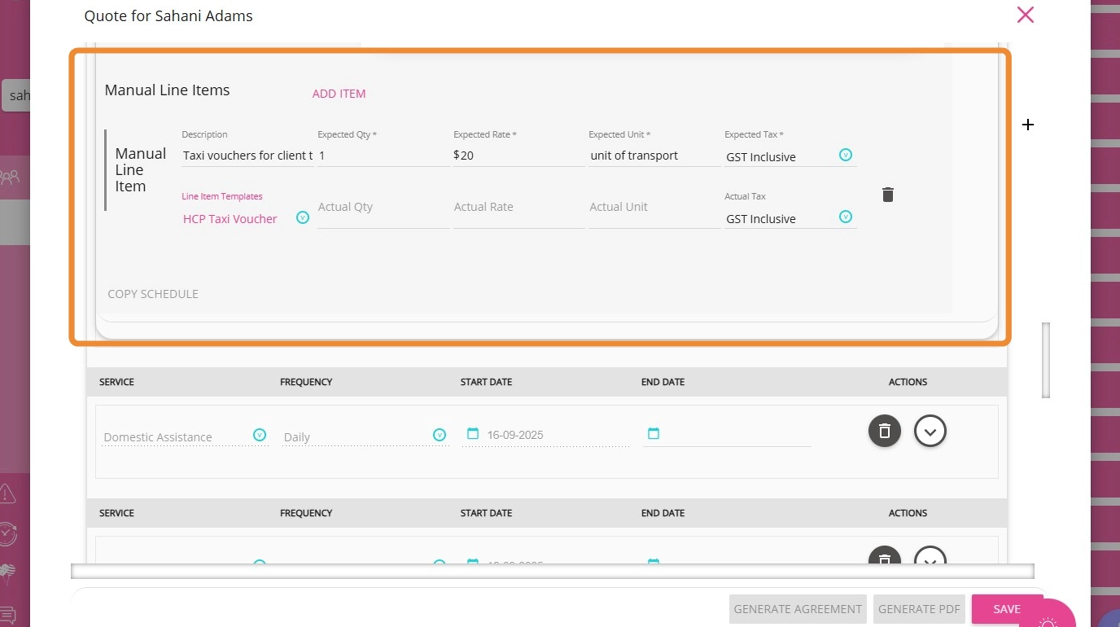
Enter a brief description of the item or service being billed.
Expected Quantity: Enter the total number of items or units you anticipate billing.
Expected Rate (per unit): Specify the cost per individual item or unit.
Expected Unit: Indicate the measurement used for billing or claiming purposes (e.g., "voucher" or "unit of transport").
Expected Tax: Select the appropriate tax treatment for the item: GST free, GST inclusive, or GST exclusive.
Actual Quantity: Enter the actual number of items or units provided.
Actual Rate: Specify the actual cost per item or unit delivered.
Actual Unit: Indicate the actual measurement used for billing (if different from expected).
Actual Tax: Select the actual tax treatment applied to the item or service.
- To copy the recurring service schedule, click Copy Schedule. This will duplicate the recurring service details and billing categories, making it easy to set up daily services without manual data entry.
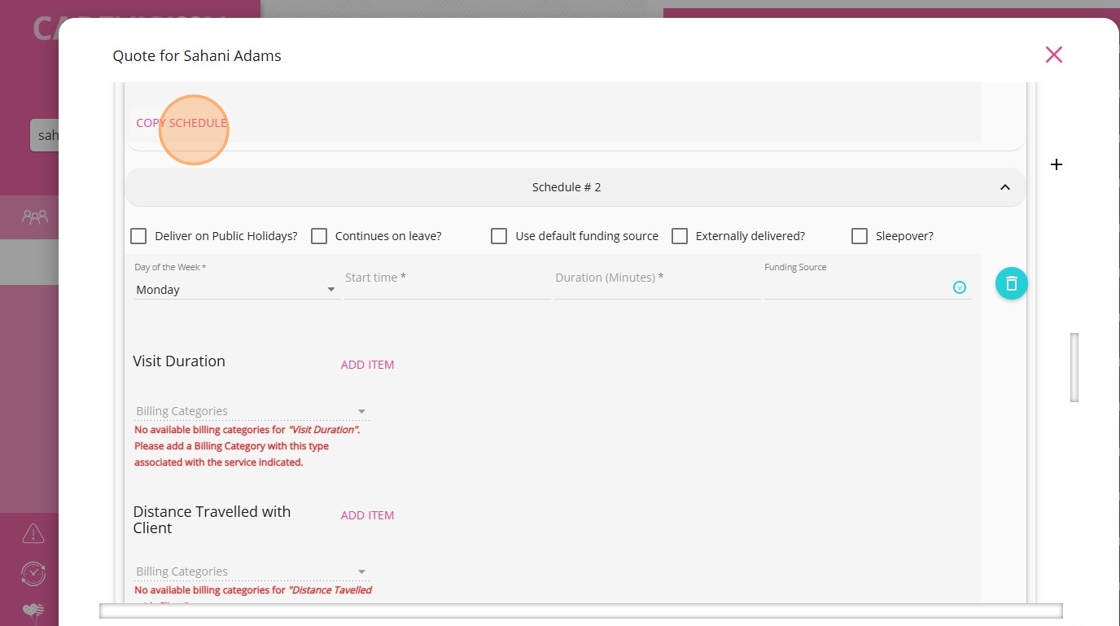
Alternatively, click Add Schedule to create a new schedule. Use this option if you need to enter different information for the service on different days
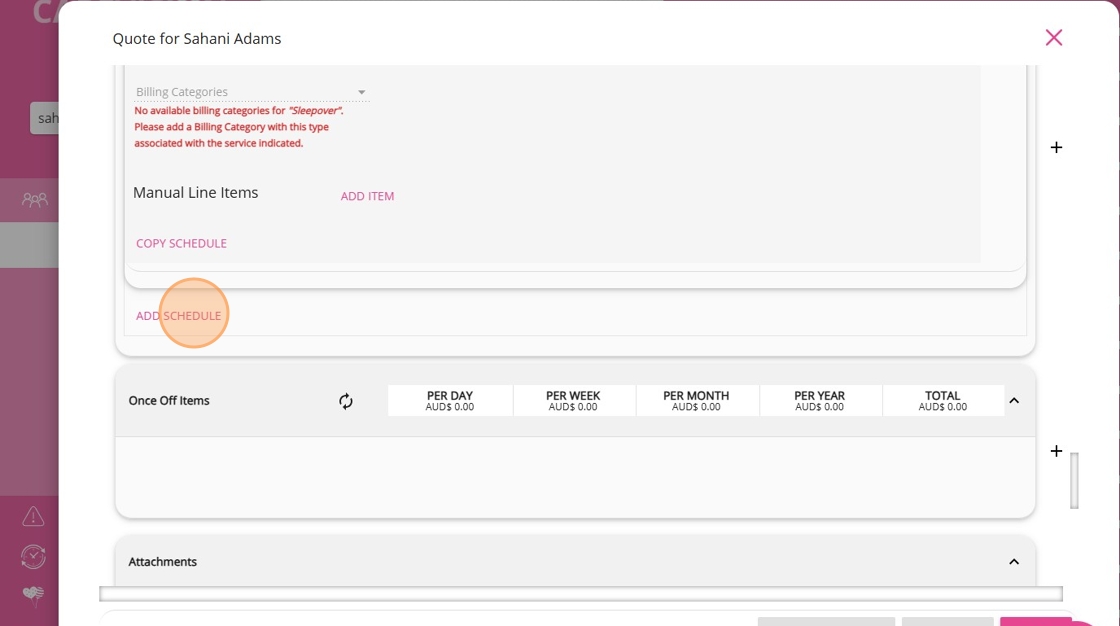
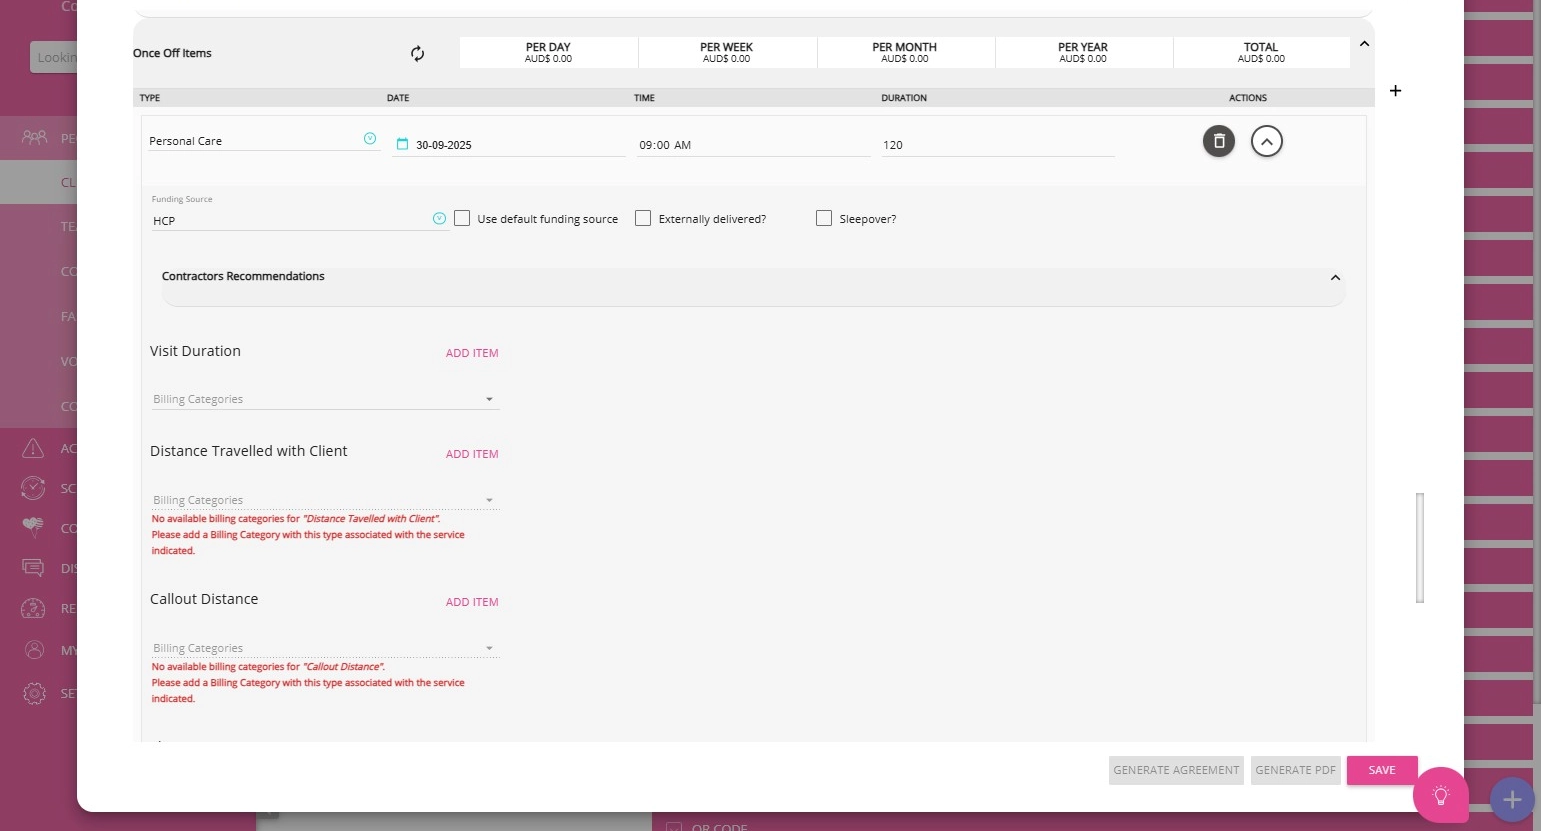
Step 6: Add One-Off Services (if needed)
One-off services depend on the client’s funding source. For example, during client onboarding, a one-on-one session with a specialist to assess client needs, therapy, or other relevant services may be included.
Follow the same steps as in the Completing Recurring Services section. The difference is that once-off services are single, non-recurring services provided to a client as needed, rather than on a regular schedule. Add any known once-off services required by the client so they can be included in the quote.
Step 7: Upload Attachments
1. Go to the Attachments section.
1. Go to the Attachments section.
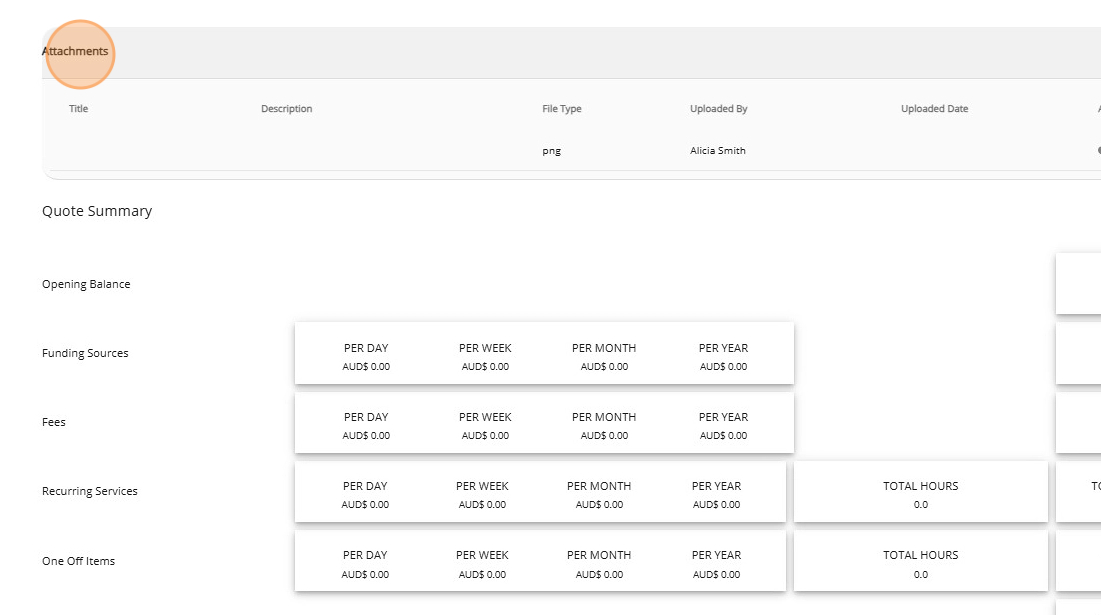
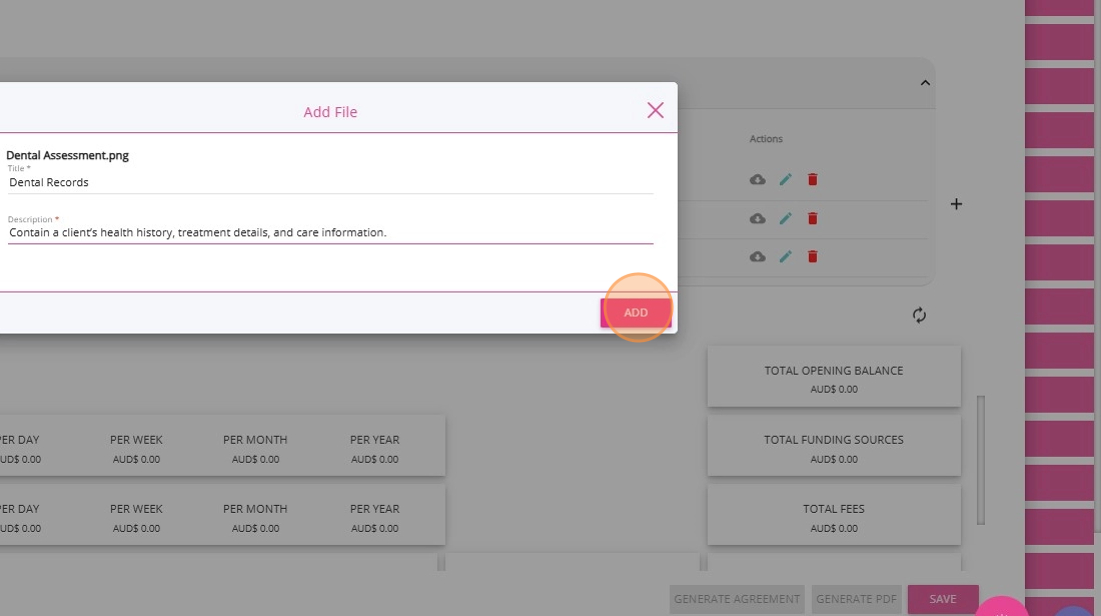
2. Click the plus sign (+) to add an attachment.
3. Enter a title and description for the attachment, then click Add.
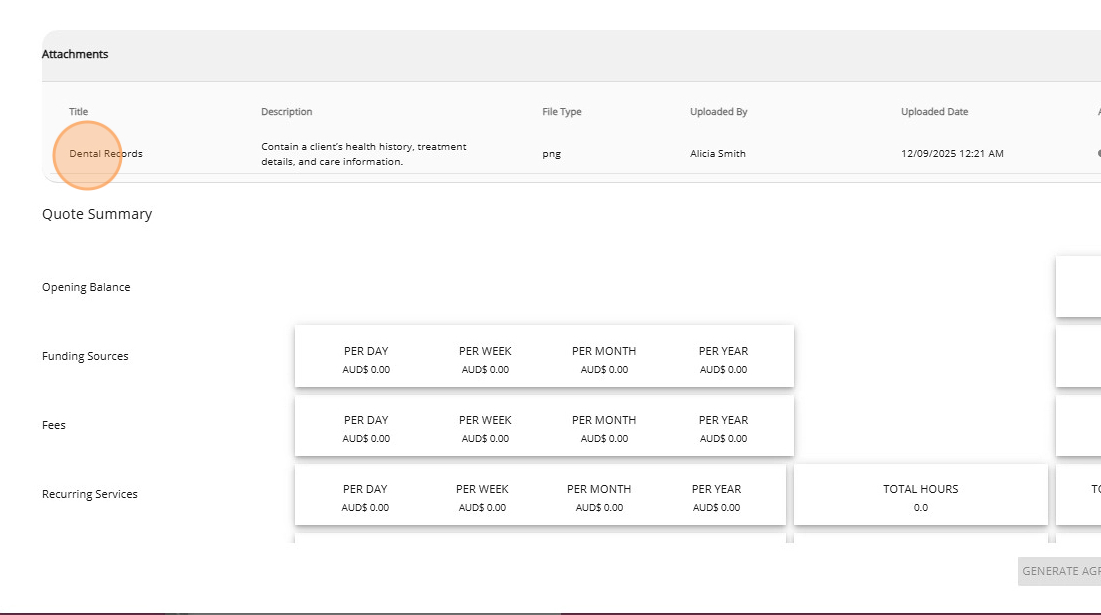
4. The attachment will appear under the Attachments section.
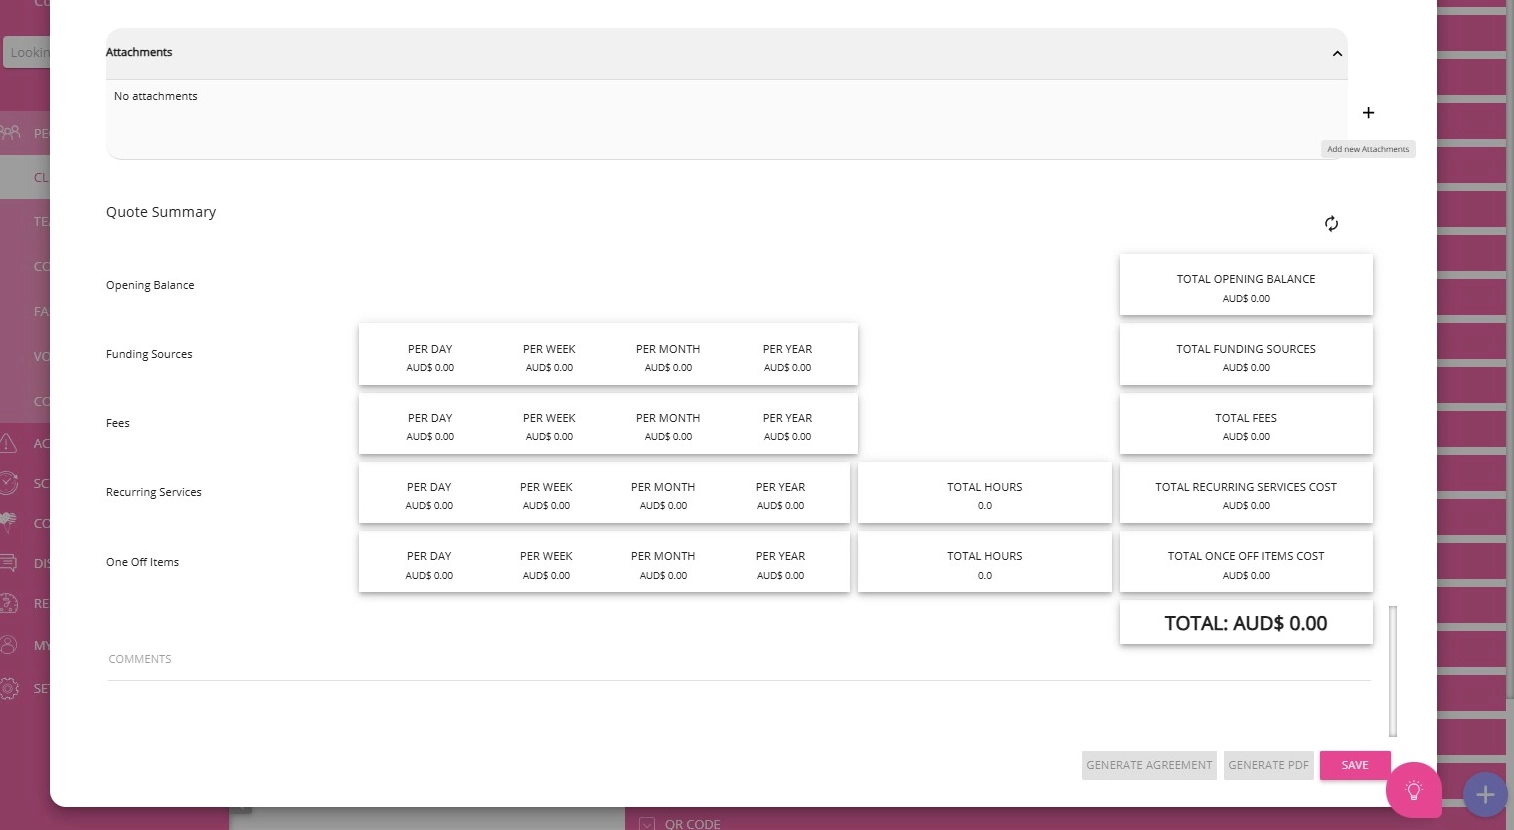
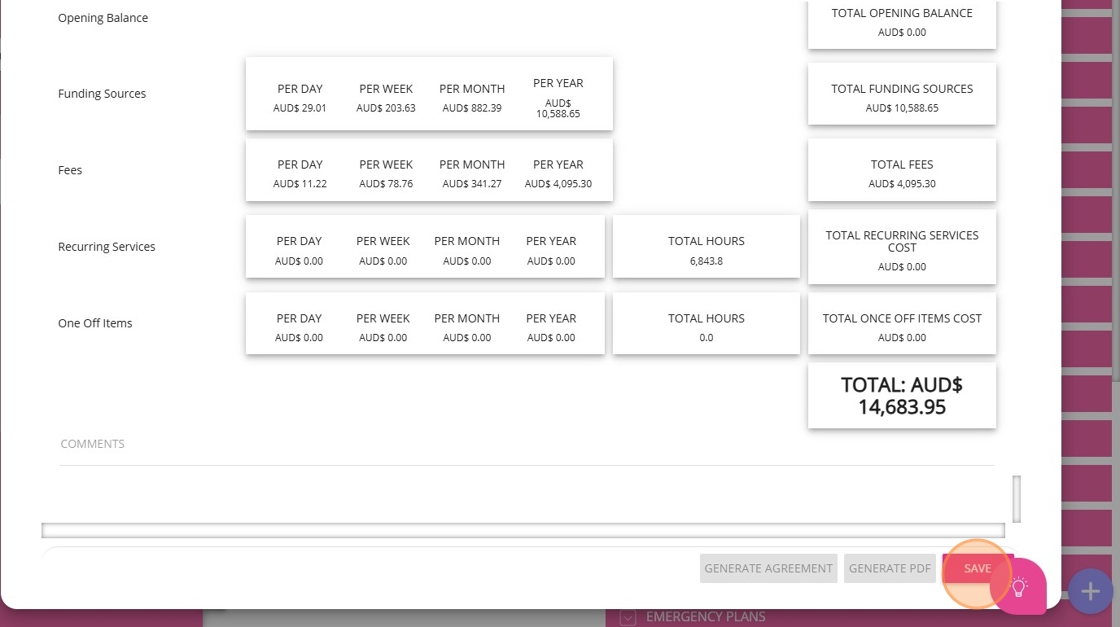
Step 8: Review and Calculate Quote
You can view the quote summary, which includes the opening balance, funding sources, fees, recurring services, and once-off items. Adjust funding amounts or service details as needed.
In the lower section of the quote, click the Calculate button to determine the total amount the client will be charged for the quoted service.
Step 9: Manage Quote Status
- Save as the Quote as Draft: When you create a quote, it is automatically saved in Draft status. This allows for editing and internal review before presenting it to the client.
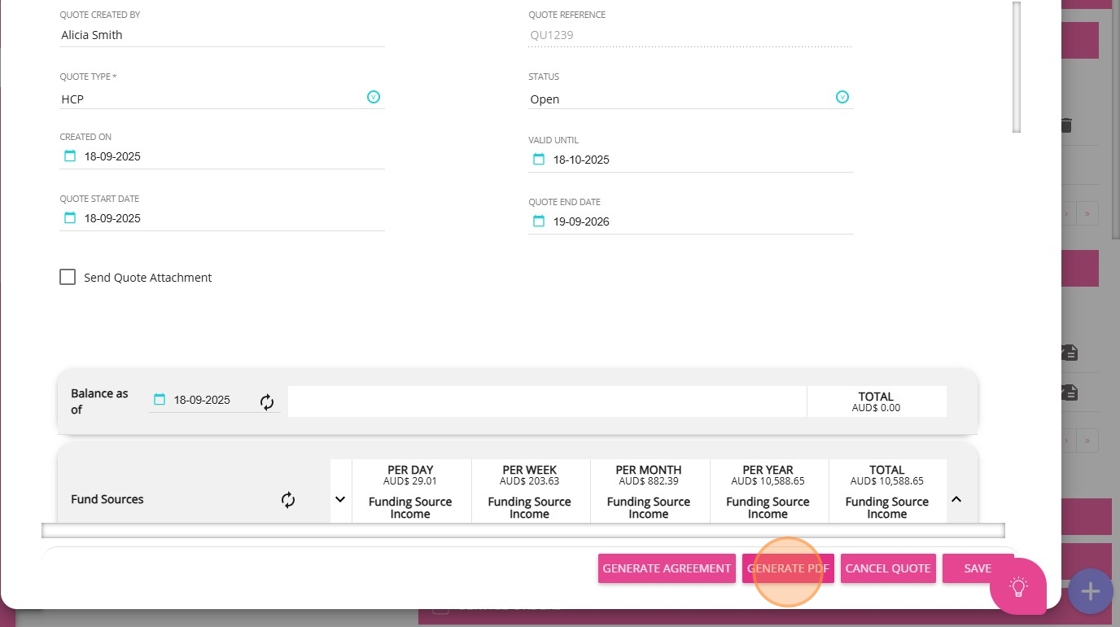
- Change Status to Open: Once the quote is ready for the client, update its status to Open.
Step 10: Produce Quote
Click Generate PDF to create the initial quote as a PDF. At this point, a quote is produced and ready for client review.
What Happens Next?

2. Generate and Send the Agreement. If the client agrees to proceed, click Generate Agreement.
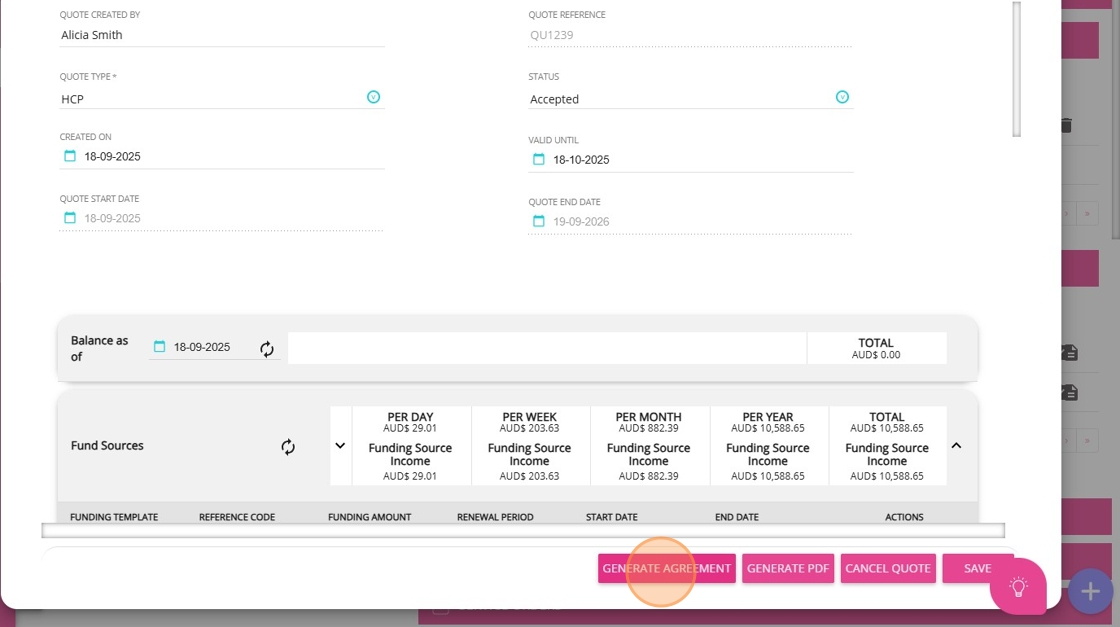
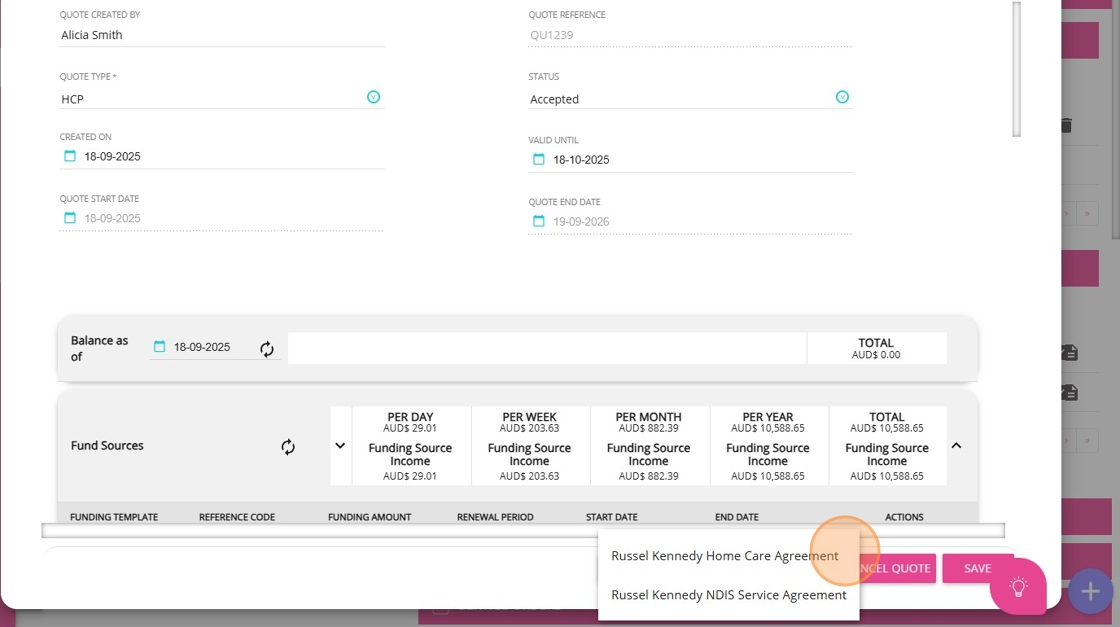
3. The system will create the appropriate agreement (Example: Russell Kennedy Home Care Agreement or, for NDIS clients, the Russell Kennedy NDIS Service Agreement).
4. Send the agreement to the client and obtain their signature to complete the process.
For new clients, the profile status will automatically update from Lead to Active. For further details, please refer to this document.For more information about creating and managing quotes and contracts in CareVision, contact the CareVision Support Team.
Related Articles
Client Status and Stages
In CareVision, Client Status indicates the current phase of a client’s journey with your organisation, from initial contact through active service and subsequent exit. Keeping client status up to date is important for ensuring that records reflect ...Pausing Client Services & Client Leave
Client leave occurs when a client cannot receive services for a period of time due to reasons such as social leave, respite, hospital stays, transition care, or other circumstances. During client leave, services are suspended, which may affect ...How to create a client
When do you add a client A client is to be added when you need their information on the system for future service planning or history archive, e.g. when you source a new lead, transfer a client's information from paper documents to CareVision ...Budget/Quotes and Contracts Section in Client Profile
The Budget/Quotes and Contracts section in the Client Profile displays all quotes created for the client and is used to manage client quotes and service agreements in CareVision. This section is one of the areas where users can create quotes for the ...Devices Section in Client Profile
The Devices section in the Client Profile displays all device records associated with the client. This section records device preferences configured for the client. These settings control how supported devices, such as TVs or client-facing ...