Converting Clients from Leads to Active
Leads are prospective clients who may come to your organisation through various channels, such as your website or referrals from other sources. When a new client record is created, the default status is set to Lead, indicating that the individual is in the initial stage of your client engagement process. After the client accepts the quote and contract, their status is automatically updated to Active.
This topic describes the step-by-step process for converting leads to active clients.
Keywords: lead to active, lead conversion, client onboarding, client management, client status, client profile, active client
I. Steps for Converting Clients from Leads to Active
1. In the left navigation pane, click People, then Clients.
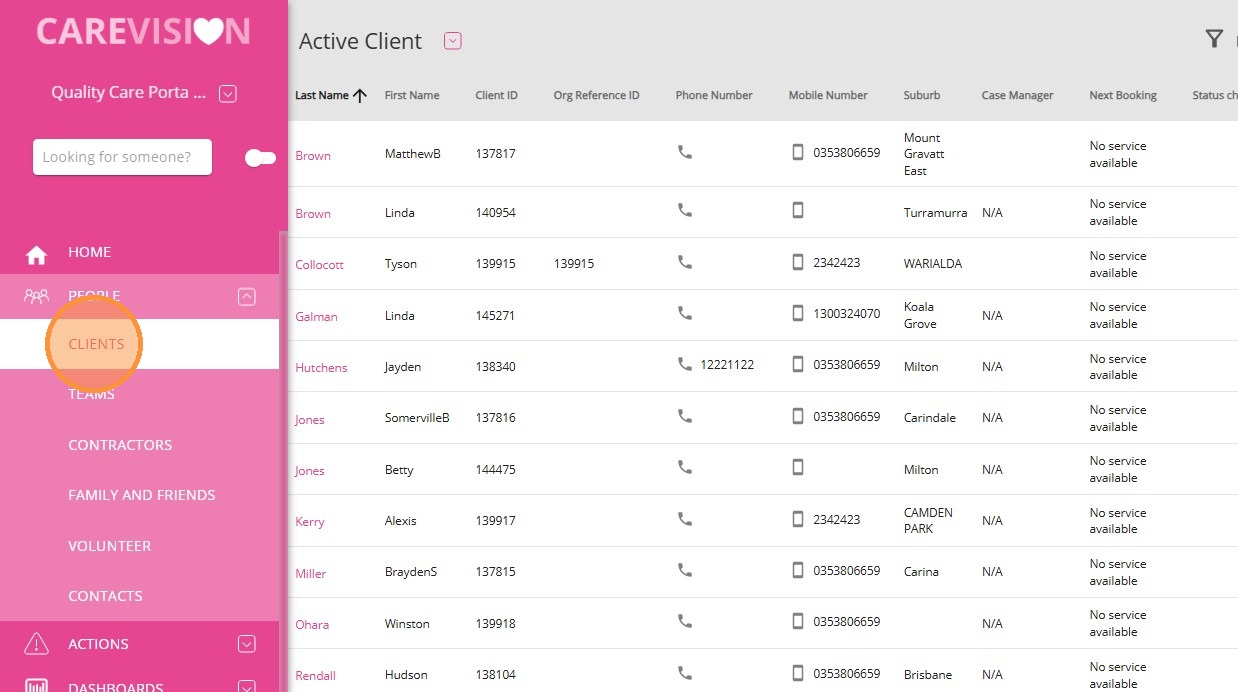
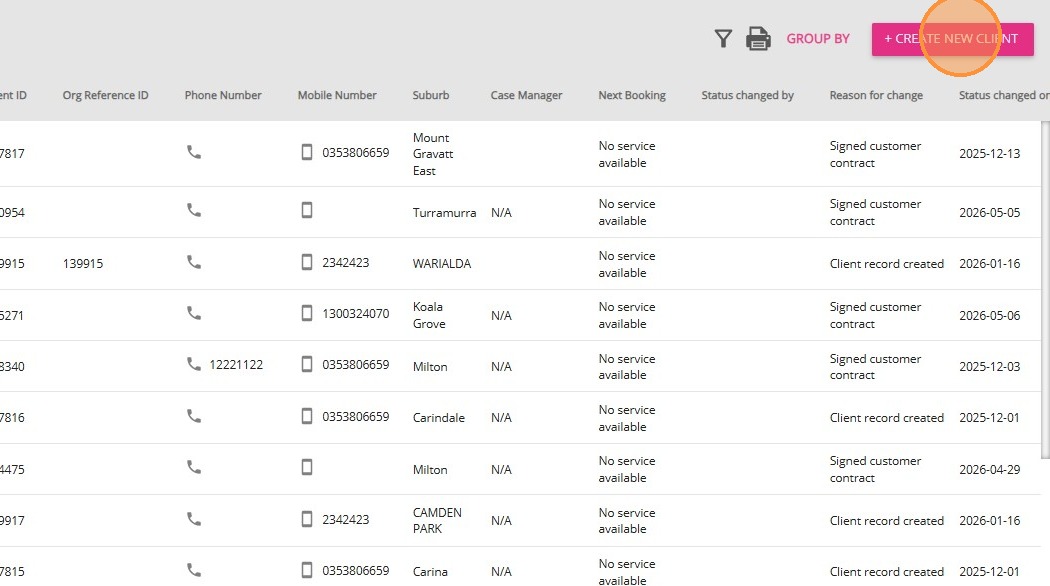
2. Click +Create New Client to start a new client record.
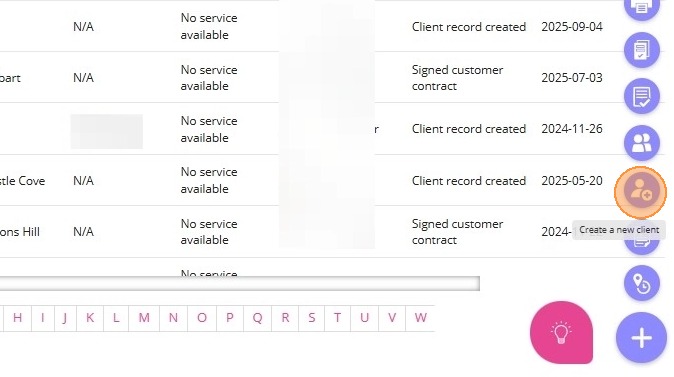
- Alternatively, you can use the quick action button at the bottom right of the screen to create a new client.
3. Complete all required fields in the Lead Form.
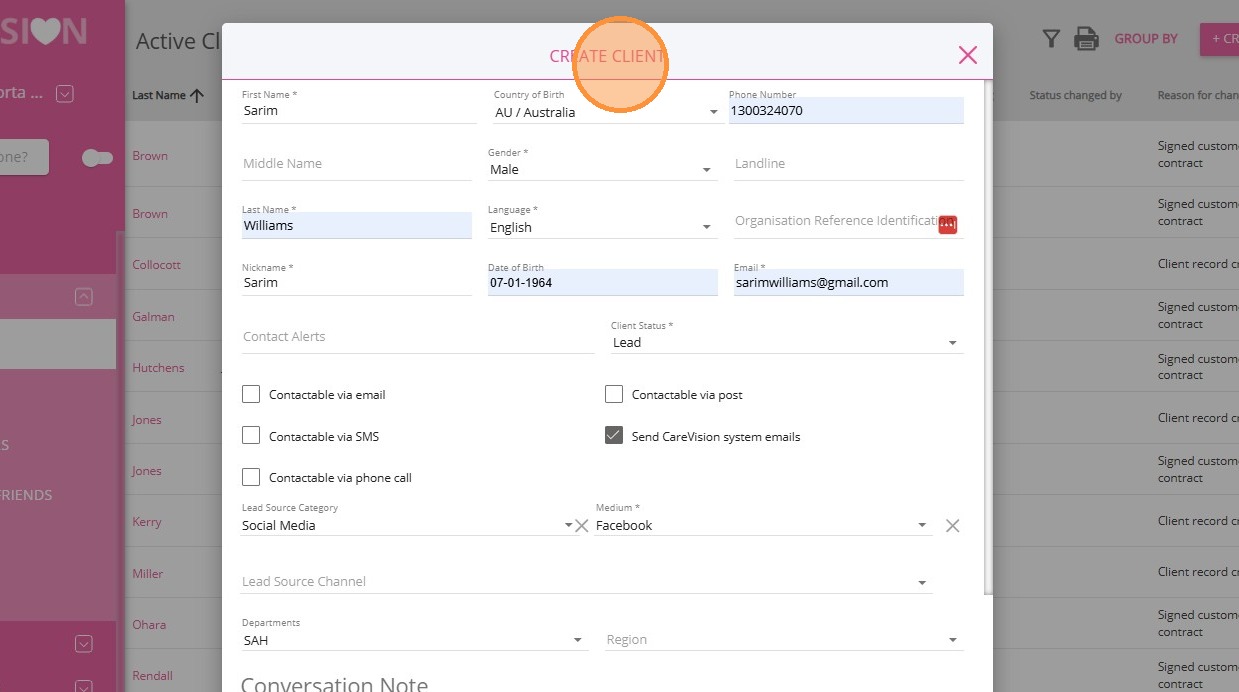
For a description of each field in the form, see this table.
Field | Description |
Required Fields | |
First Name | The client’s given name. |
Last Name | The client’s family or surname. |
Nickname | Auto-populates based on the first name but can be edited. Enter any preferred name or nickname the client uses. |
Gender | The client’s gender. Options include Female, Male, Other, or Prefer Not to Say. |
Language | The client’s preferred language for communication. |
Email | The client’s email address. If the client does not have an email, your organisation can assign a general email address to receive notifications on their behalf. |
Client Status | The default client status is set to Lead. You can update this field based on the client’s stage by selecting the appropriate status (Lead, Active, Active Client On Leave, No Longer A Client). For more information, refer to the Client Status and Stages documentation. |
Optional Fields | |
Middle Name | The client’s middle name(s), if applicable. |
Date of Birth | The client’s date of birth in DD-MM-YYYY format, which can be selected from a calendar picker. |
Country of Birth | The country where the client was born. |
Phone Number | The client’s mobile or primary phone number. |
Landline | The client’s landline phone number, if available. |
Organisation Reference Identification | Unique identifier or reference number of your organisation. This field is autogenerated and does not require manual entry. |
Contact Alerts | Any important alerts or notes regarding contacting the client. |
Contactable via email | Indicates if the client can be contacted by email (checkbox). |
Contactable via SMS | Indicates if the client can be contacted by SMS (checkbox). |
Contactable via phone call | Indicates if the client can be contacted by phone call (checkbox). |
Contactable via post | Indicates if the client can be contacted by postal mail (checkbox). |
Send CareVision system emails | Indicates if the client should receive system-generated emails (checkbox). It is recommended to keep this checked to enable automatic notifications, such as service agreements or booking cancellation alerts, to be sent to the client. |
Lead Source Category | The general category of how the lead was sourced (referral, website, word of mouth, social media). |
Medium | The specific method or subcategory through which the lead was acquired (LinkedIn, Facebook, Instagram). |
Lead Source Channel | The particular channel, campaign, or advertisement that generated the lead. |
Departments | Relevant departments associated with the client. |
Region | The geographic region associated with the client. |
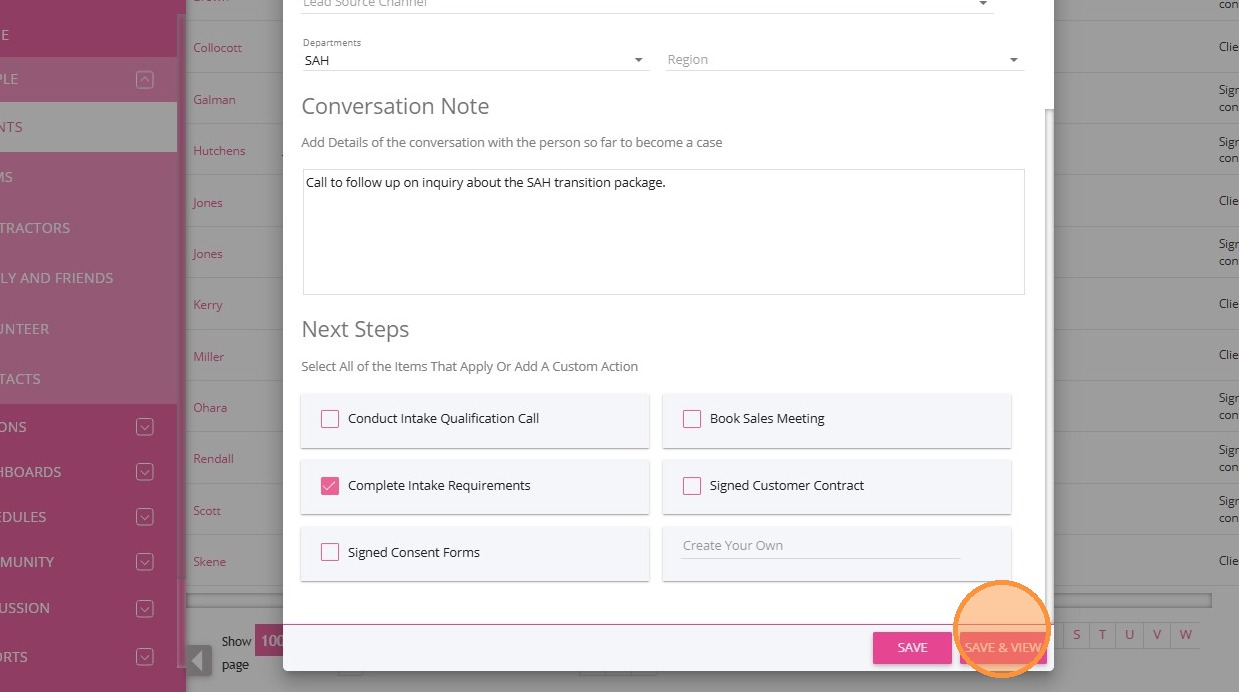
Conversation Note | A multiline text area for recording details of ongoing conversations with the client. This can include transcripts of cold calls, discussions about the client’s needs, or any other relevant communication notes. |
Next Steps | Tasks that need to be delegated and completed for the client. You can select from predefined options or create custom actions as needed. Follow-up tasks will appear on the client’s profile and in the tasks section of the Action Board, and can be assigned to team members as required. |
Conduct Intake Qualification Call | Checkbox to indicate if an intake qualification call should be conducted. |
Complete Intake Requirements | Checkbox to indicate that intake requirements still need to be completed. |
Signed Consent Forms | Checkbox to indicate if consent forms still need to be completed. |
Book Sales Meeting | Checkbox to indicate if a sales meeting should be booked. |
Signed Customer Contract | Checkbox to indicate if the customer contract still needs to be signed. |
Create Your Own | Option to add a custom action as a next step. |
4. Save the client record by clicking Save or Save & View. Save & View will take you directly to the client profile, allowing you to make further edits.
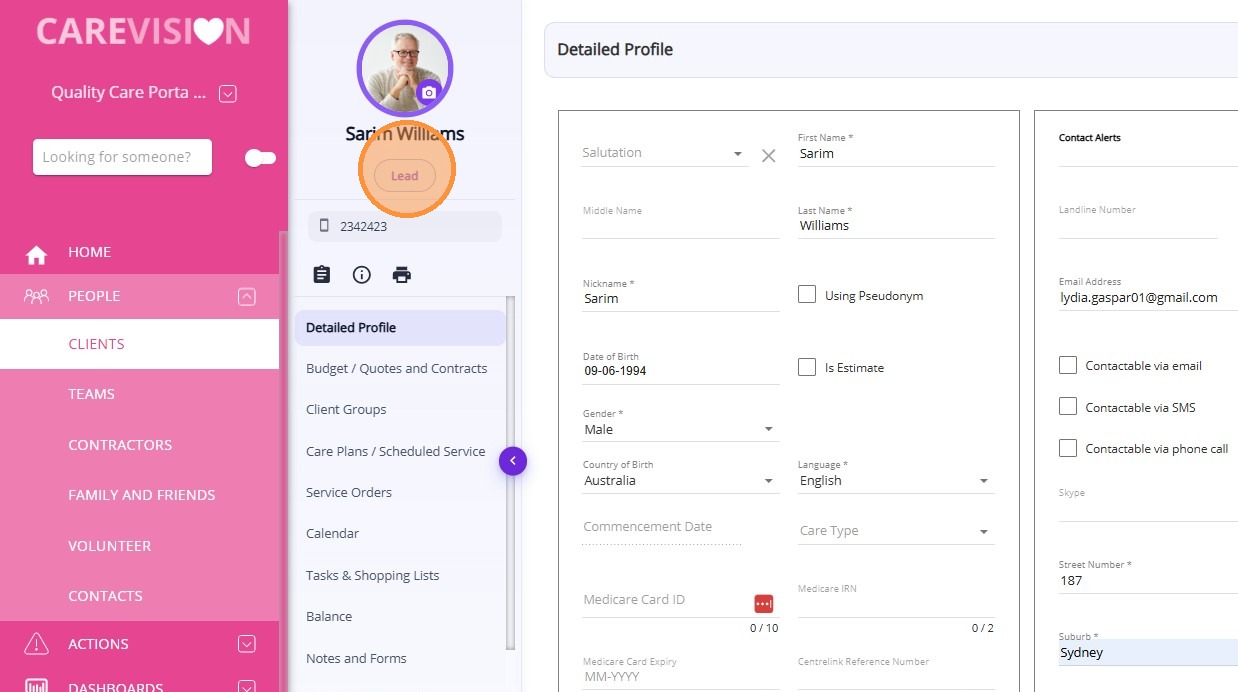
5. The client profile will display Lead under the name, and the profile ring will appear purple to indicate the client is a lead. You can also add a profile photo (optional).
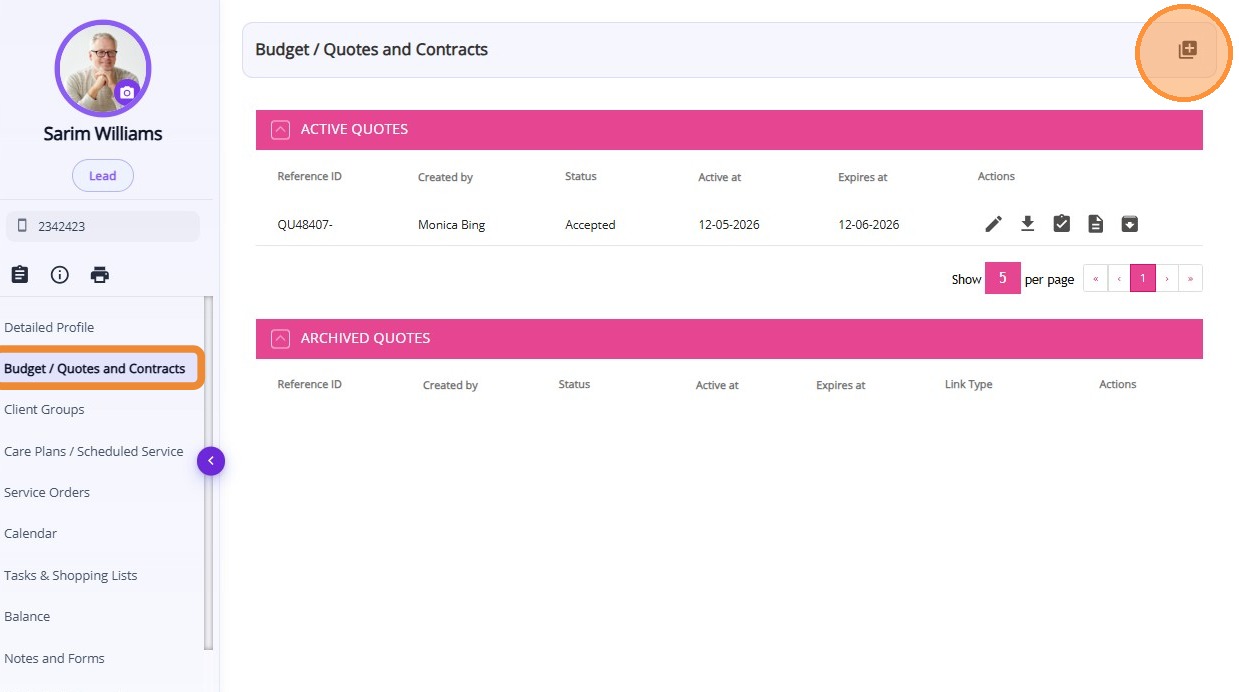
6. Before a client becomes active, we recommend creating a quote for them. In the Budget / Quotes and Contracts section of the client profile, draft a quote with a cost breakdown summary, including services, fees, funding sources, and supporting documents. The draft can be edited as needed.

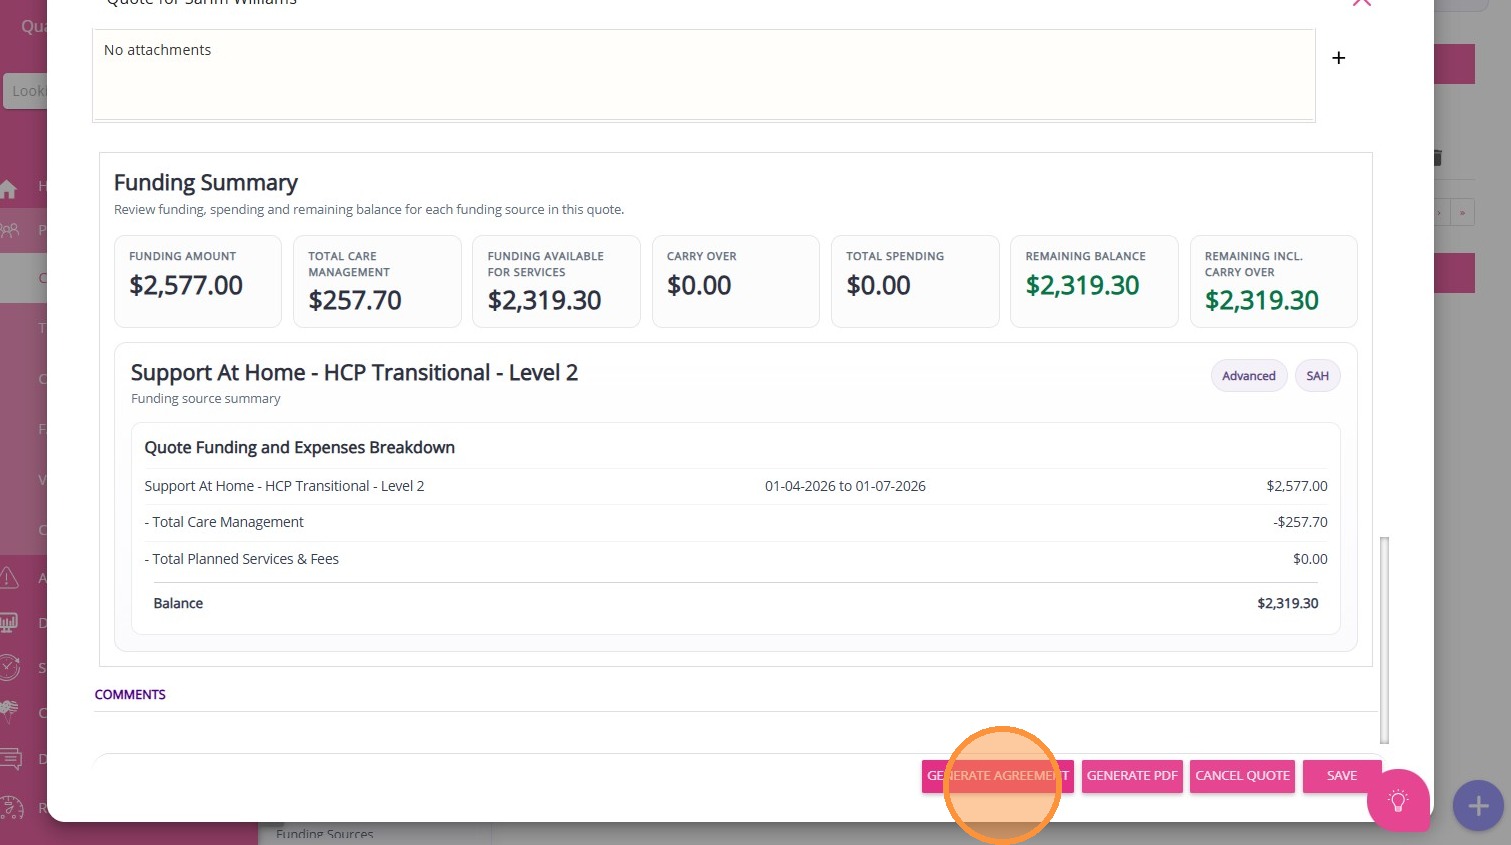
7. When you’re ready to present it to the client, set the quote status to Open, click Save, and generate the draft quote and agreement as a PDF.
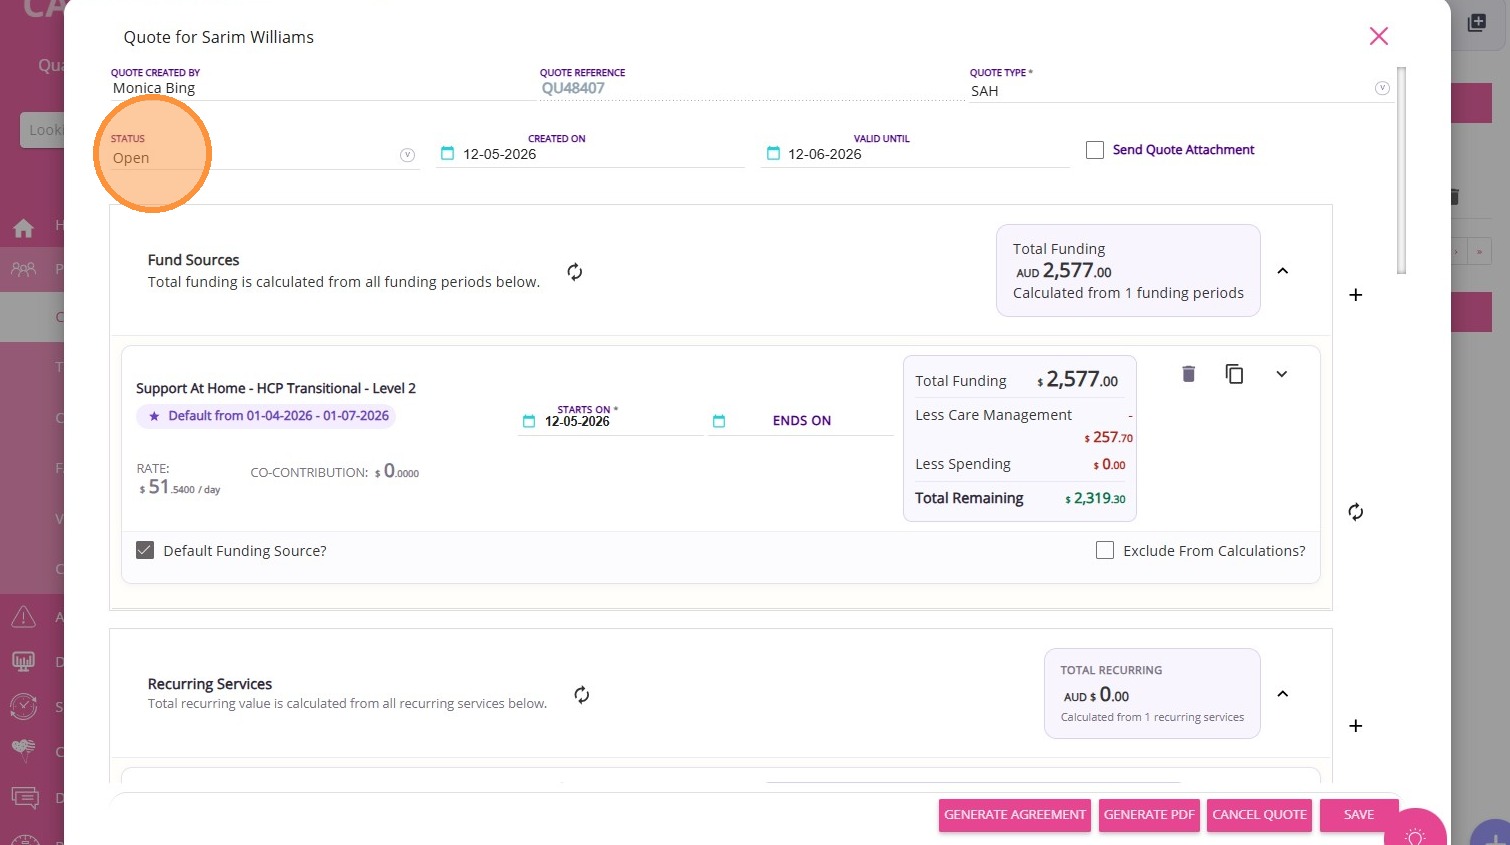
8. If the client agrees and accepts the quote, generate a service agreement and obtain their signature.
9. Set the quote status to Accepted once the client has reviewed the quote and signed the agreement, then click Save. All details, such as funding sources, fees, recurring services, and one-off items, will be reflected on the client profile.
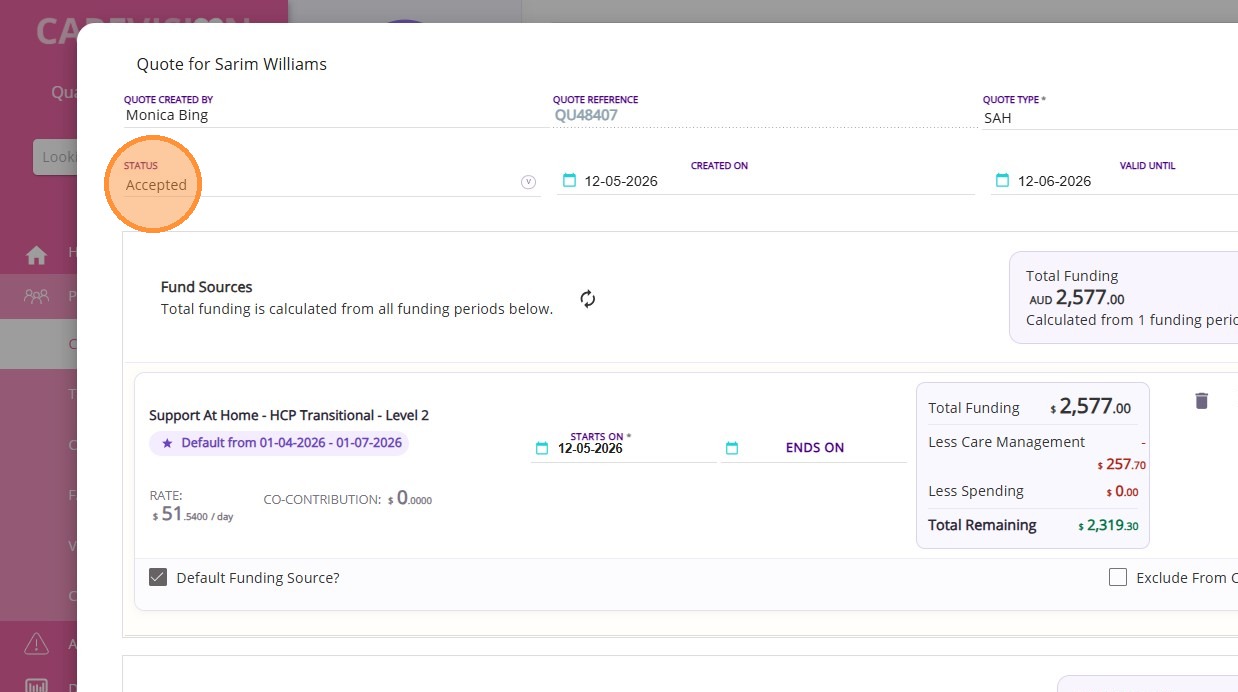
What happens after a lead accepts a quote
- The client’s status is automatically updated to Active Client.
- The label below the client’s profile picture changes from Lead to the quote acceptance date (DD-MM-YYYY format).
- The profile ring turns blue-green to indicate the client is Active.

Scroll to the bottom of the client profile and go to the Client Status Logs section.

The Effectivity Date is displayed, and the date reflects when the lead accepted the quote and was converted from a lead to an active client.
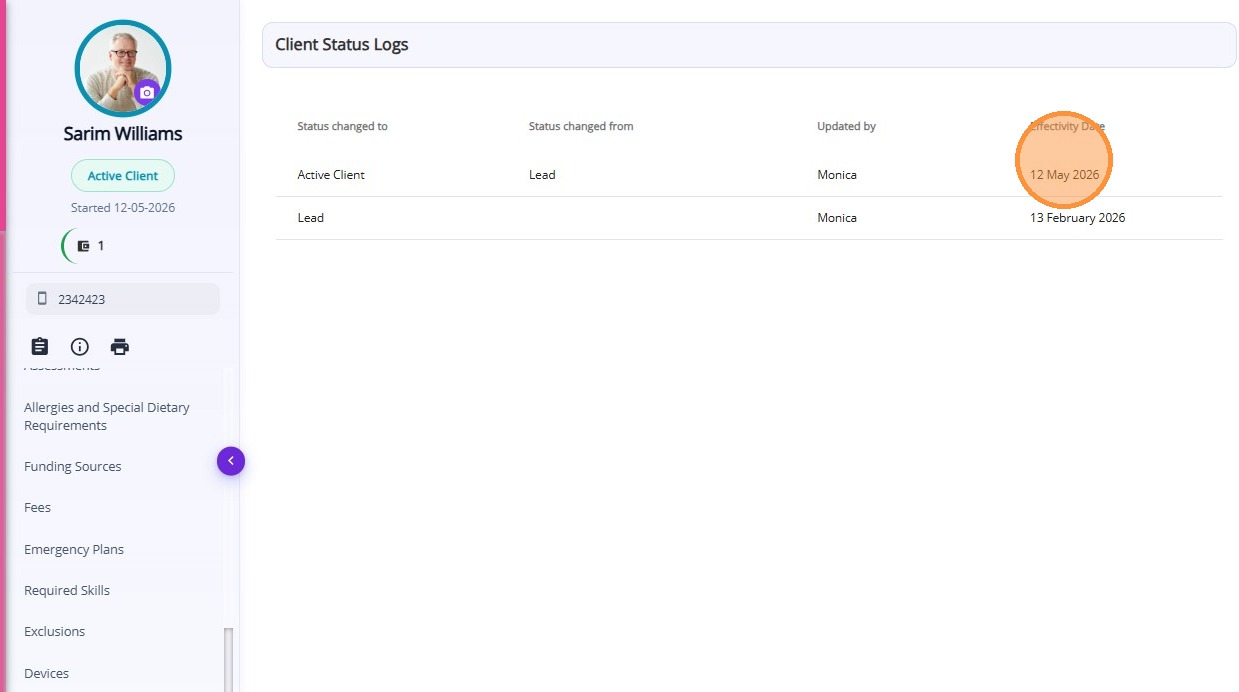

Note: The Effectivity Date should be after the date the client was created or added as a lead. It is not related to when the client’s package starts.
This topic walked you through the process for converting leads to active clients. By following this workflow, your organisation can ensure a seamless onboarding experience.
For more information about client onboarding, contact the CareVision Support Team
Related Articles
Client Status and Stages
In CareVision, Client Status indicates the current phase of a client’s journey with your organisation, from initial contact through active service and subsequent exit. Keeping client status up to date is important for ensuring that records reflect ...Notifications for Lead Management and Client Onboarding
Lead to Onboarding Workflow Organisations regularly receive new client leads and it is important that the proper team is notified at the appropriate stage of the lead nurture and client onboarding process so they can follow up on and complete the ...How to Add a Lead
Managing leads is a key step in building strong client relationships and supporting a smooth onboarding process. This topic describes how to add a lead in the portal. Keywords: lead management, client onboarding, create lead, client profile setup, ...Detailed Profile Section in Client Profile
The Detailed Profile section in the client profile provides an overview of each client, supporting personalized care and efficient communication. This topic describes the Detailed Profile section and explains how to complete client profile details. ...Client and Staff Profiles Redesigned
The Client and Staff Profile sections in the management portal have been redesigned. This update is part of CareVision’s ongoing efforts to enhance the look and feel of the portal while improving the user experience. This article outlines the key ...
Request an Article or Guide
We are keen to know what you want to know more about? Let us know on chat or raise a ticket for an article or topic you would like covered in more detail. We have a team of technical writers and learning content creators keen for your suggestions.