Create Staff Leave in Bulk
Keywords: create staff leave in bulk, bulk staff leave, staff leave management, leave approval in bulk, staff leave feature, public holiday leave, manage staff leave, carevision staff leave, bulk leave creation, staff leave filters
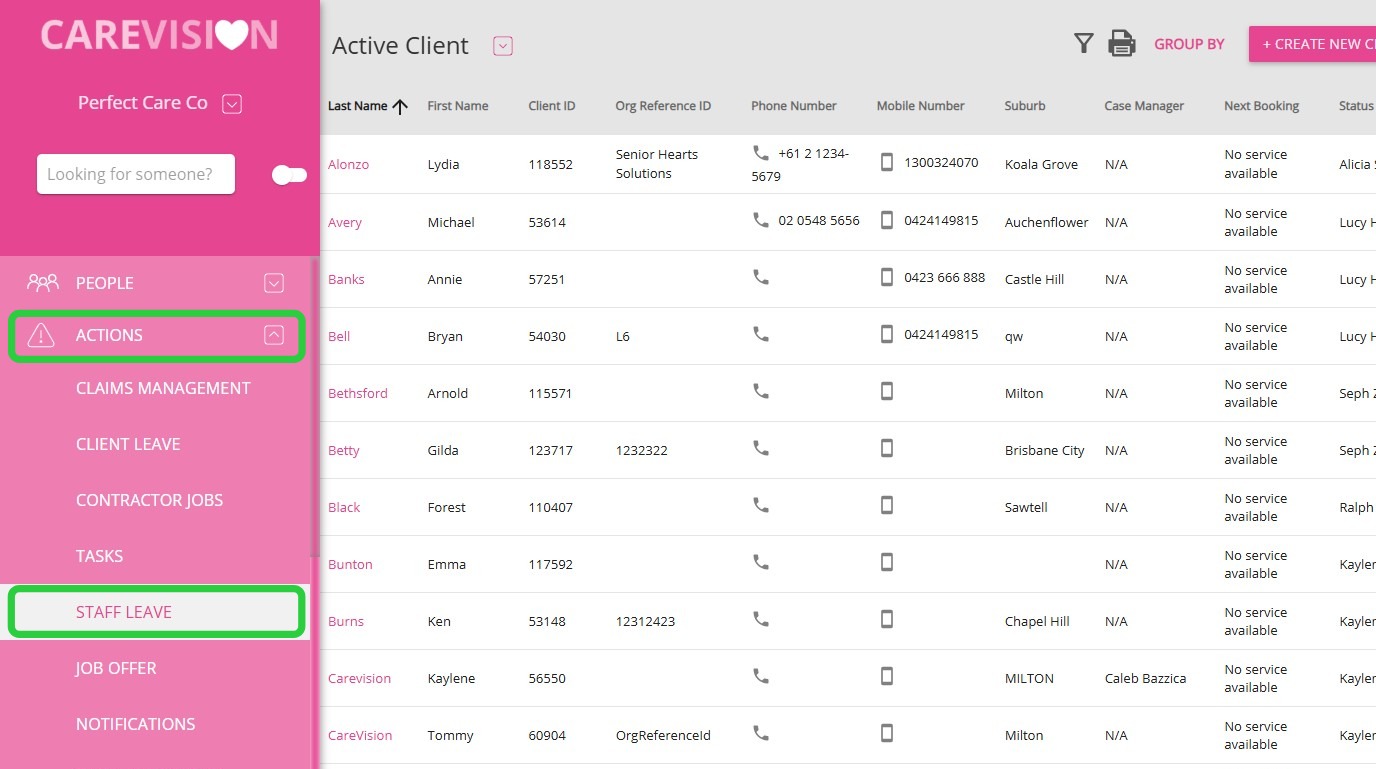
I. Access Bulk Staff Leave Creation
 Notes:
- The bulk leave creation feature is only available from the Action Board.
- Leave can only be created for Active staff.
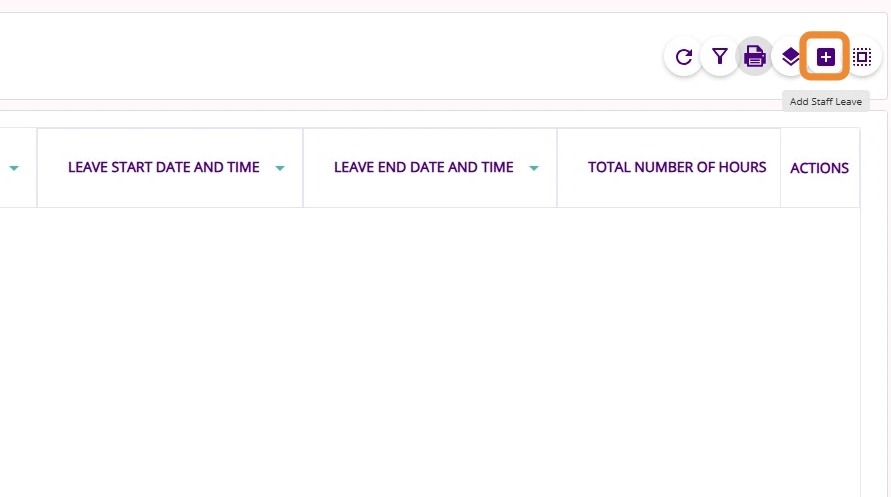
II. Create Staff Leave in Bulk
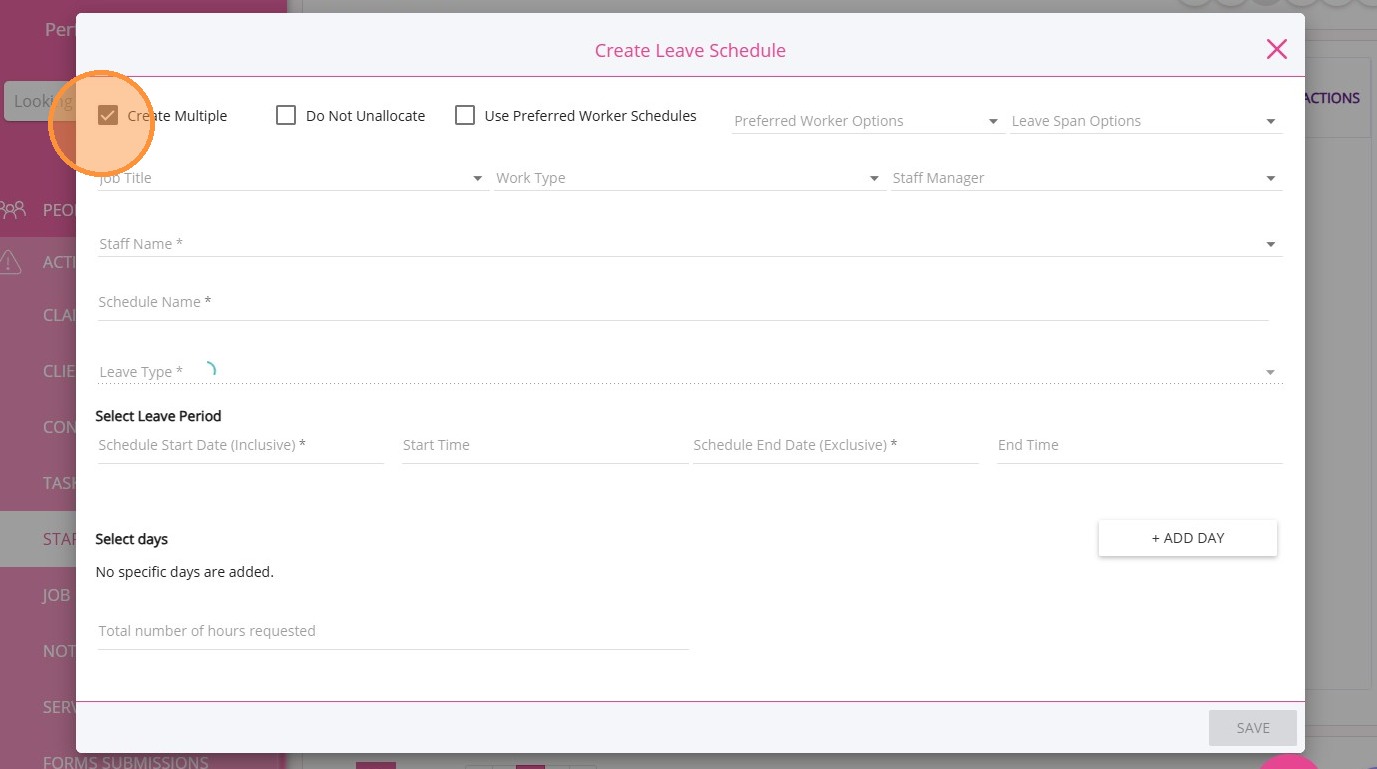
Tick the Create Multiple checkbox at the top left to enable bulk creation.
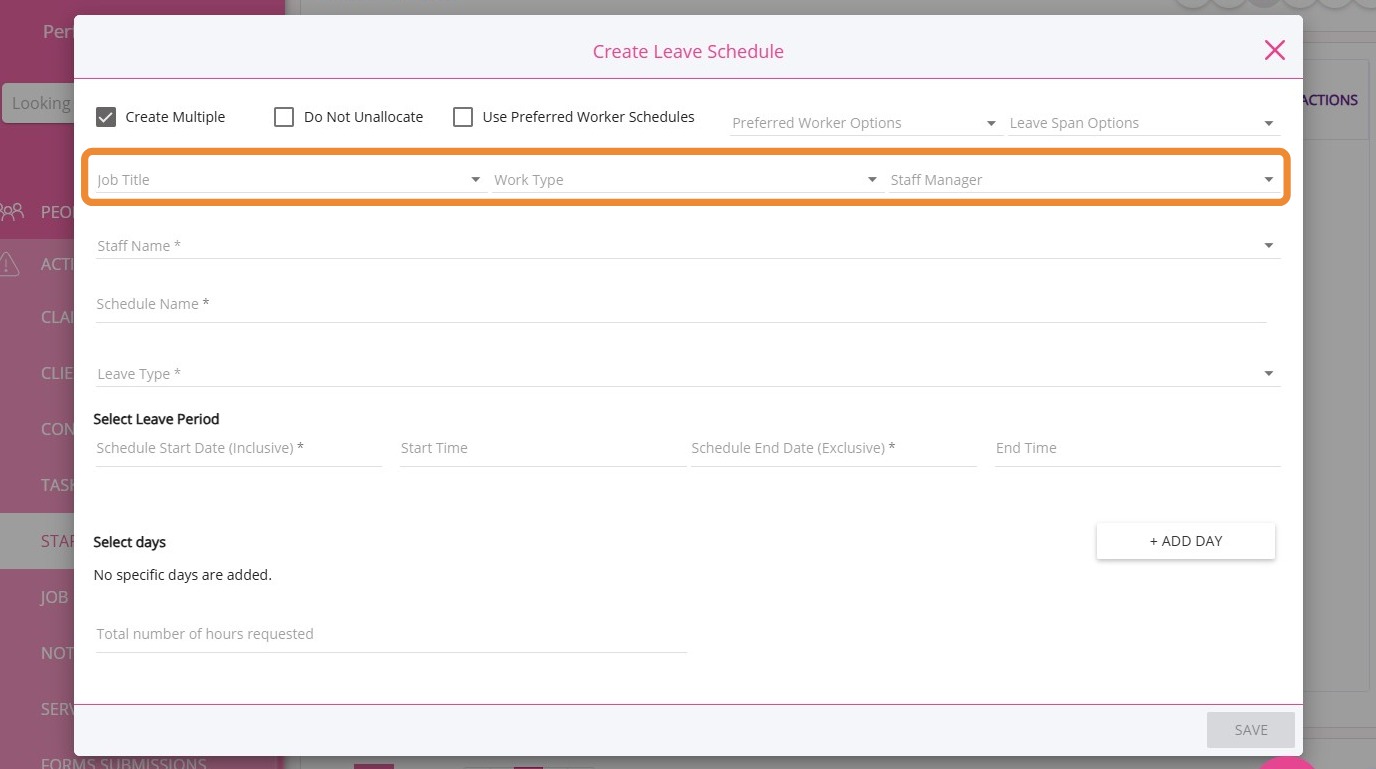
B. Set Criteria for Bulk Leave
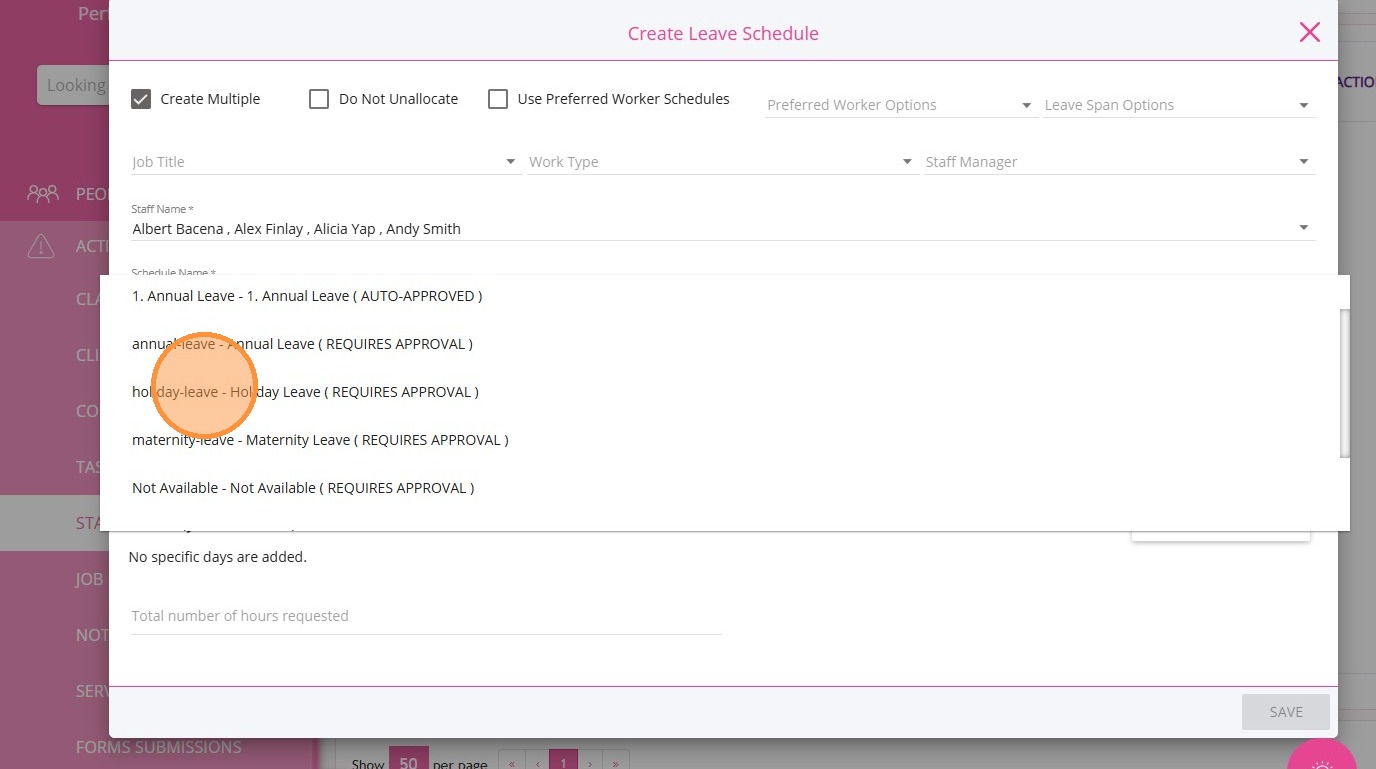
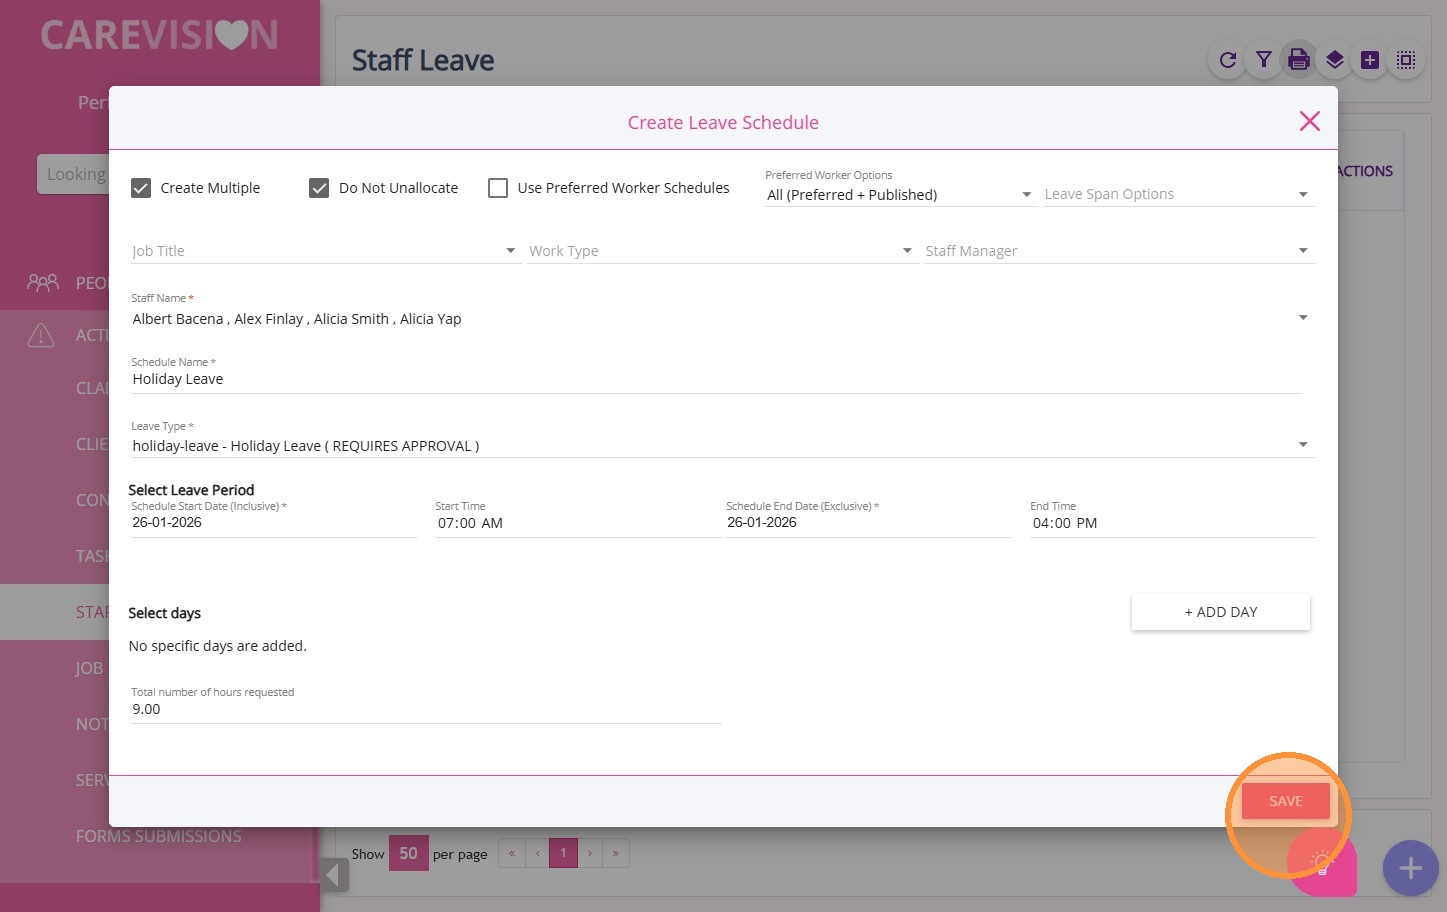
You can select multiple staff or set criteria such as job title, work type, or staff manager. The system will generate leave records for all staff matching the selected criteria.
Note: When Create Multiple is checked, sections for Allocated Bookings on Time of Leave and Leave Balances are hidden (these are only available for single leave entries).In the Staff Name field, select multiple staff from the dropdown or use the search bar to find names. You can also select all staff.

Enter a Schedule Name.
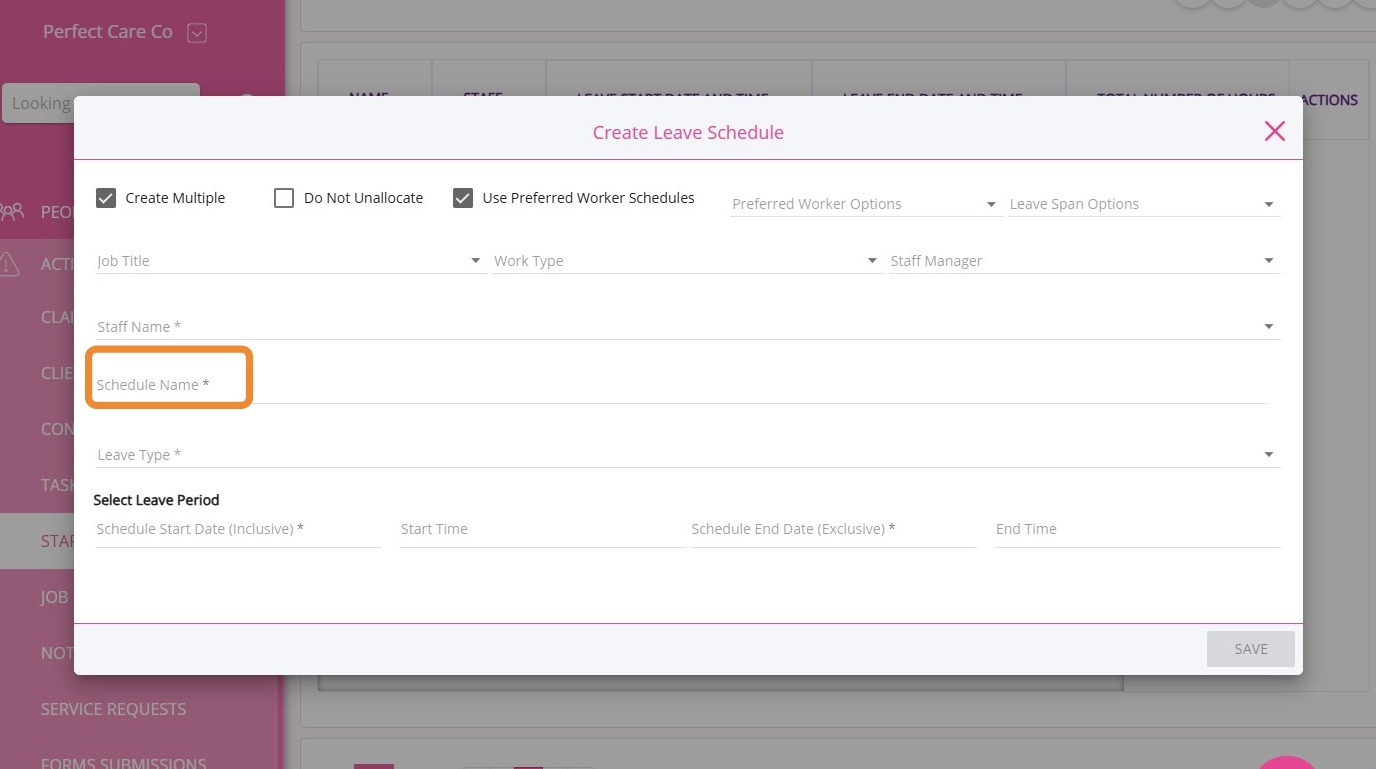
Choose a Leave Type (holiday leave, annual leave).
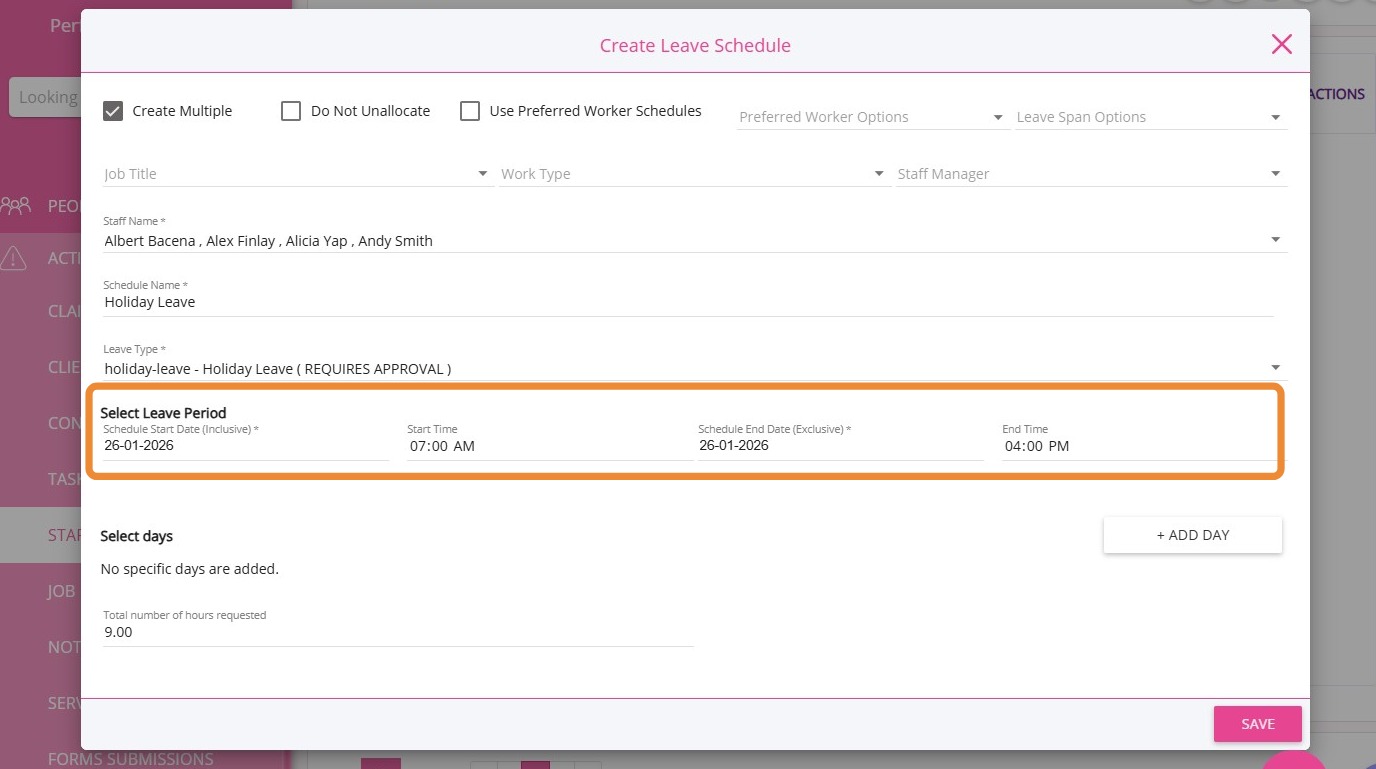
Set the date range for the leave. This applies to all selected staff.
III. Use Preferred Worker Schedules (Optional)
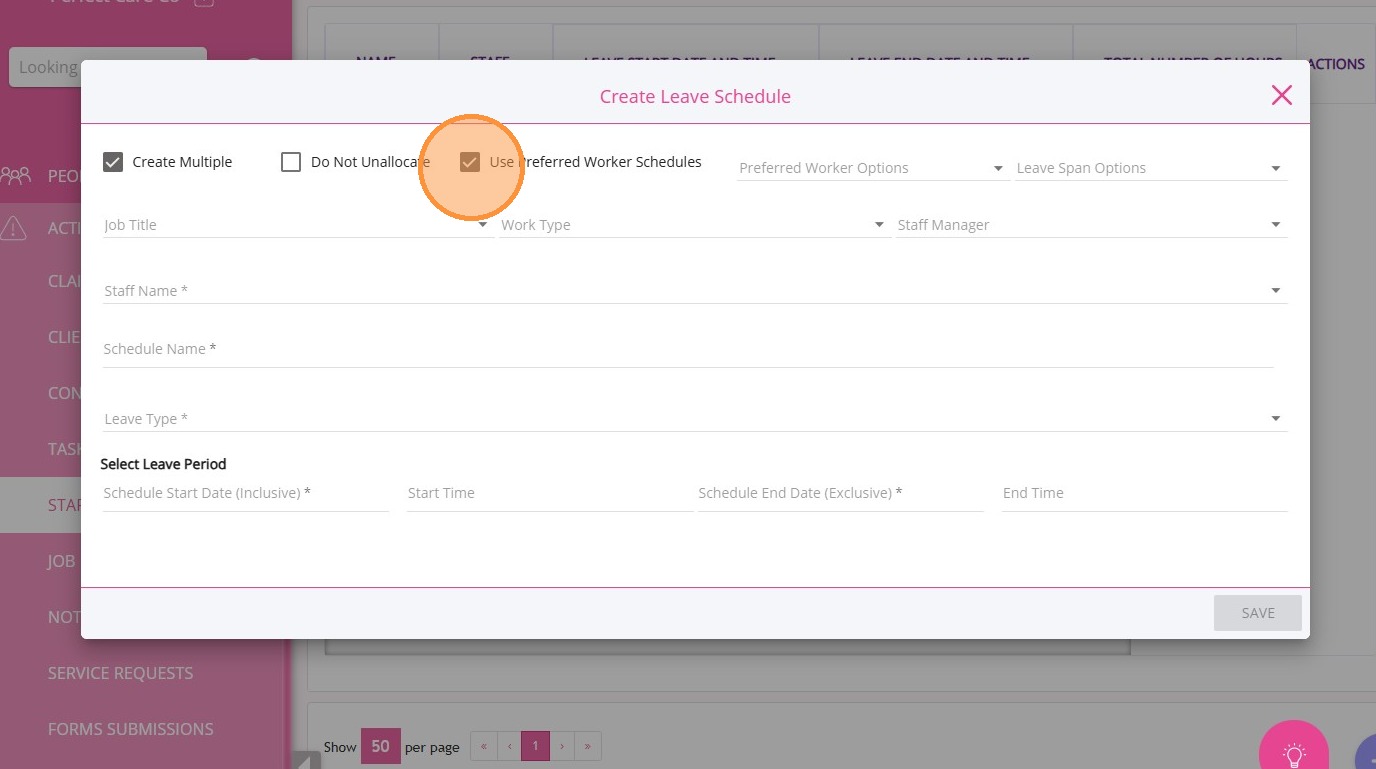
- Leave hours are calculated from care plans, shifts, or Member Planned Attendance Schedules (MPAS).
- The Select Days section is hidden if Use Preferred Worker Schedules is ticked.
- The system supports leave for sleepover shifts and overlapping work/leave hours. Sleepover time is excluded from leave and split accordingly.
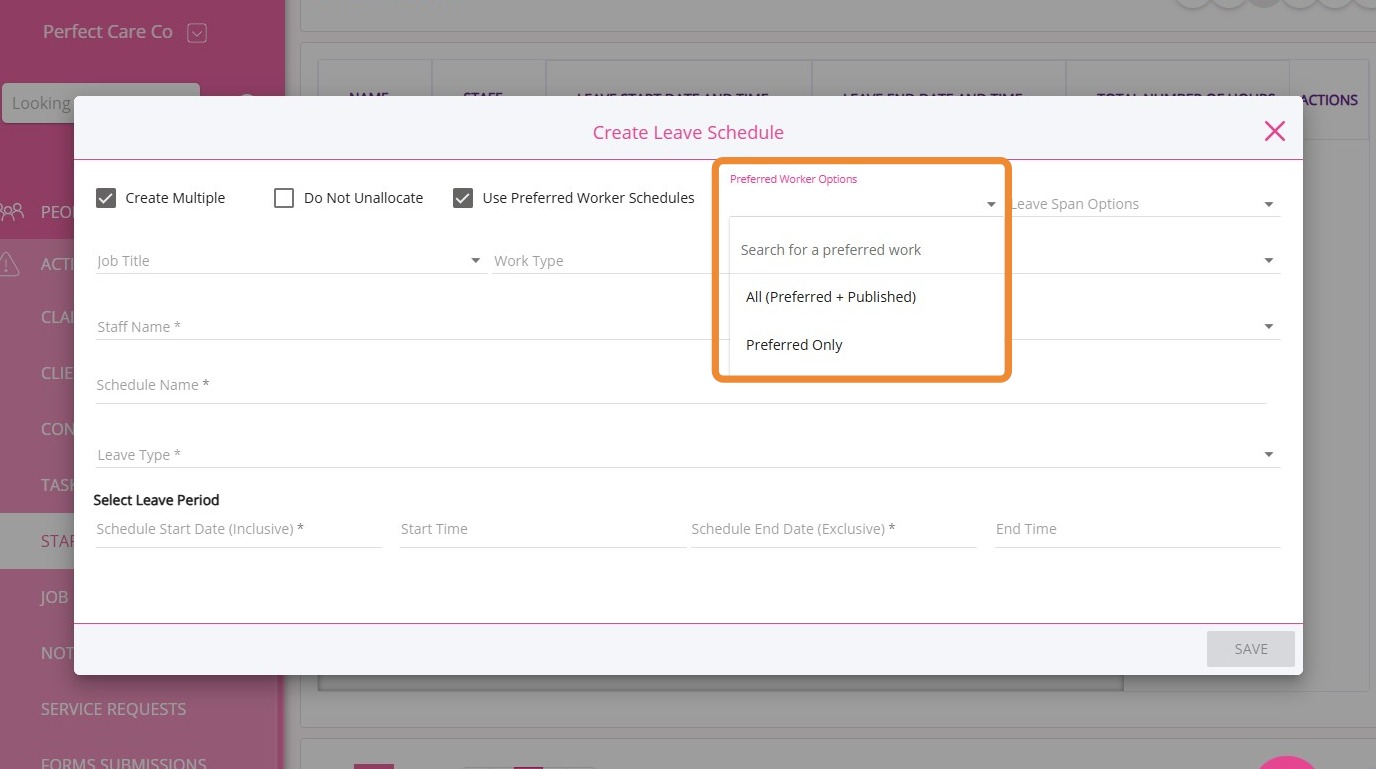
In the Preferred Worker Options field, select one of the following:
- All (Preferred + Published): Includes all relevant schedules, both preferred and published.
- Preferred Only: Uses only preferred worker arrangements.
IV. Leave Span Options

- Example: If the leave span is February 26, a shift that starts at 8pm on February 25 and ends at 8am on February 26 is included.
- The system pays for leave times based on all bookings and shifts that overlap with the leave span. In the example above, the overnight shift is included for leave payment on February 26.
- Use this option if you want to include all shifts that touch the leave day.
- Example: If the leave span is February 26, only shifts that begin on February 26 are included.
- A shift starting at 8pm on February 25 is not included, even if it ends on February 26.
- New Option: This selection restricts leave payments to shifts that start within the leave span and excludes shifts that start outside the leave period.
- Use this option if you want to include only shifts that start on the leave day.
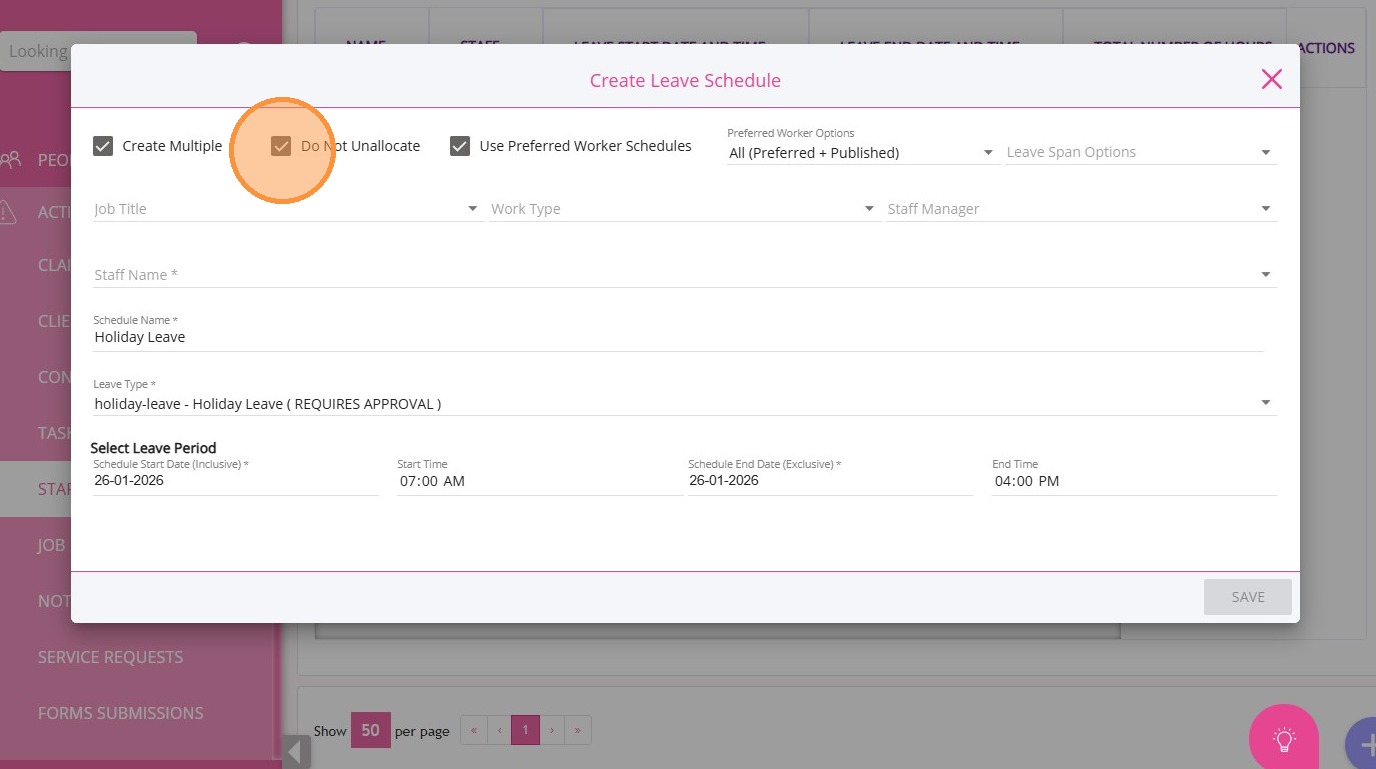
V. Do Not Unallocate Option
If you want to keep staff assigned to published bookings or shifts when leave is created, tick the Do not Unallocate checkbox.
VI. Submit Leave Request
Complete the required fields and click Save. Leave entries will be created for all selected staff.
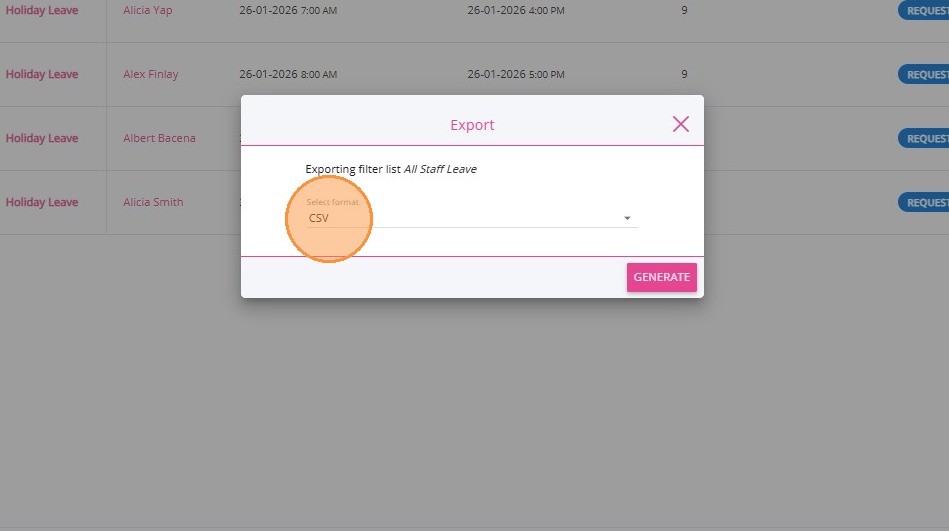
Note: When you bulk create staff leave, the system generates a CSV file with the results. The file shows which leave entries succeeded and which failed. This export is only available with bulk leave creation.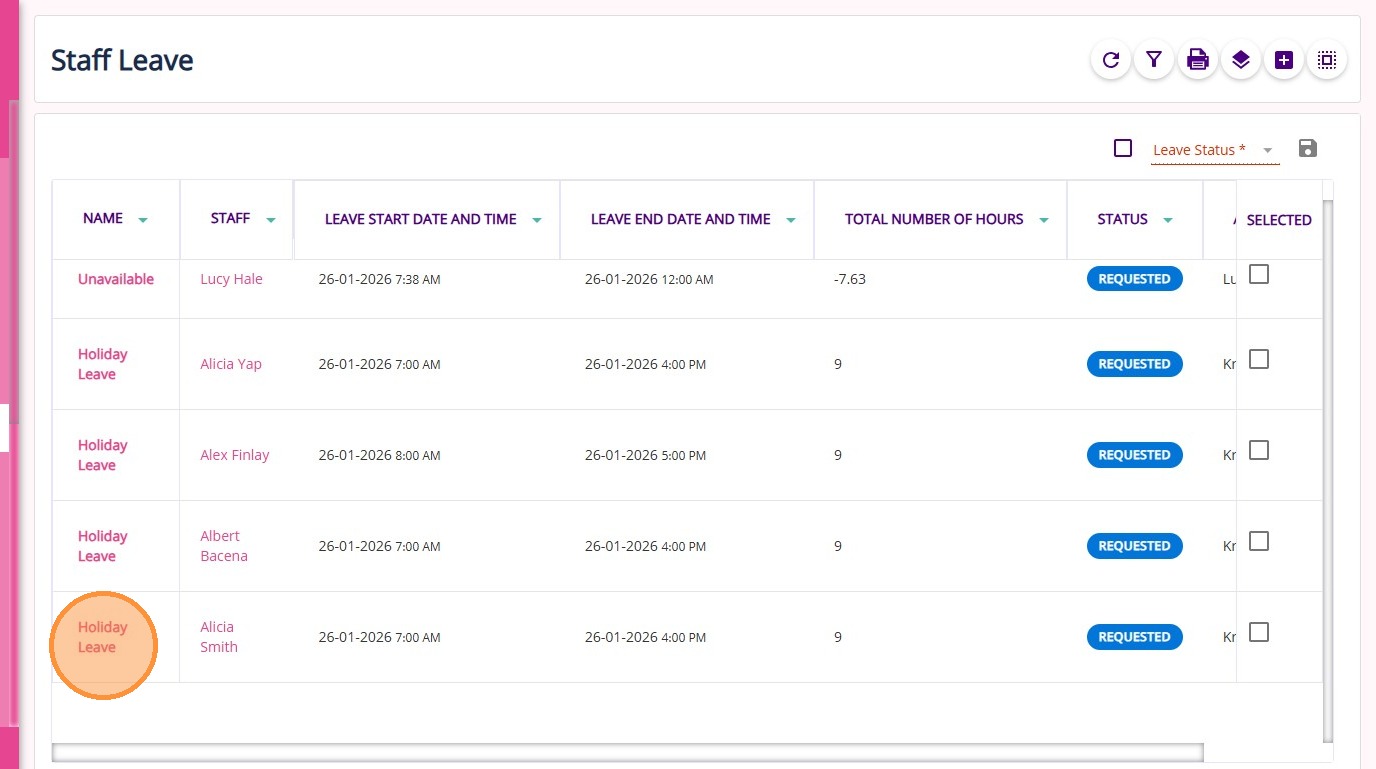
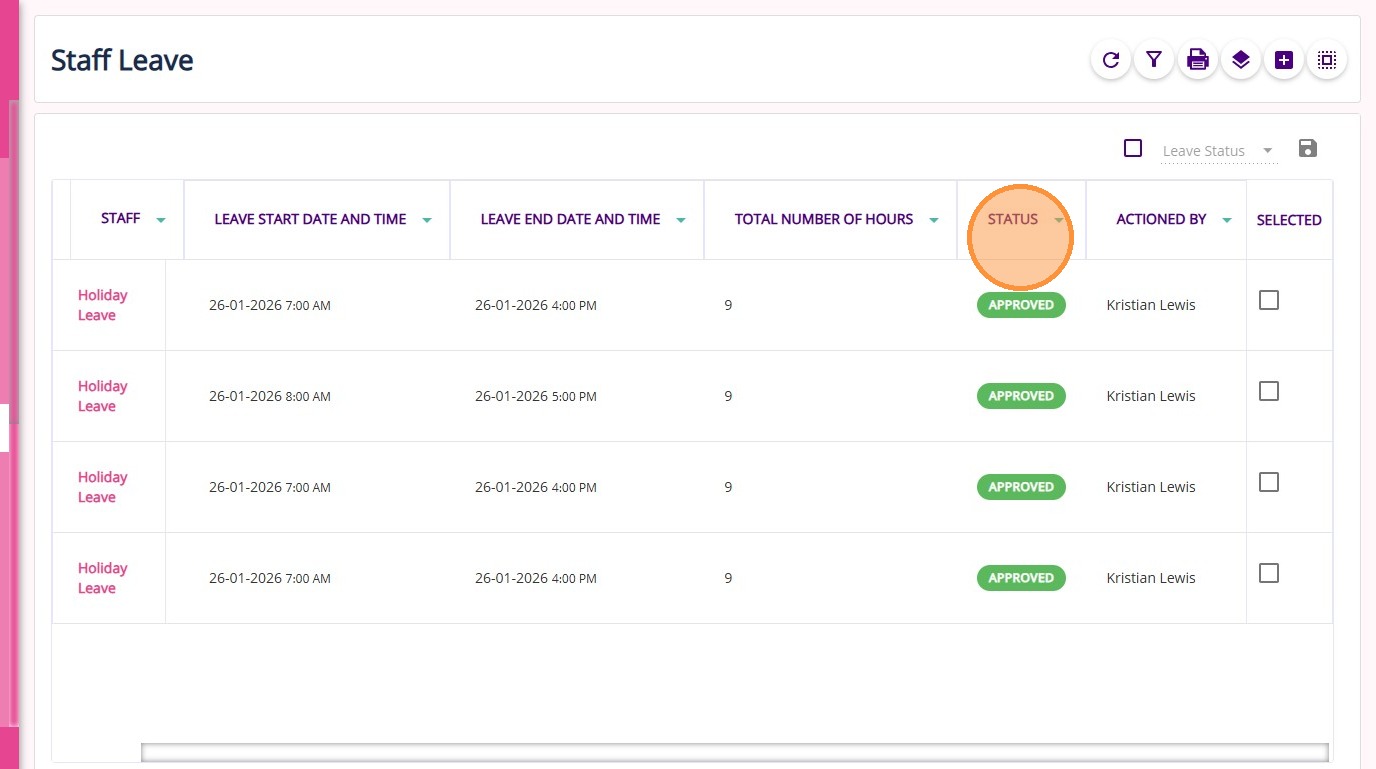
VII. Staff Leave Approval Process
A. Individual Leave Actions
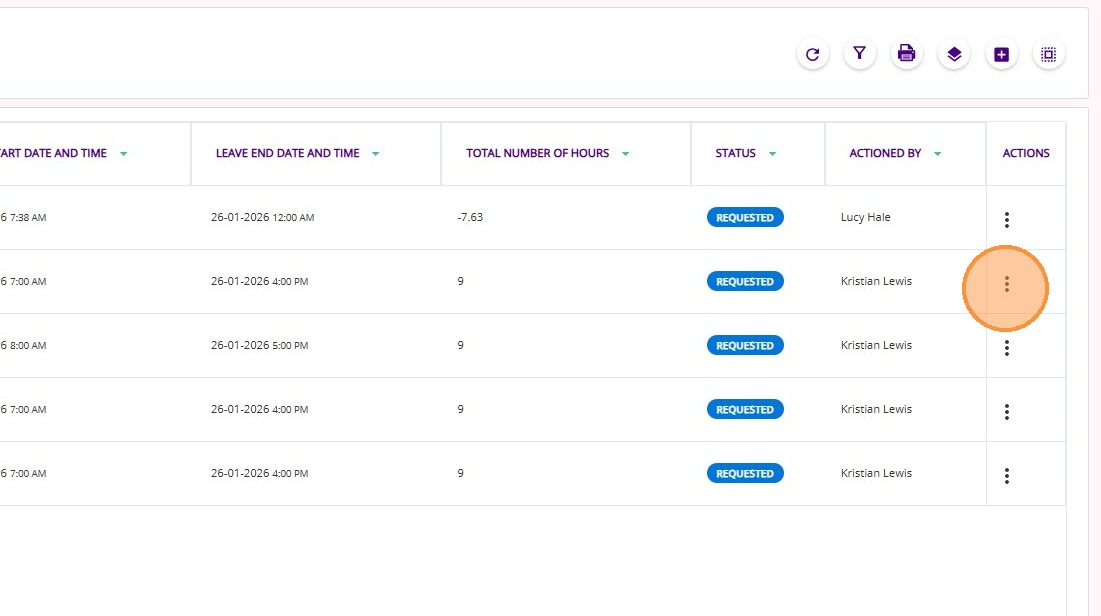
In the Staff Leave dashboard, locate the staff leave entry you want to manage.
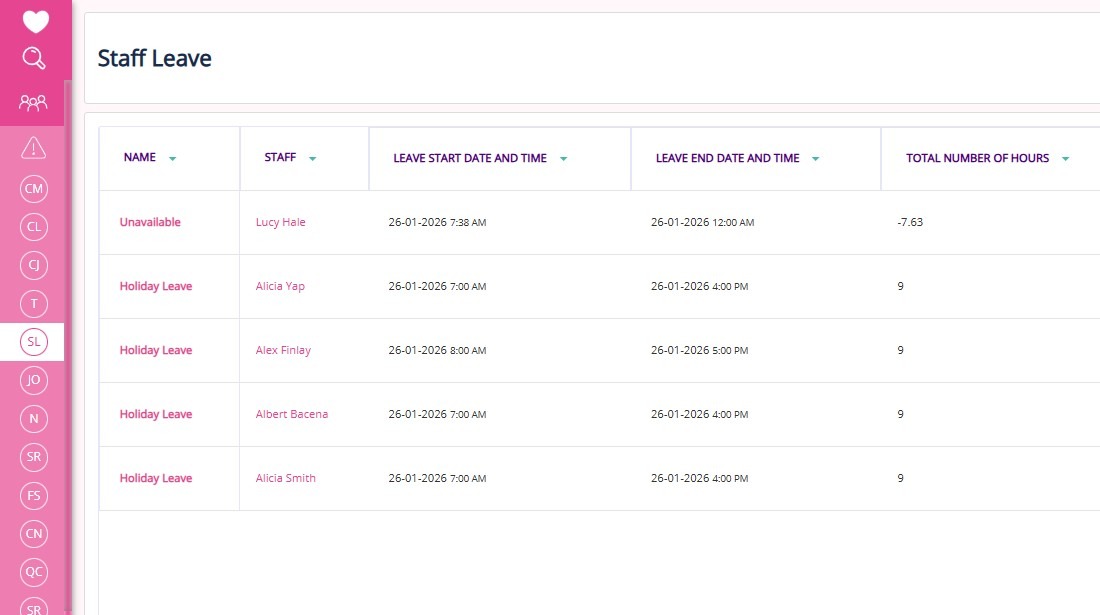
In the Actions column, click the three vertical dots (⋮) next to the entry.
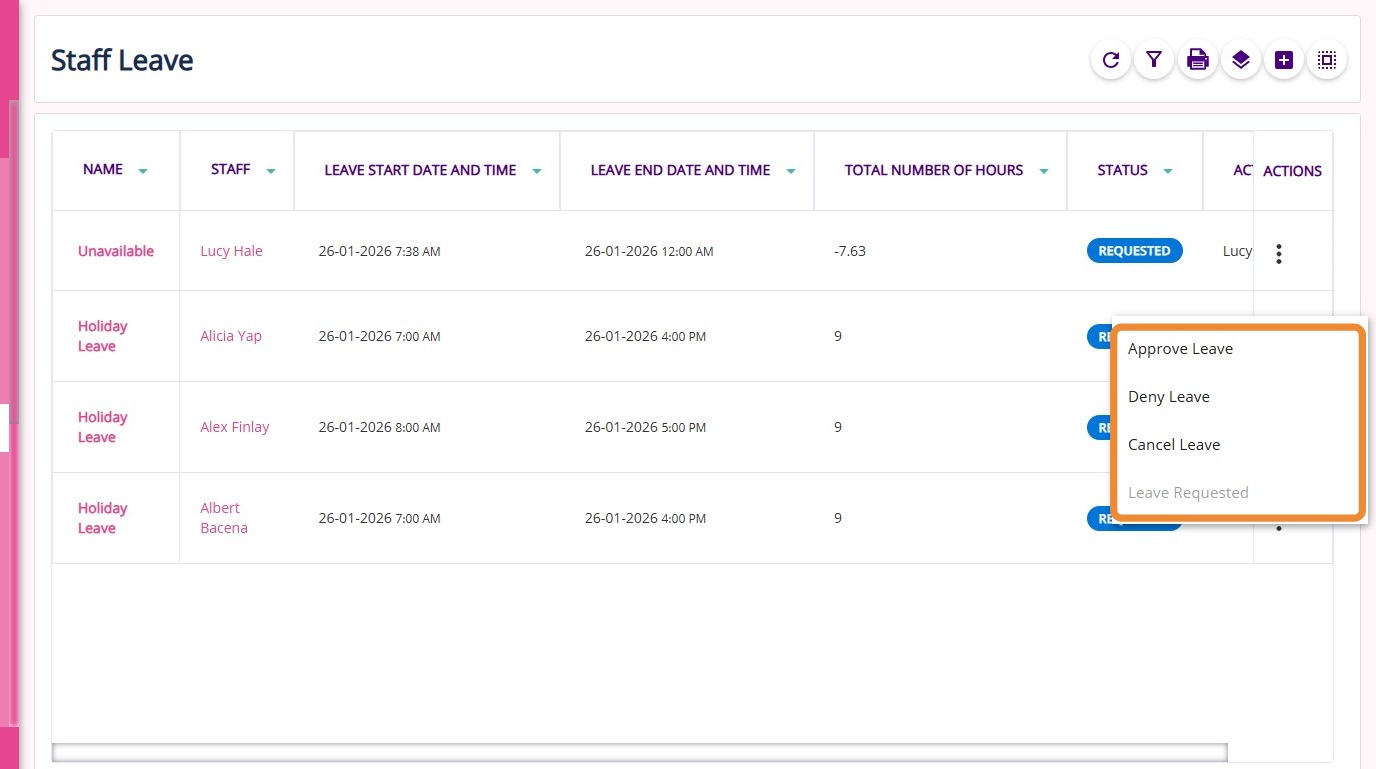
Choose one of the following options:
- Approve: Approves the selected leave.
- Deny: Denies the selected leave.
- Cancel: Cancels the selected leave.
Review the details of the leave to check for accuracy. You can also view any notes that have been added to the leave request.
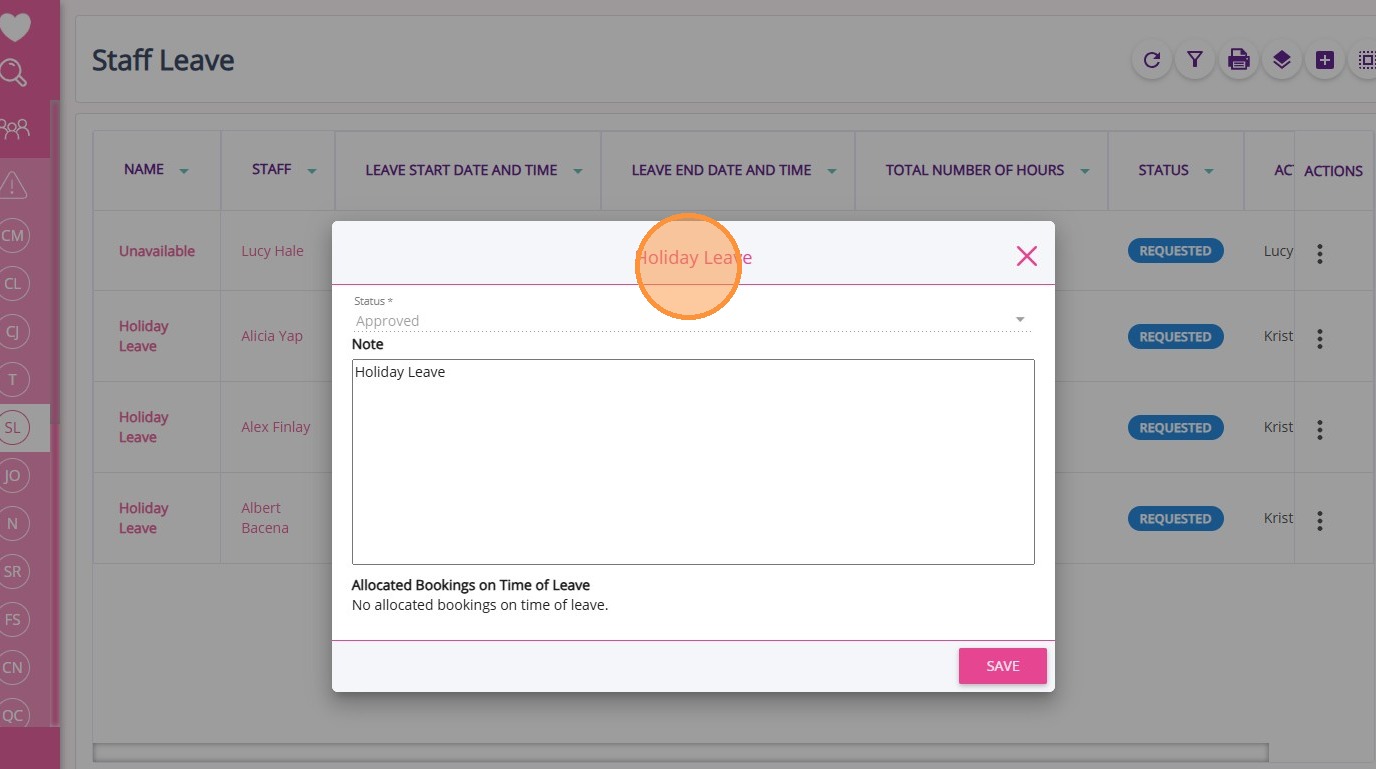
Click Save to confirm and apply your action.

B. Bulk Leave Actions
Click the Bulk Actions icon at the top of the leave list.
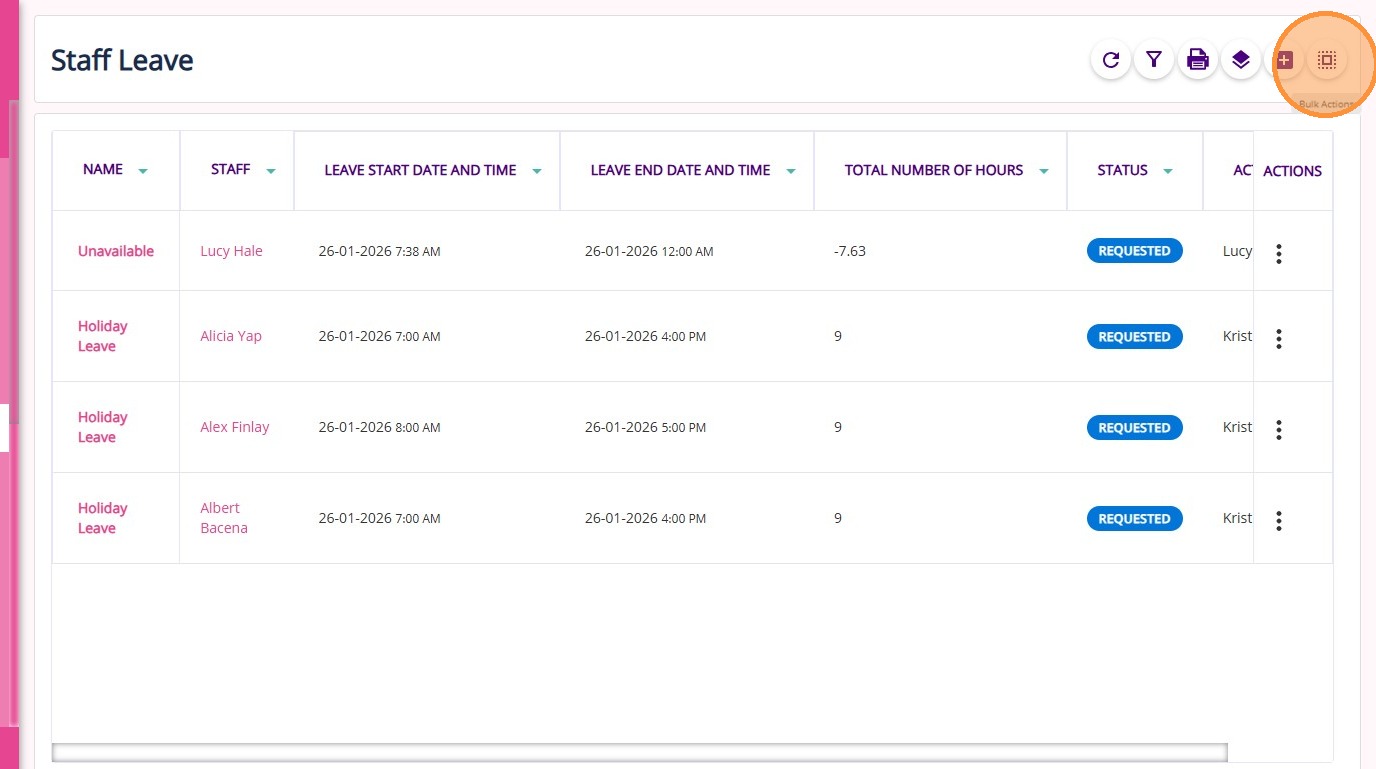
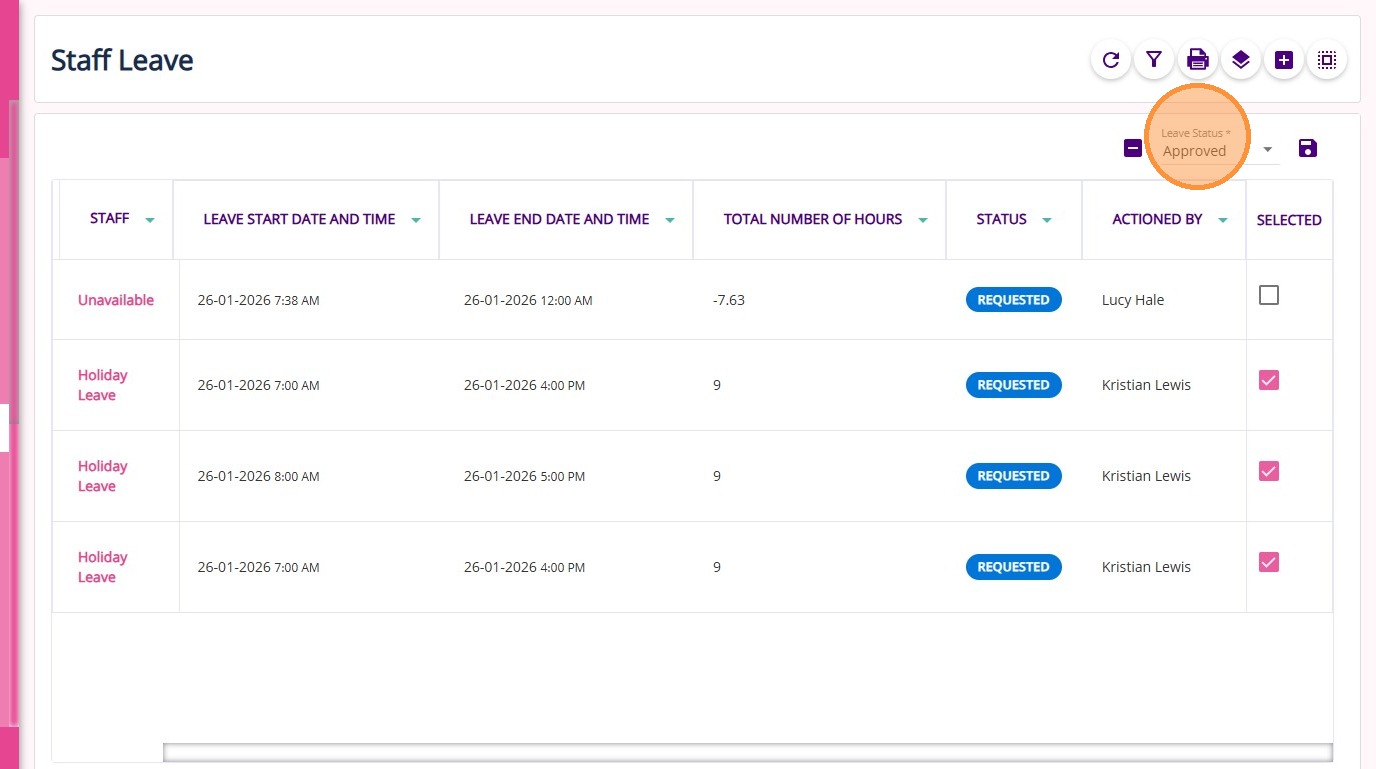
To select all staff leave entries for bulk action, tick the Select All box. This will automatically check all entries in the Selected column.

In the Leave Status field, select the desired status for all selected leaves. Example: Set to Approved to approve multiple leaves at once.
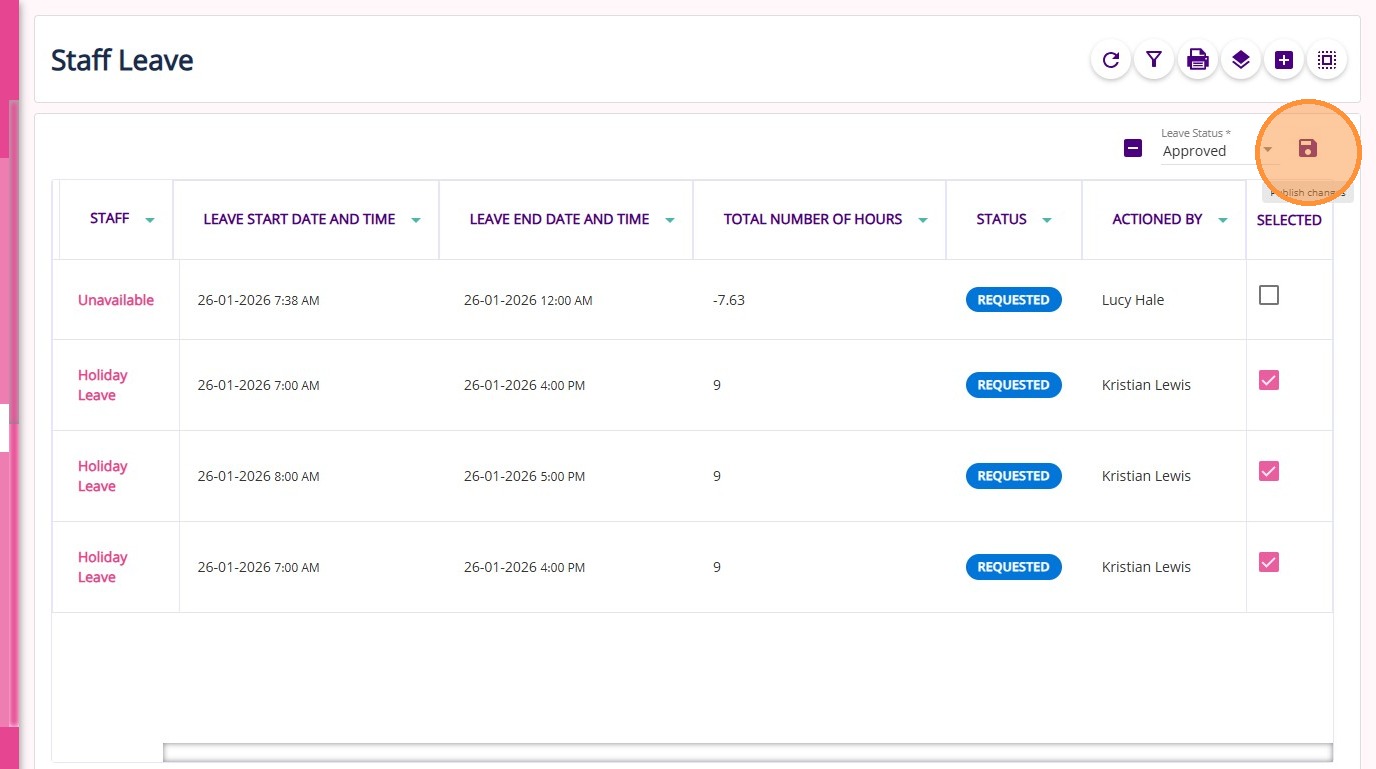
Click the Publish Changes icon to apply your changes.
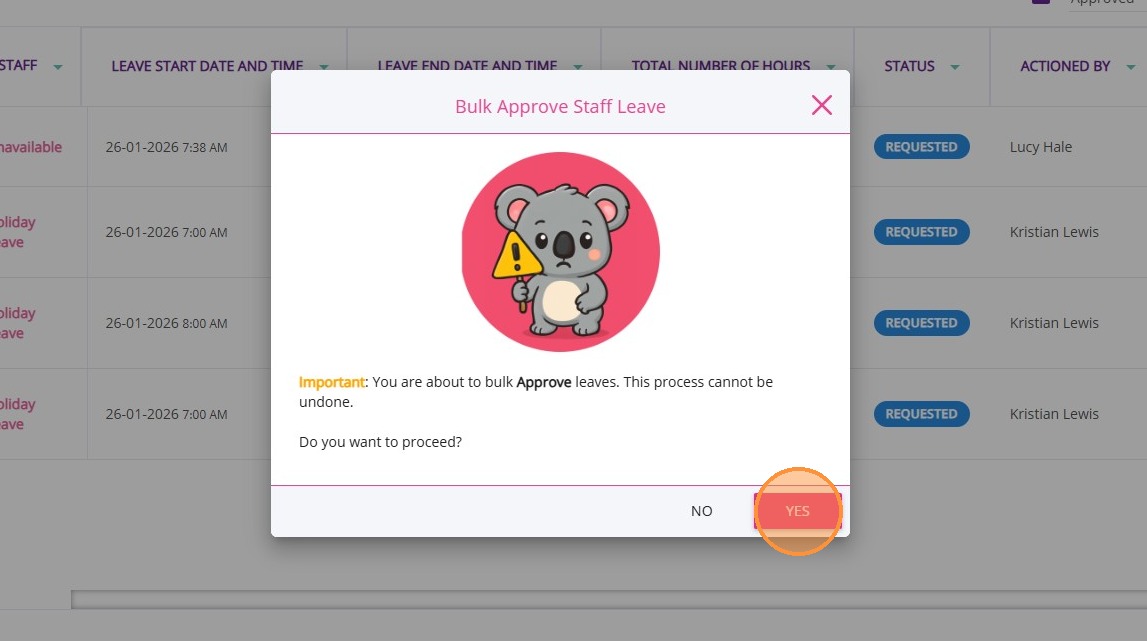
A confirmation message will appear asking if you want to proceed with bulk approval. Click Yes to confirm or No to cancel.
All selected leave entries will update to the chosen status. Example: Approved.
VIII. Status Rules
- Denied/Cancelled: Cannot be modified further.
- Approved: Can only be changed back to Requested.
- Requested: Can be changed to Approved, Cancelled, or Denied.
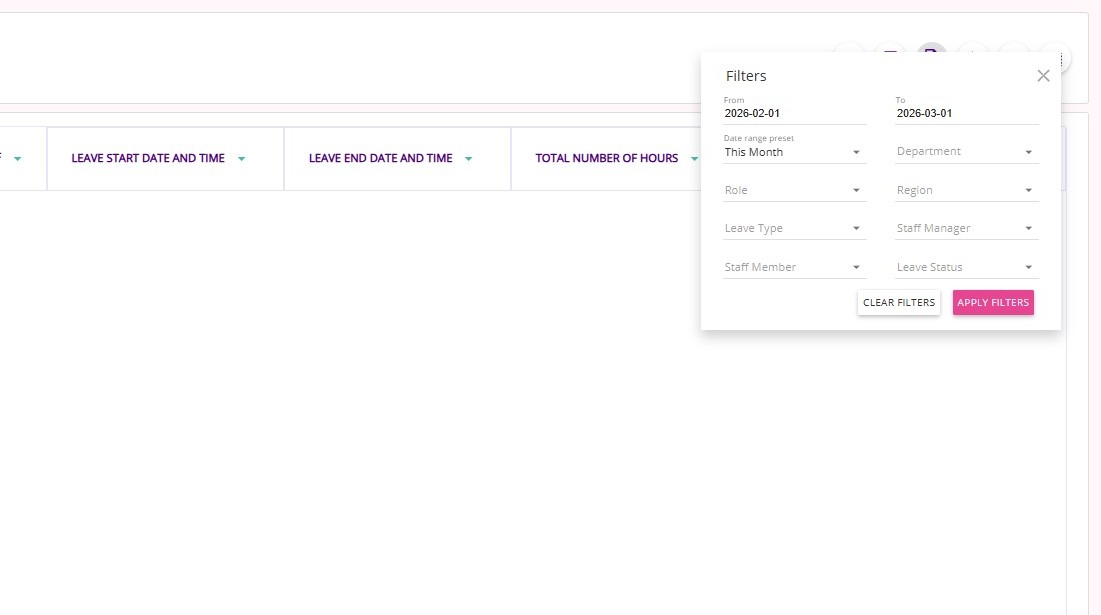
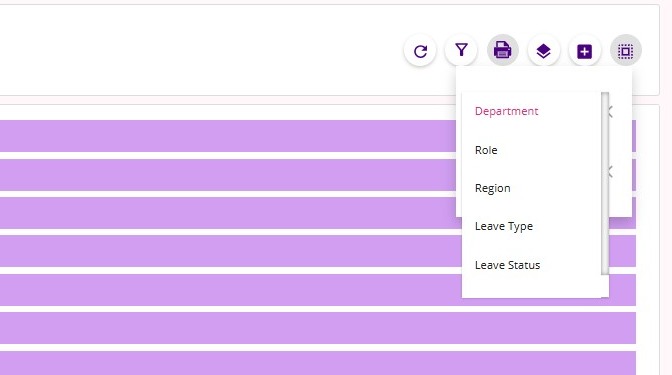
IX. Filtering Staff Leave Requests
Click the filter icon to quickly find and process leave requests.
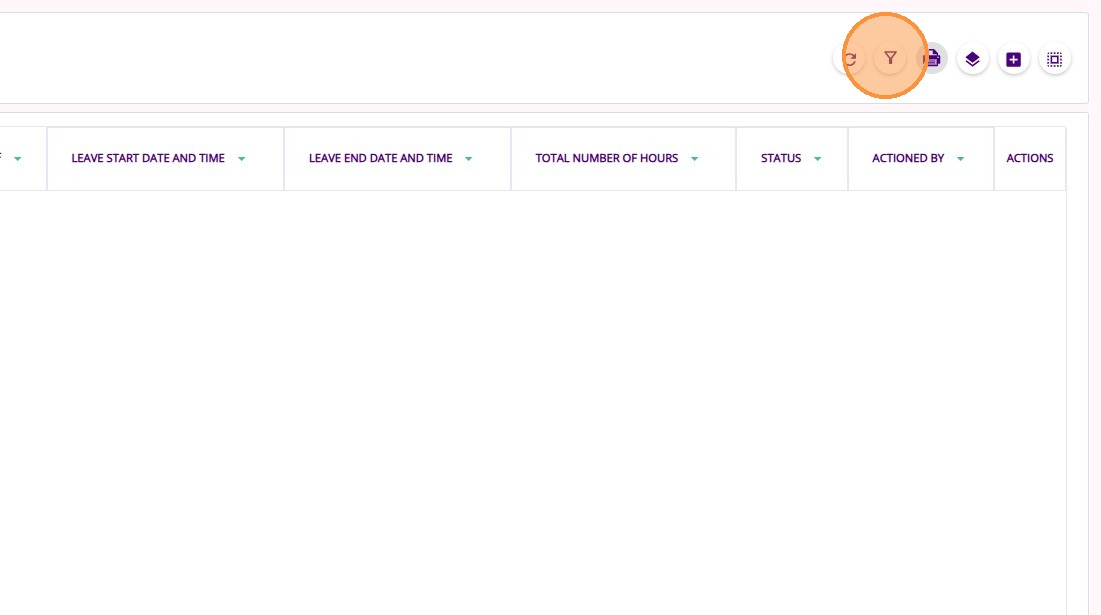
Available filters
X. Additional Features
A. Group By
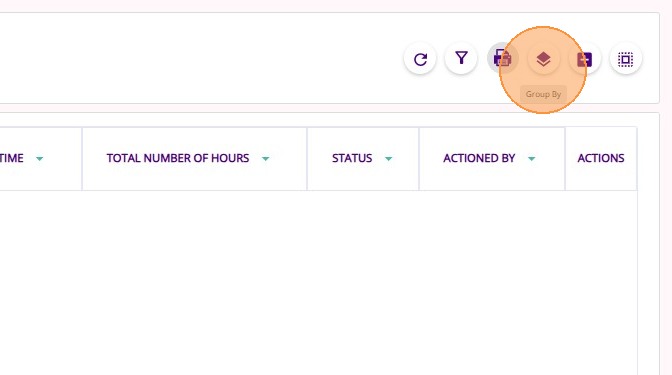
Use the Group By icon to group leave by department, role, leave type, status, and more.
B. Export
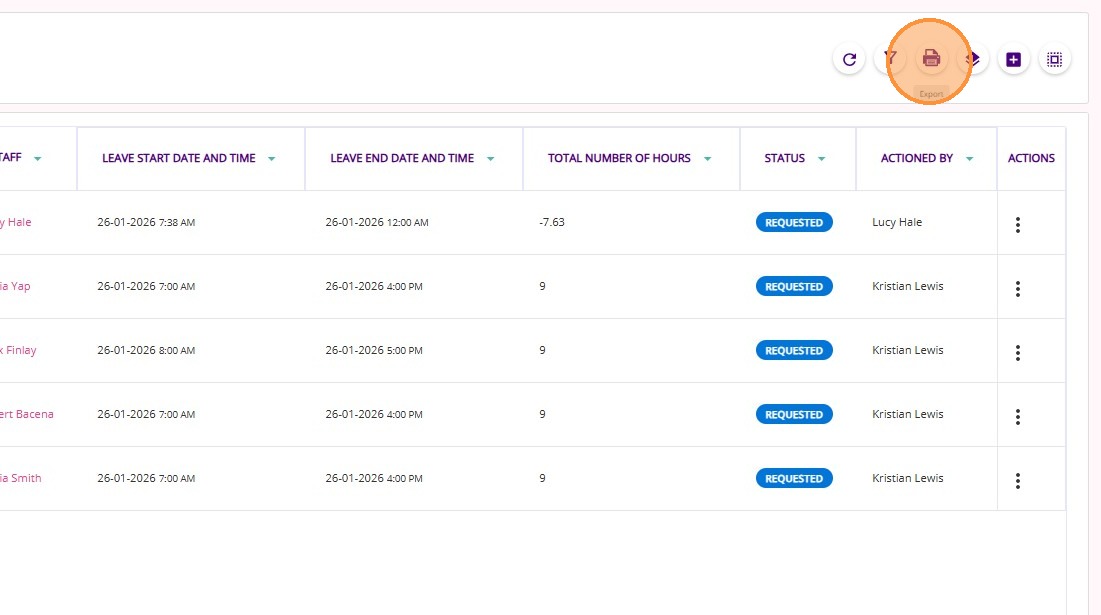
Export staff leave data as CSV or PDF.
What Happens After Approval
- Allocated bookings and shifts are unallocated when leave is approved.
- Once approved, leave appears on the staff calendar as Leave.
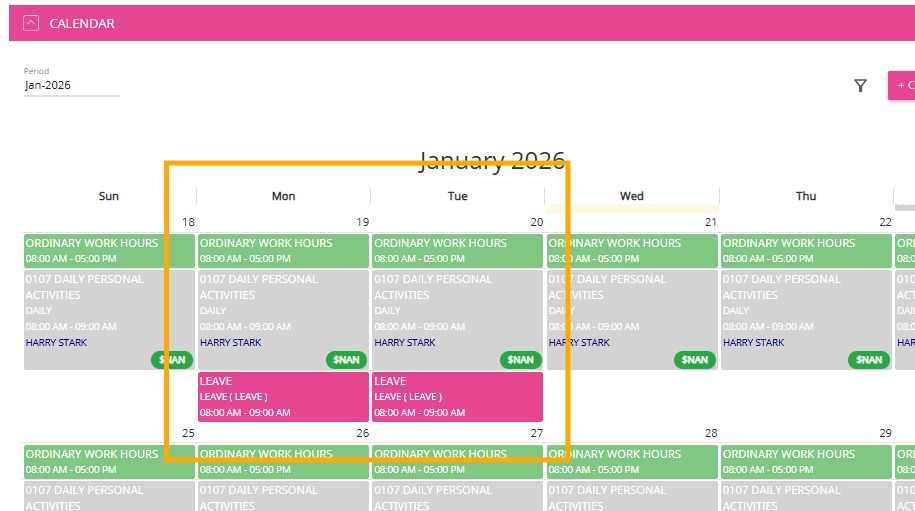
- Approved leave will display in social groups as On Leave when the event is allocated to a staff member.

Related Articles
Notifications for Staff Leave Management
Staff Leave Workflow Organisations regularly receive new staff leave requests and it is important that the proper team is notified at the appropriate stage of the staff leave process so they can follow up and complete any required actions. Timely ...Filters on the Service Review Board
You can use filters on the Service Review Board to quickly narrow down your results and find the information you need as you process bookings before export. This topic describes the available filter options on the Service Review Board. Keywords: ...Service Review
Service Review is a section in the left navigation pane of the CareVision portal, found under Actions > Service Review. In this section, teams handle all service processing and approvals. Users often refer to this area as the Service Review Board or ...Claims Management
The Claims Management Dashboard allows you to manage, review, and reconcile Support at Home claims against Services Australia payment statements. It supports the claiming workflow, from uploading payment statements and reviewing variances to ...How to use the Close Quarter Button
This topic explains how to use the Close Quarter button to calculate and roll over remaining SAH balances. Keywords: close quarter sah, support at home rollover, sah remaining balance, claims management carevision, finalize period, statement periods ...