How To View Timesheet and Booking Hours on the Mobile App as Field Staff
Keywords: carevision plus mobile app, field staff timesheet, track total hours, booking hours, time tracking app, mobile timesheet management, staff work hours, billable hours tracking, care staff scheduling
I. Prerequisites

2. The security role of the field staff member should be set to Field Care Professional (Staff).

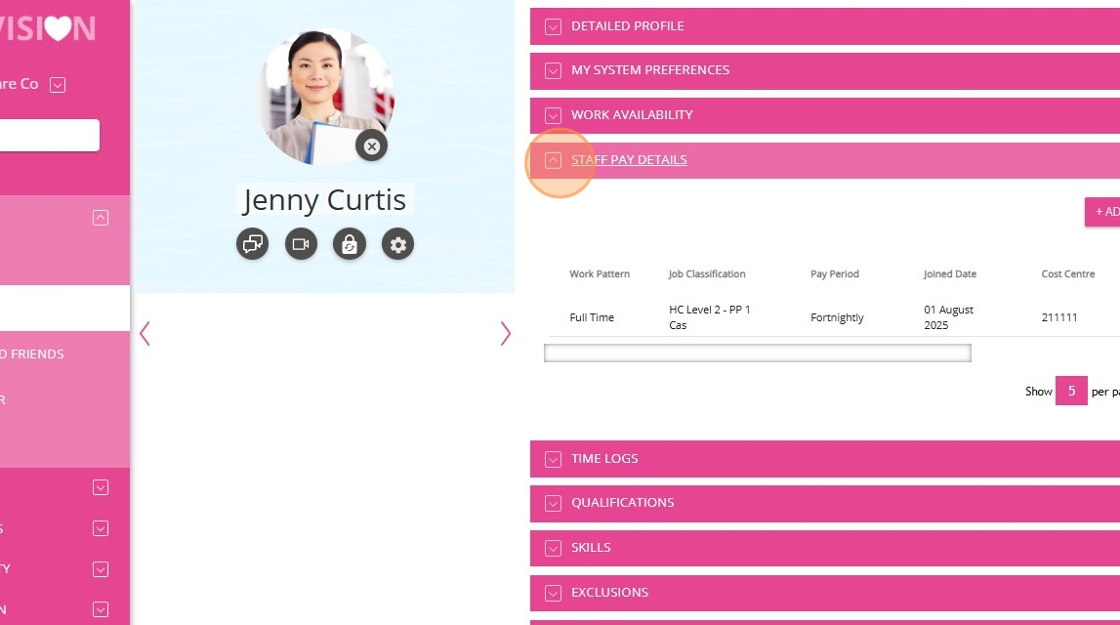
3. Staff pay details must be set up in the field staff member’s profile by the Coordinator (Admin) user. If this has not been completed, please refer to Set Up Staff Pay Details documentation for detailed instructions.
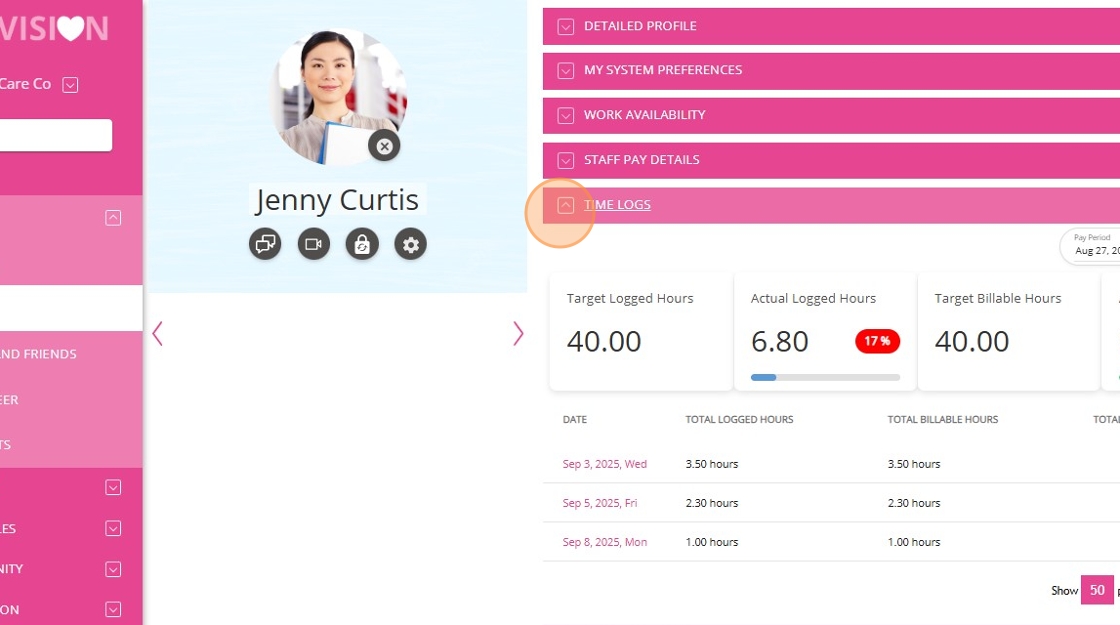
4. In the Time Logs section of the field staff member’s profile, the Target Logged Hours and Target Billable Hours specified by the Coordinator (Admin) user must be accurately reflected.
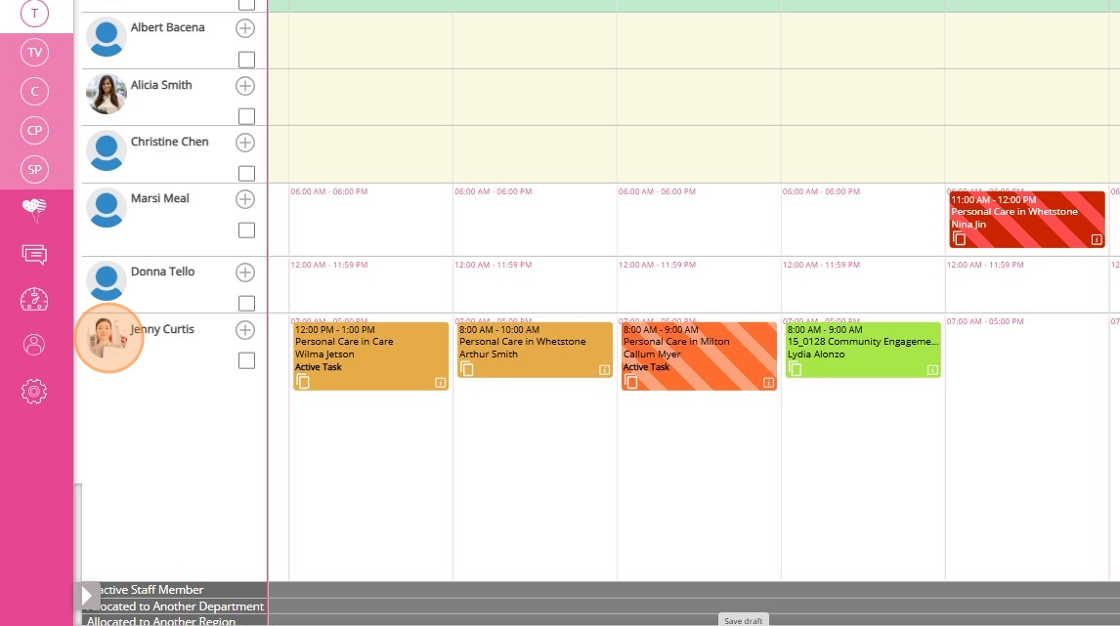
5. Bookings are allocated to the field staff member, and each booking should have a specified Visit Duration.
II. Complete a Booking on the Mobile App
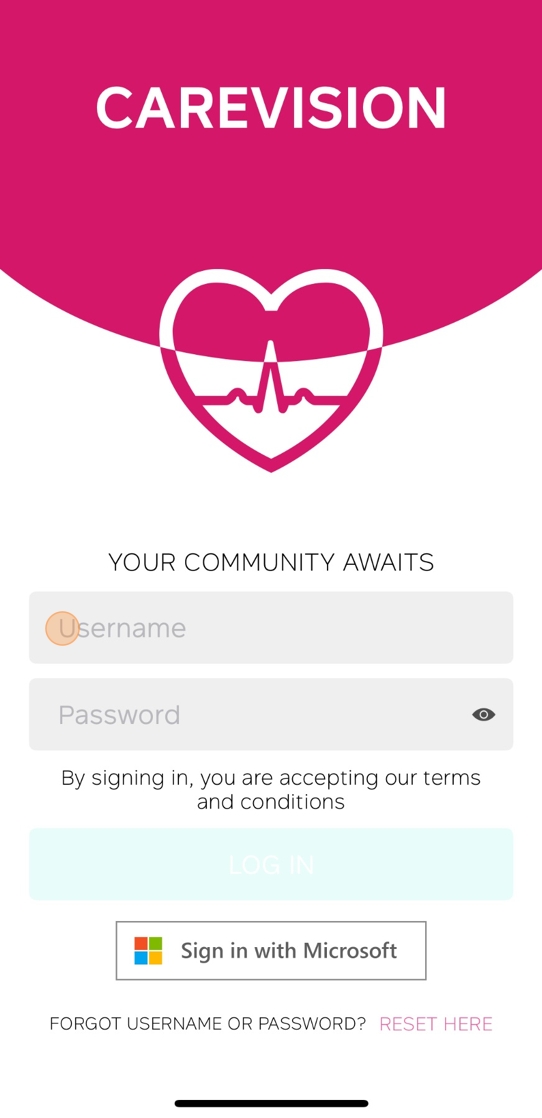
1. Log in to the CareVision Mobile Plus App using your field staff member credentials.
1. Log in to the CareVision Mobile Plus App using your field staff member credentials.
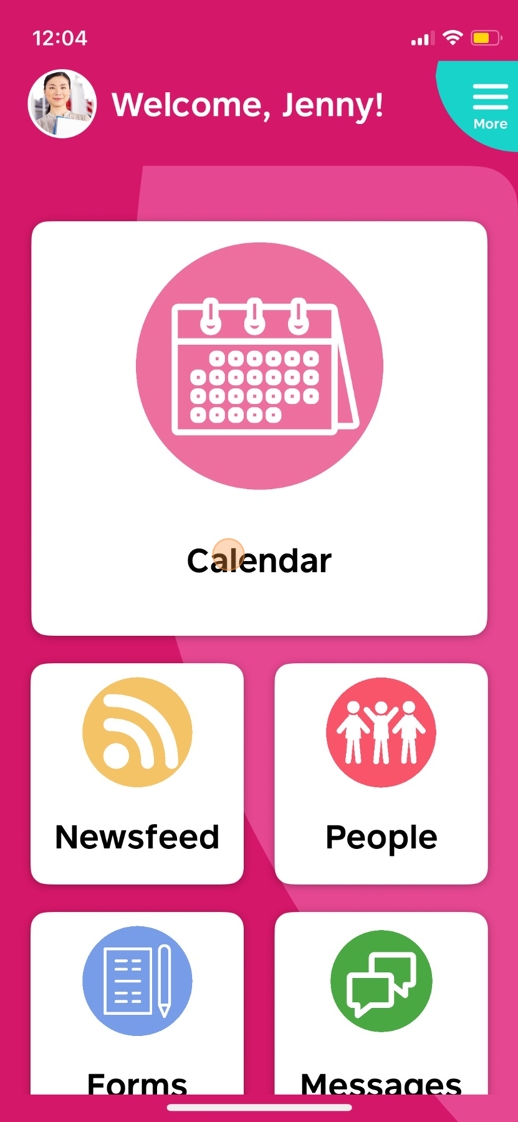
2. Tap Calendar to view your upcoming bookings.
3. Review your bookings and tap the one you want to check in to.

 By default, bookings are automatically accepted and staff can simply click on a booking to check in. However, if the Require Staff Acceptance setting is enabled in your organisation, staff must accept the booking before they can check in. For more information, see this documentation.
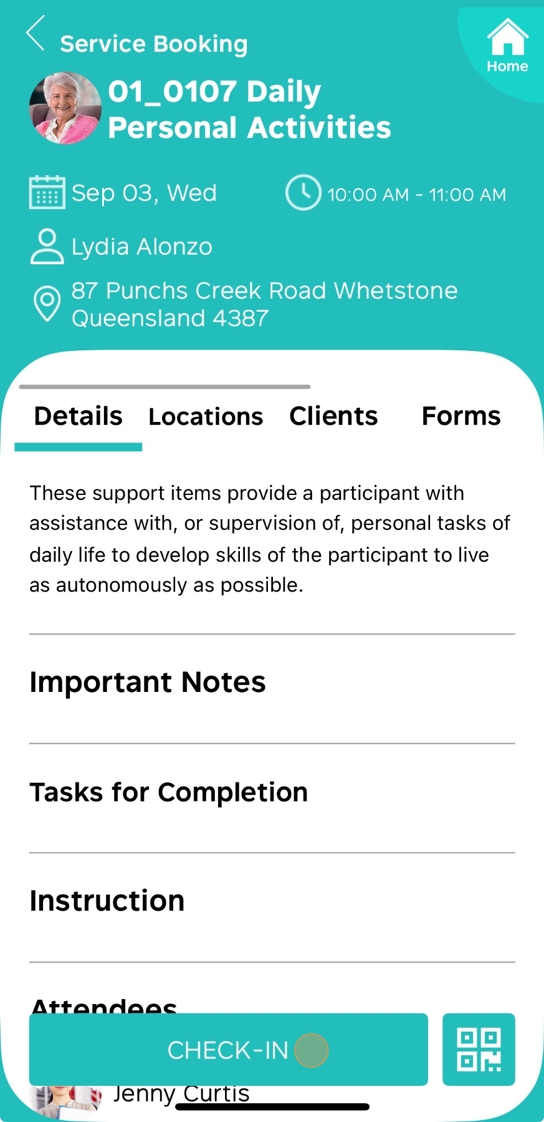
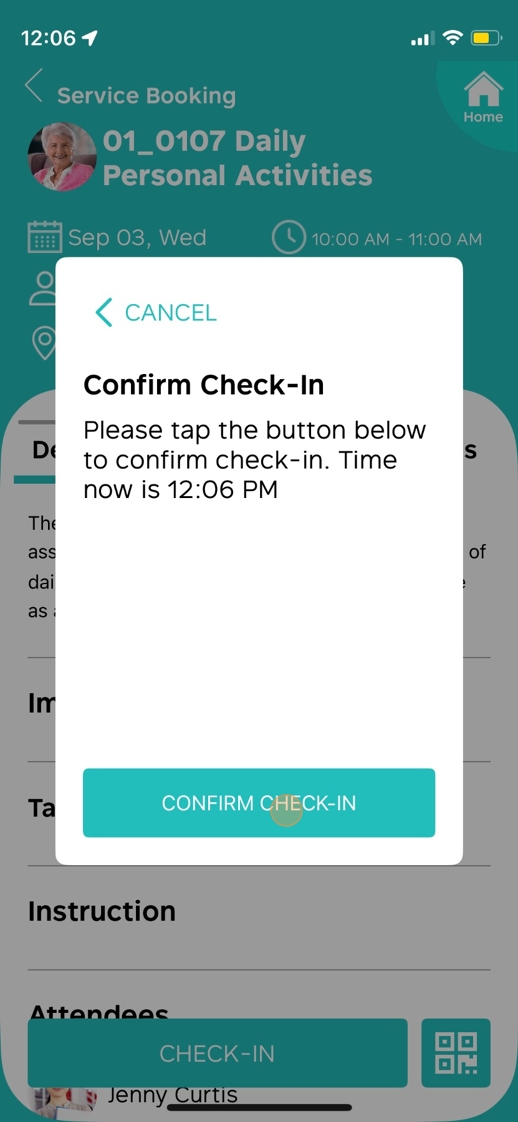
5. Tap Confirm Check-in.
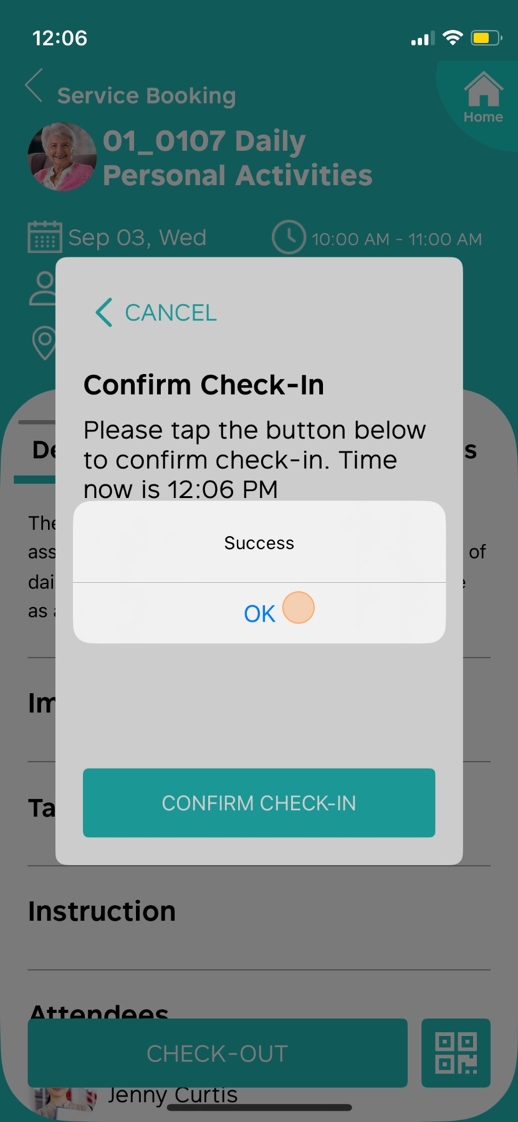
6. A success message will appear. Tap OK to continue.
7. When you have completed your visit, tap Check-out.
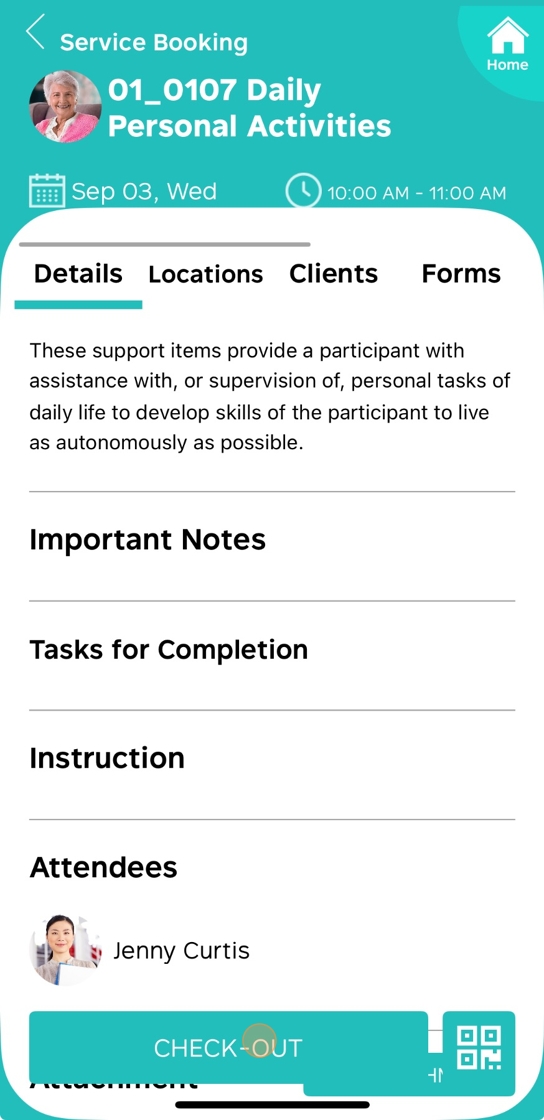
8. Complete any required forms, if applicable.
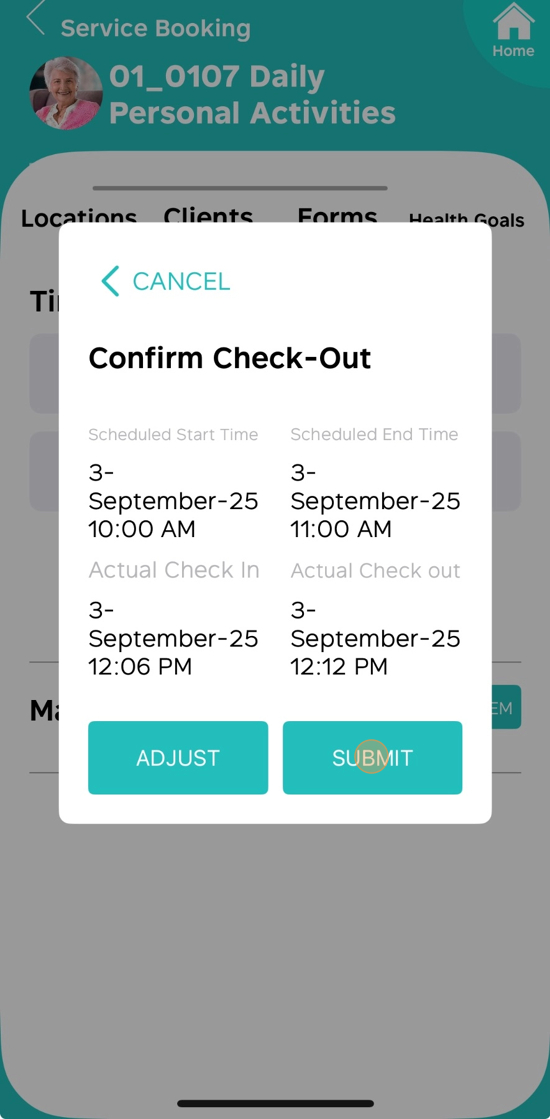
9. Read the details in the Confirm Check-out form, which displays the scheduled start and end times, as well as your actual check-in and check-out times.
- If you want to adjust your check-in or check-out date and time, tap Adjust.
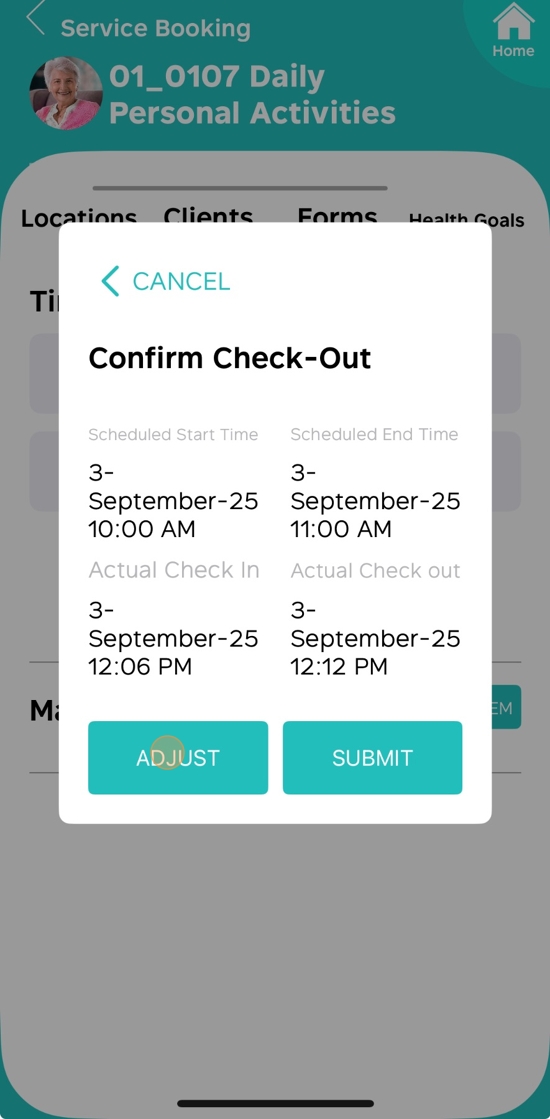
- If you want to submit without making changes, tap Submit.
10. A success message will appear. Tap OK to continue.
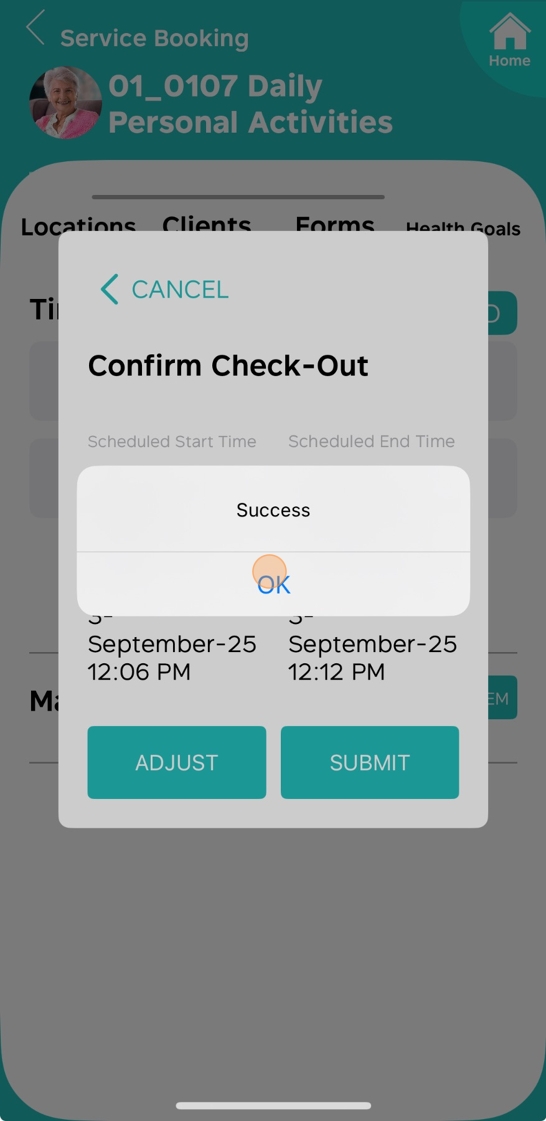
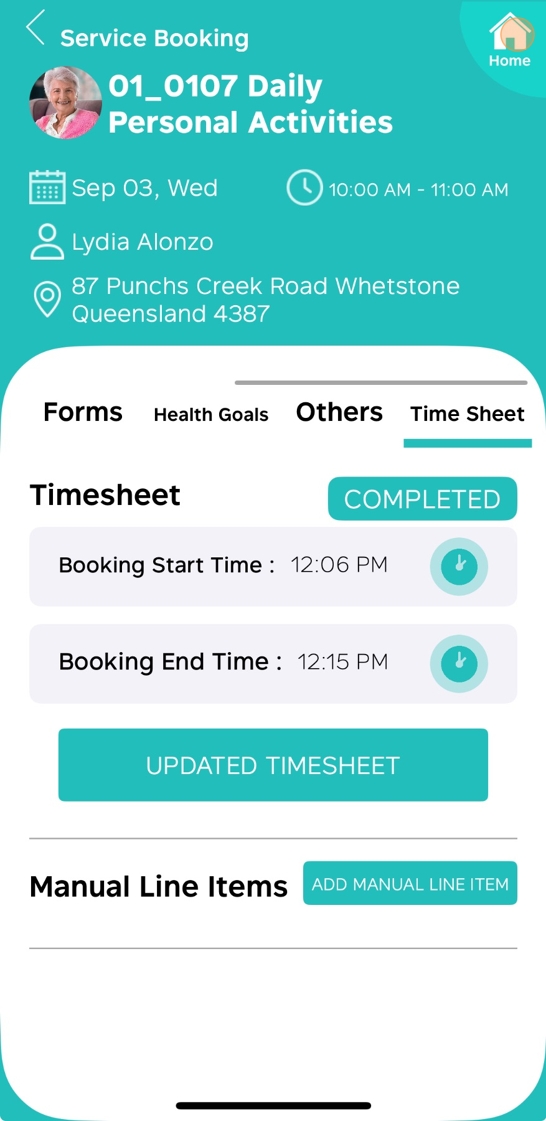
- You will be redirected to the Timesheet section, indicating that the timesheet has been completed.
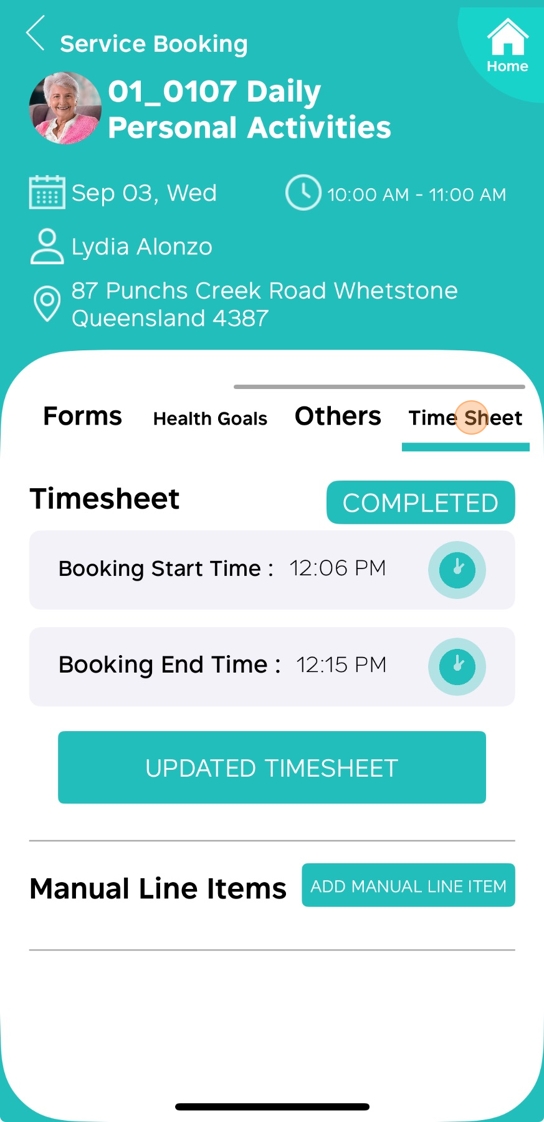
- If you need to make changes, you can still update the timesheet by tapping Updated Timesheet.

III. View Your Timesheet and Booking Hours
1. Tap Home to return to the main menu.
2. Go to My Timesheet.

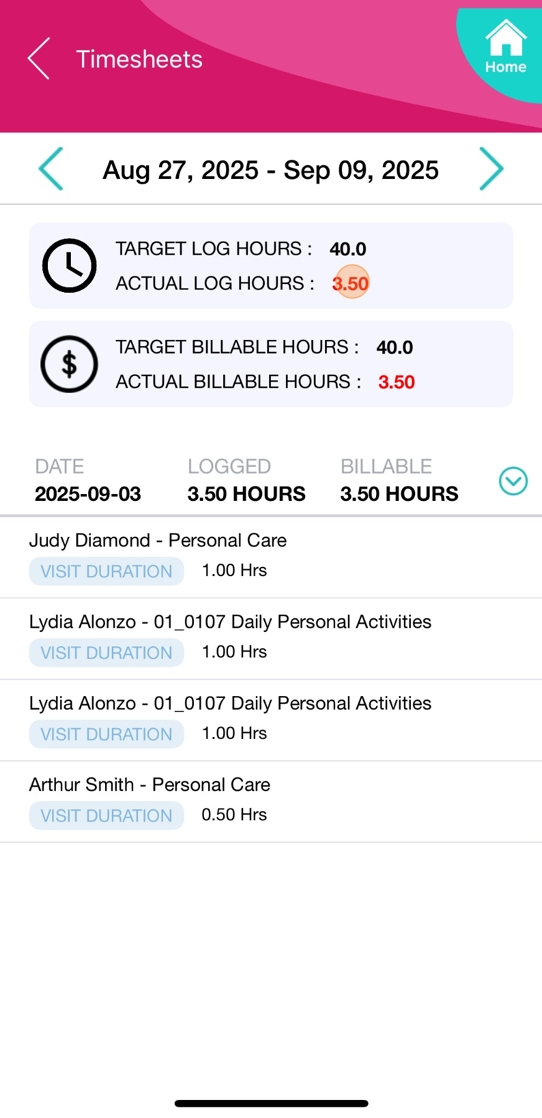
3. At the top of the screen, you will see the pay period. Use the left and right arrows to select the desired pay period.

4. View Target Log Hours, which represent the expected number of hours you should log for the selected pay period, as set by the Coordinator (Admin) user.

5. View Actual Log Hours, which represent the total hours you have logged for the selected pay period, representing the actual time spent delivering service or care to clients.
 In the Visit Duration section, the way timesheet hours are recorded depends on the settings in the client booking:
- Scheduled Time: If the "Bill Using" and "Pay Using" fields are set to Scheduled Time, the timesheet will capture the entire scheduled hours of the booking and apply the specified rate to those hours, regardless of the actual hours the field staff member arrives or leaves.
- Example: If a booking is scheduled from 9:00am to 10:00am, the timesheet will record 1 hour at the scheduled rate, even if the field staff member arrives late or leaves early.
- Checkin/Checkout Time: If the "Bill Using" and "Pay Using" fields are set to Checkin/Checkout Time, the timesheet will capture the actual hours logged by the field staff member based on their check-in and check-out times, and the rate will be applied to the actual hours worked.
- Example: If the booking is scheduled from 9:00am to 10:00am, but the field staff member checks in at 9:00am and checks out at 9:30am, the timesheet will record 0.5 hours at the actual hours rate.
6. View Target Billable Hours, which represent the expected number of billable hours for the selected pay period, as set by the Coordinator (Admin) user.
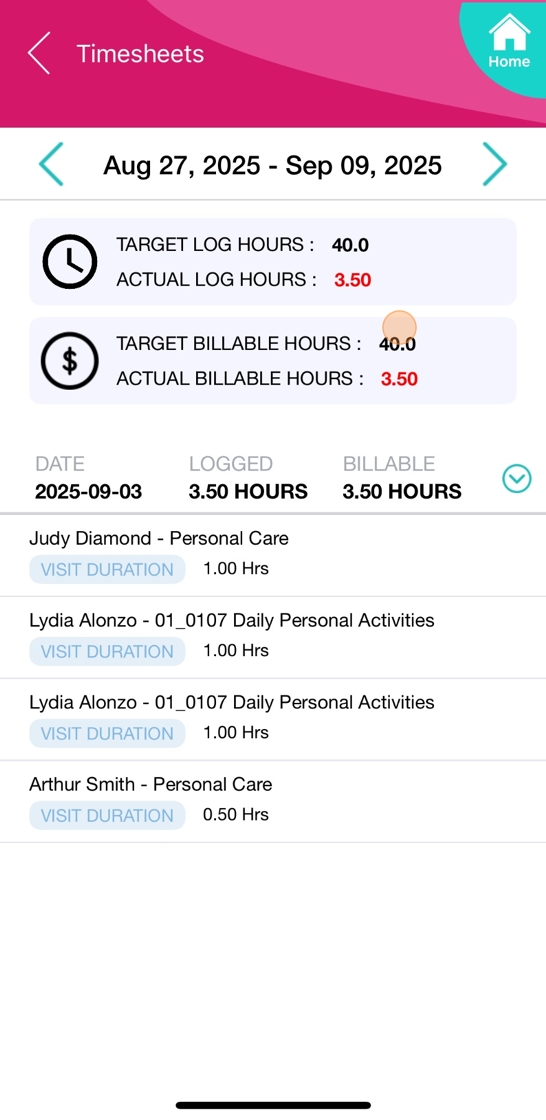
7. View Actual Billable Hours, which represent the total number of hours eligible for billing according to service requirements.
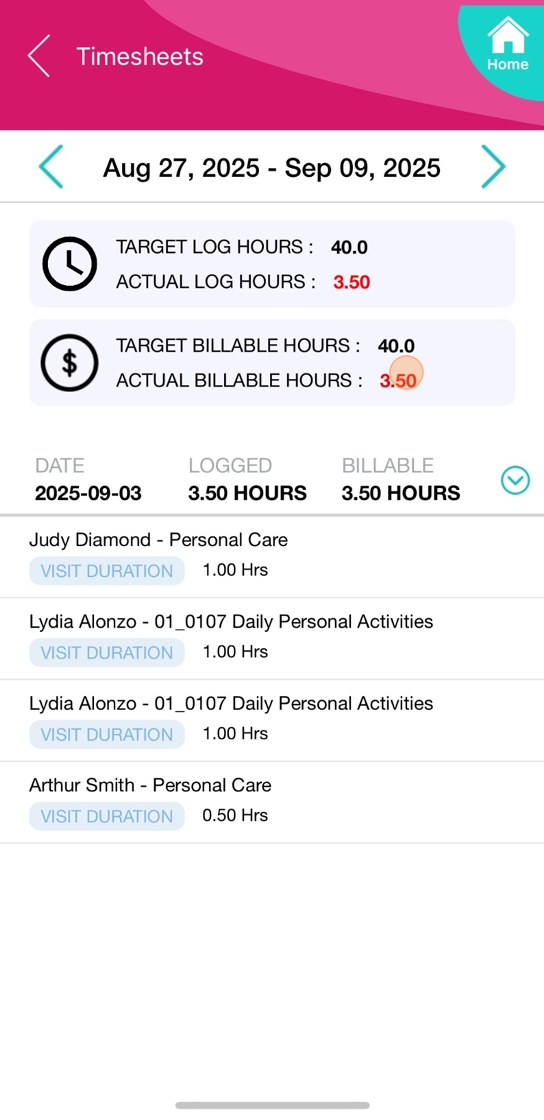
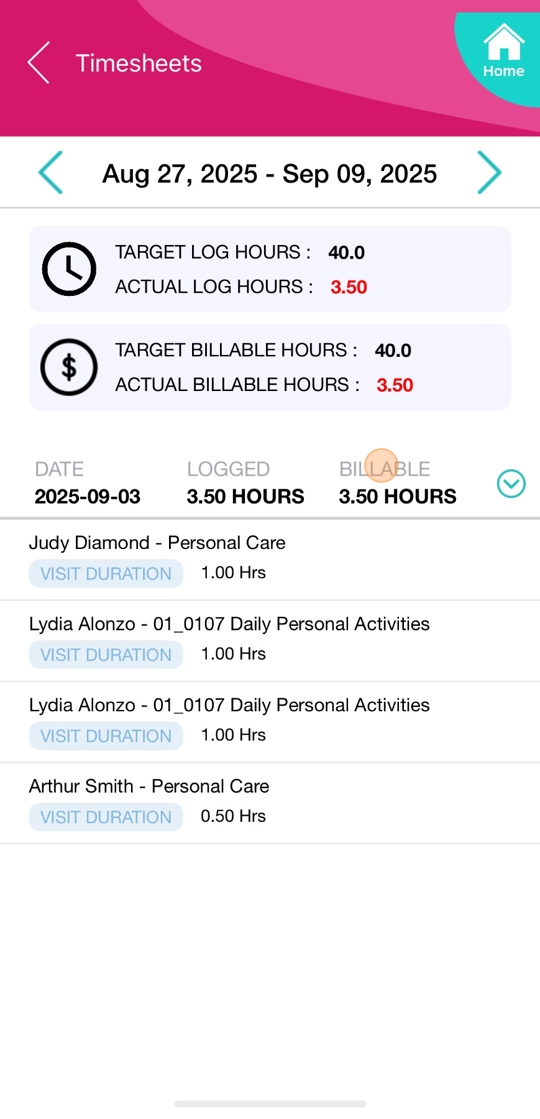
8. In the middle section, under the Date column, specific dates are listed.
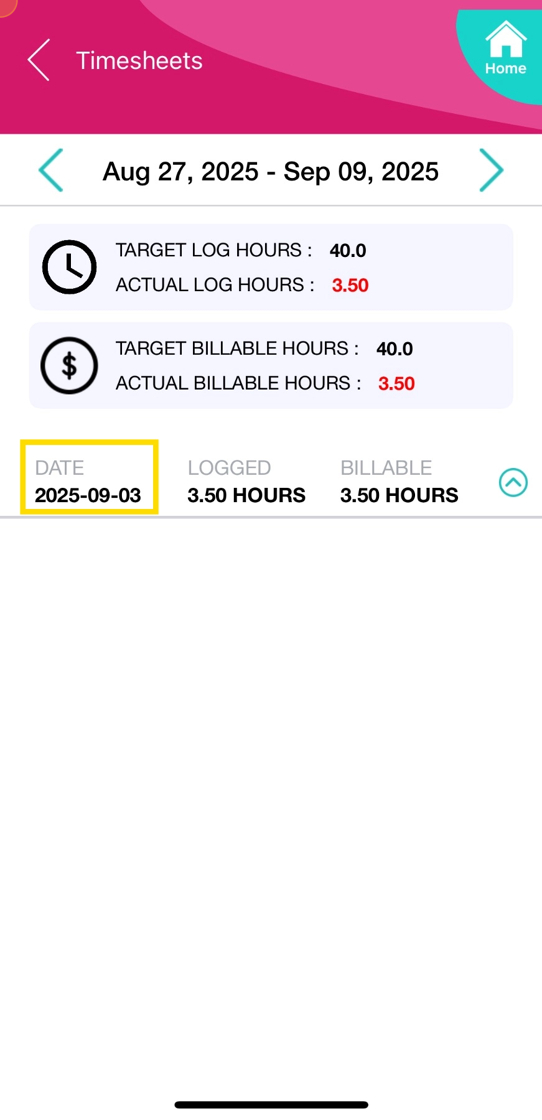
9. Tap the arrow icon to view all bookings for a specific date.

10. In the Logged column, you can view the total logged hours for each date.
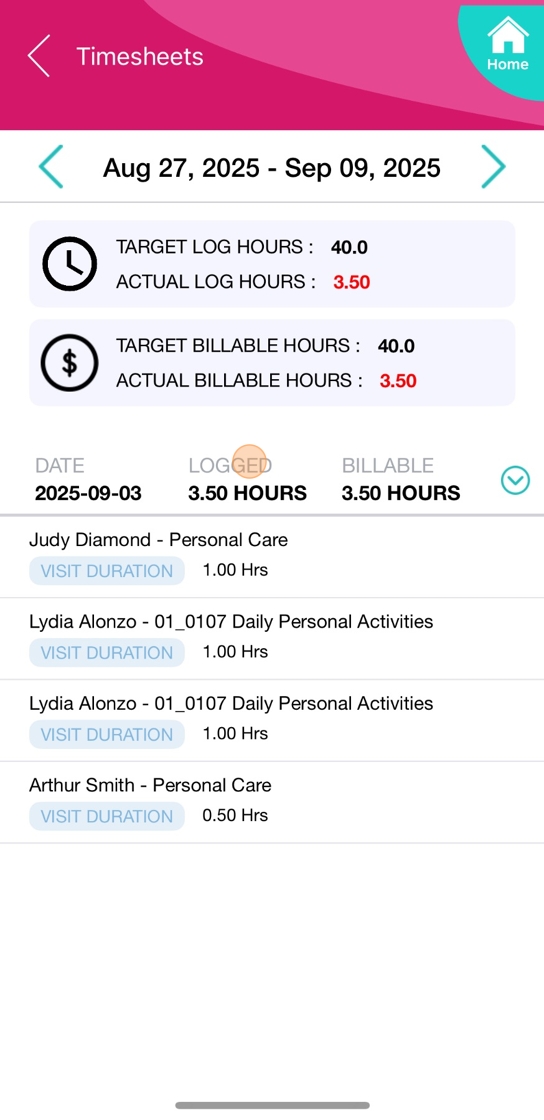
11. In the Billable column, you can view the total billable hours for each date.
This topic explained how field staff members can track their total hours, timesheet hours, and booking hours in the CareVision Plus mobile app, including step-by-step instructions for accepting bookings, logging time, and viewing timesheet details.
By using these features, staff members can efficiently manage their work hours and enhance time management while supporting clients.

Related Articles
How To Cancel A Booking Using Cancellation Reasons
What are Cancellation Reasons You can cancel a scheduled booking from a number of areas of the system, including: Client Profile Calendar Staff Profile Calendar Scheduling Area Service Review Board Mobile App - For Coordinators or Administrators ...Approving Timesheets
Bookings capture all relevant work details, including date, time, staff, and service. When payroll is generated, these booking records are converted into timesheet data. This topic describes how to review and approve timesheets in CareVision. ...Staff Leave & Their Schedule
In this article, we will discuss the importance of the work schedule and leave schedule of the staff member, their differences, their usefulness and some scenarios for the coordinator's understanding of this module. The different types of schedules ...How to Assign Staff to a Shift Pattern with an Associated Social Group
This topic describes how to assign staff to a shift pattern with an associated social group. Keywords: shift patterns, staff scheduling, social groups, carevision scheduling, assign staff shifts, preferred staff allocation, autoscheduling, staff ...Rostering Sleepovers
CareVision allows you to roster, track, bill, and pay for sleepover bookings based on rules configured in your organisation. This topic describes how to roster sleepovers in CareVision. Keywords: sleepover rostering, carevision scheduling, roster ...