How to Generate SAH Statements
Once you have finalized a claim, you are ready to generate statements. At this stage, all finalized claims are assigned into a statement period, funding is recalculated, and official statements are produced for distribution.
This topic describes the process for generating Support at Home (SAH) statements.
Keywords: support at home statements, generate financial statements, claim finalization process, statement period assignment, recalculate funding, download client statements, finalize and send statements, statement management, sah statement generation, financial claim processing
Prerequisites: SAH Statement Configuration
- Before generating statements, make sure you have reviewed the related documentation: Support at Home Billing and Claiming Workflow.
- You must also configure the SAH statement settings to control which details will appear on the generated statements:
See detailed steps here
Configure the SAH Statement Settings
1. Navigate to Statement Configuration
Go to Settings > General Config, then locate Support at Home Statement Details.
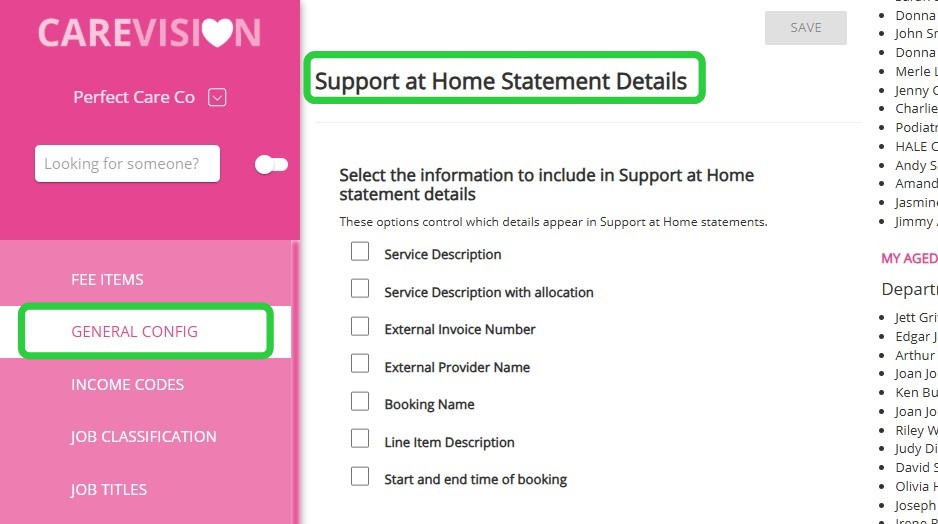
2. Configure Statement Display Options
Select which details should appear on the SAH Statement. Use the tick box options to control which details are displayed.
- Service Description
- Service Description With Allocation
- External Invoice Number
- External Provider Name
- Booking Name
- Link Item Description
- Start and End Time of Booking

3. Save Configuration
Click Save. These settings will apply to newly generated SAH Statements.
Note: This setting must be configured at both the Head Office and Branch levels. Branch settings do not inherit the configuration from the Head Office.
Steps to Generate SAH Statement
Step 1: Assign Claims to a Statement Period
See detailed steps here
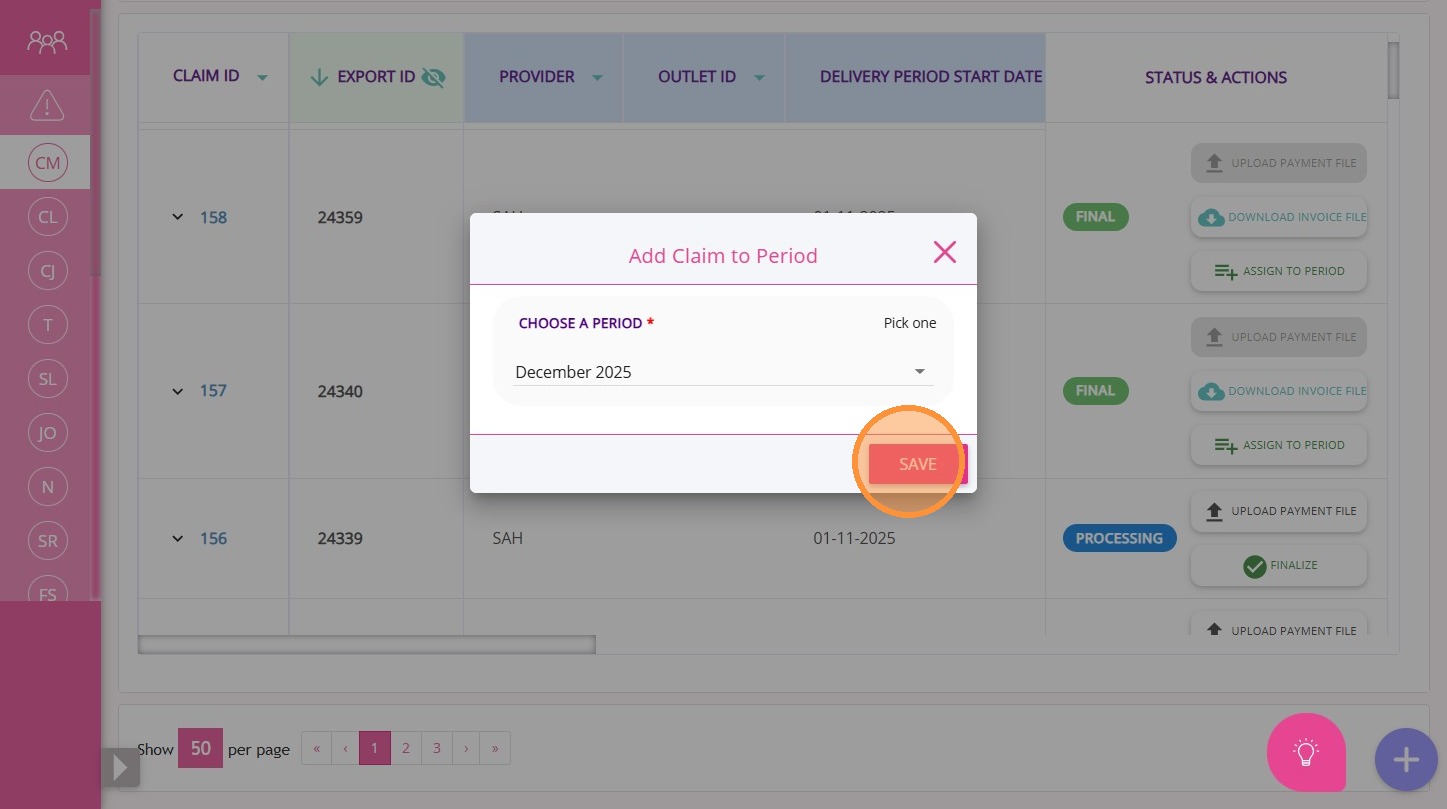
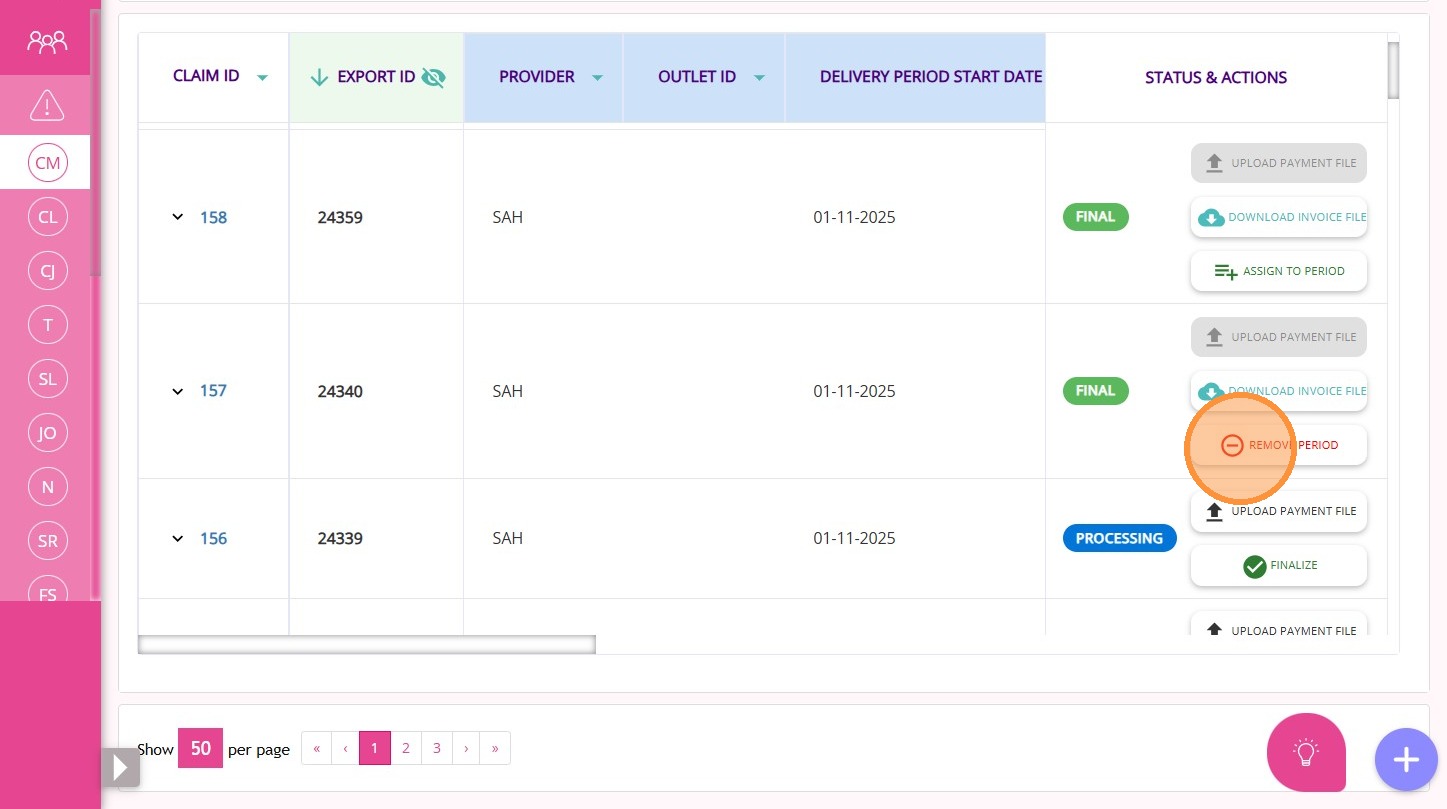
Step 1: Assign Claims to a Statement Period
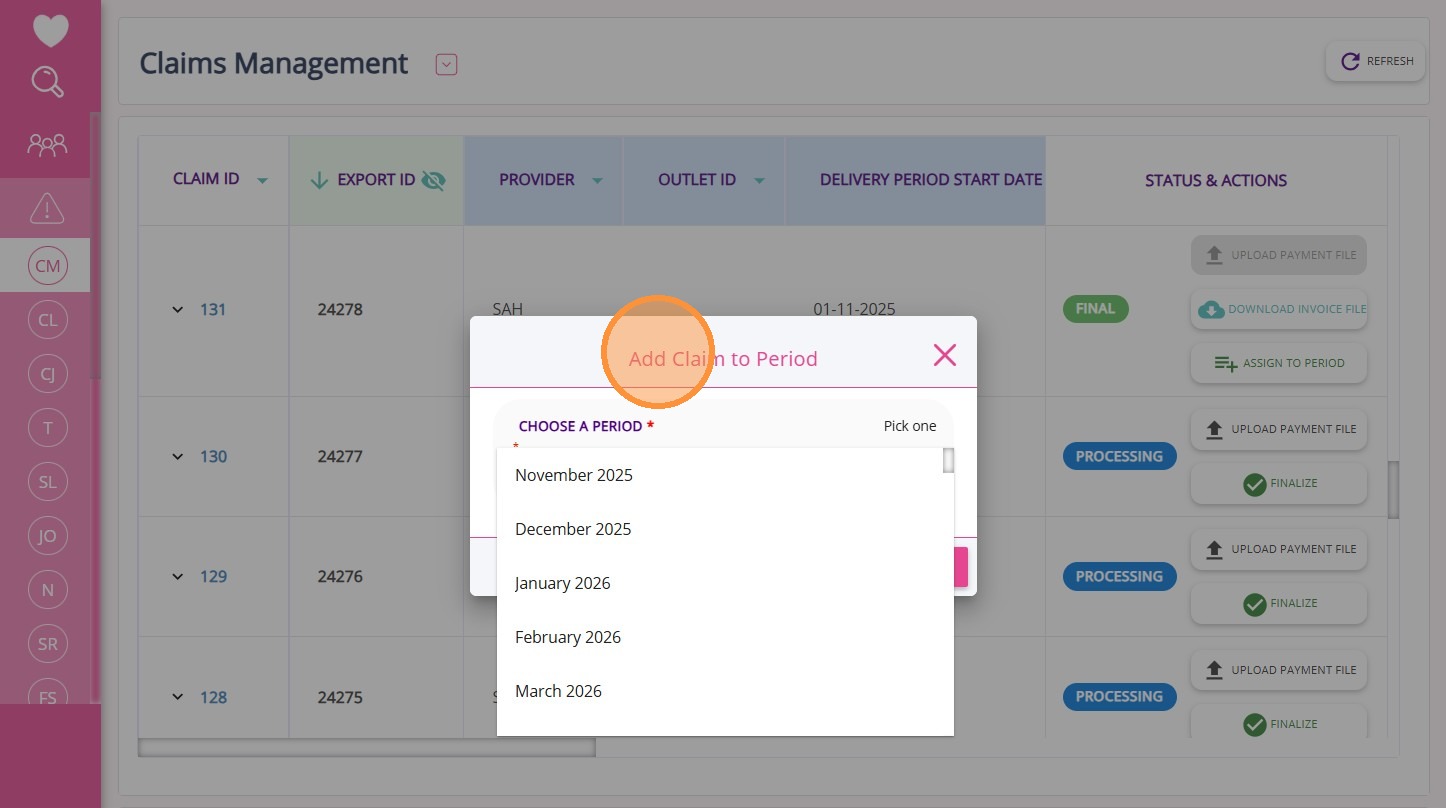
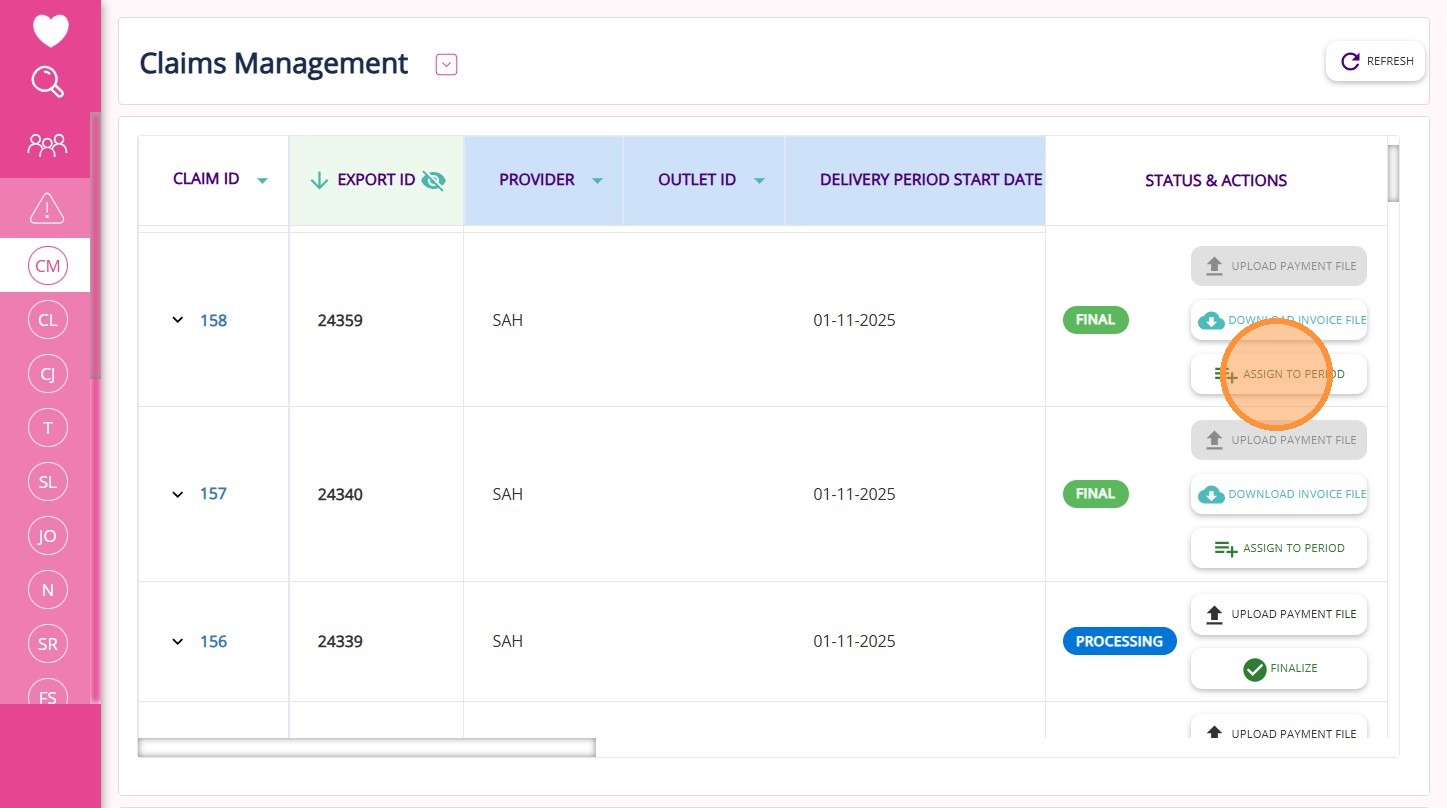
1. Go to Actions > Claims Management.
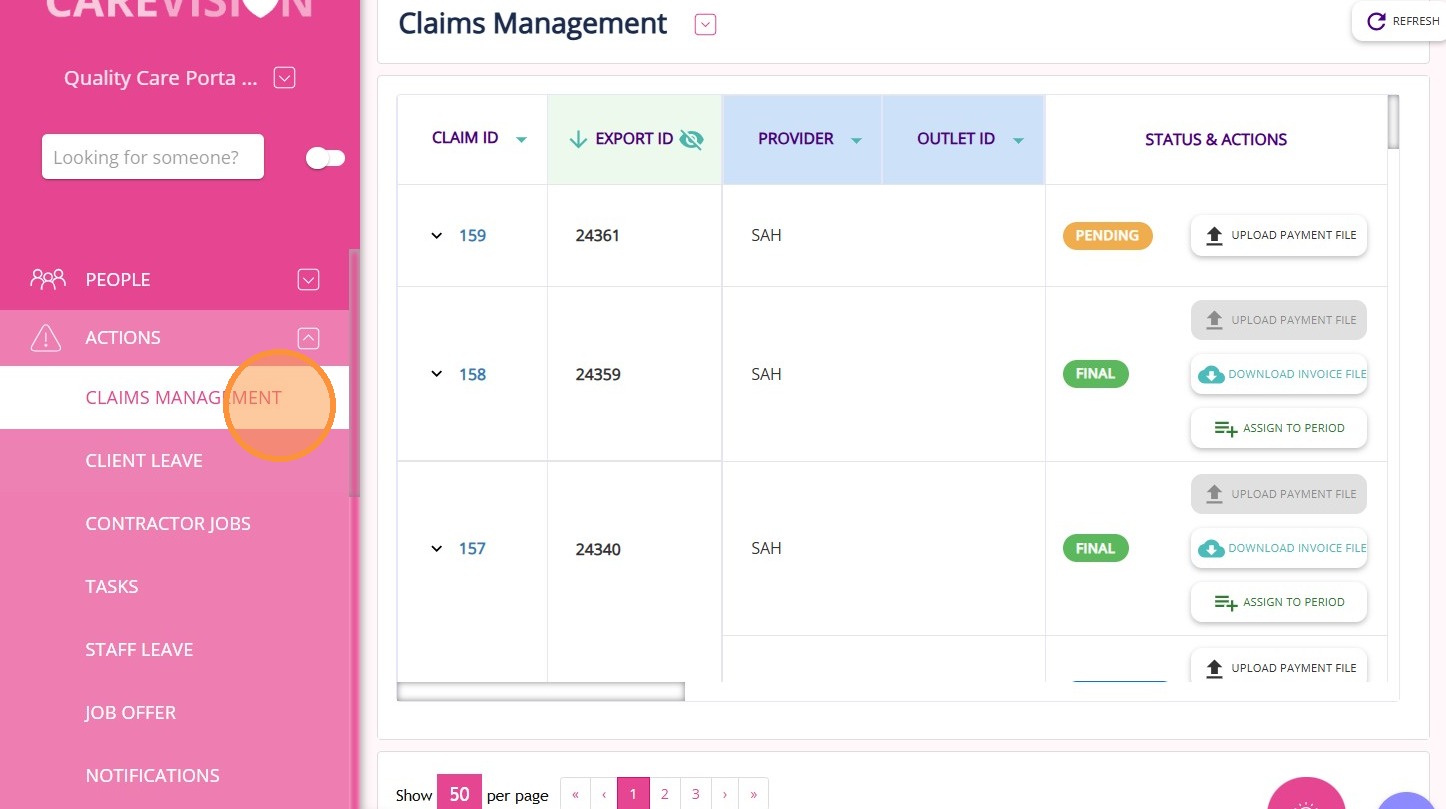
2. If the status of a claim ID is set to Final, click the Assign to Period button. Only finalized claims can be assigned to a statement period. If you cannot see the button, finish processing that period first.
3. In the Choose a Period dropdown, select the period the claim belongs to. You cannot add claims to a closed period. Each claim can only be added to one period.
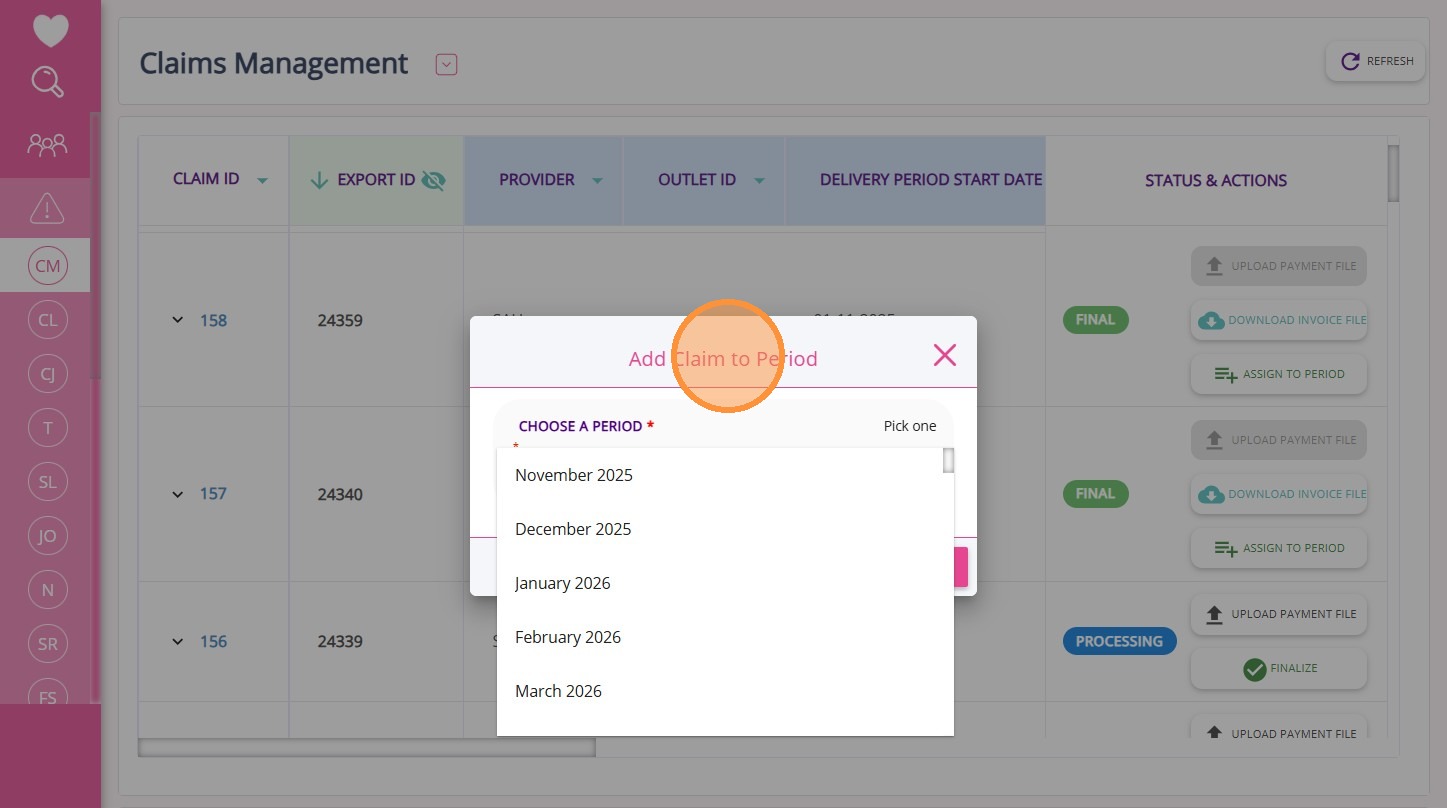
4. Then, click Save.

Note: If you make a mistake, click the Remove Period button to remove a claim from a period and reassign it as needed.
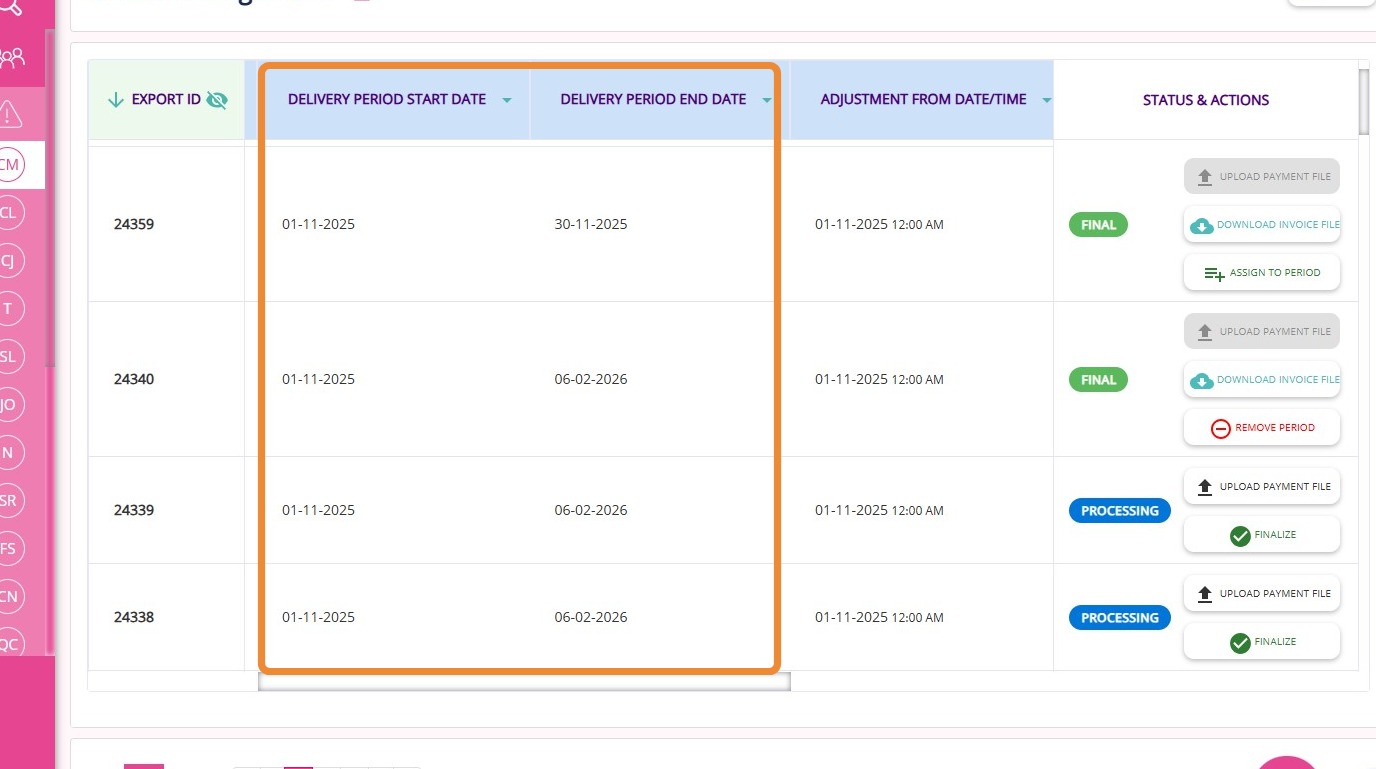
Note: Check the Delivery Period Start Date and Delivery Period End Date columns. The delivery dates within a single claim must not span more than one calendar month. The end date is exclusive.
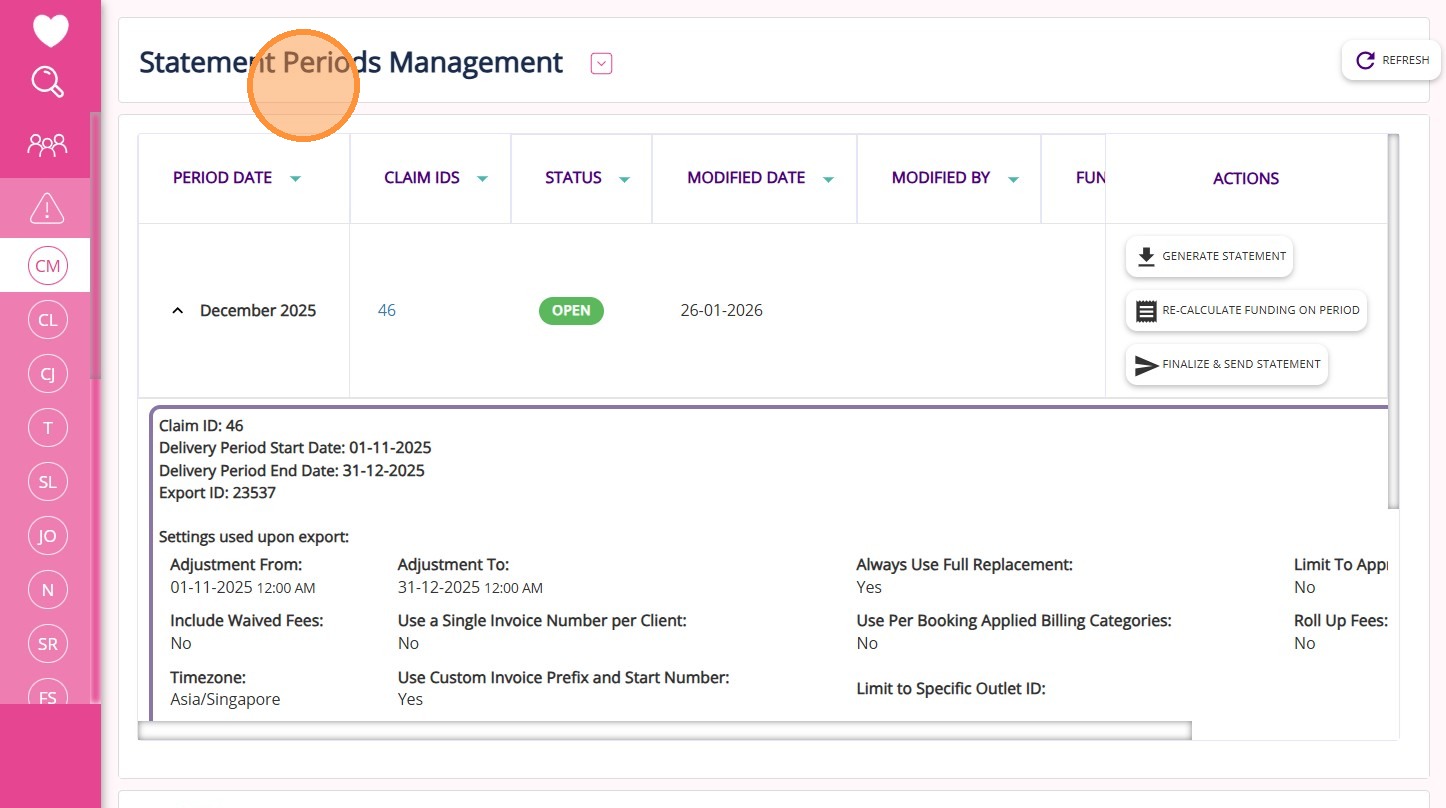
Step 2: Review Claims in the Statement Periods Management Section
See detailed steps here
Step 2: Review Claims in the Statement Periods Management Section
When claims for the period are finalized and you are ready to process statements, follow these steps:
- Go to the top, click Statement Periods Management, and then view periods with associated claims.
- The Period Date column shows only periods with associated claims. If a claim has not been added to a period, that period will not appear in the list.
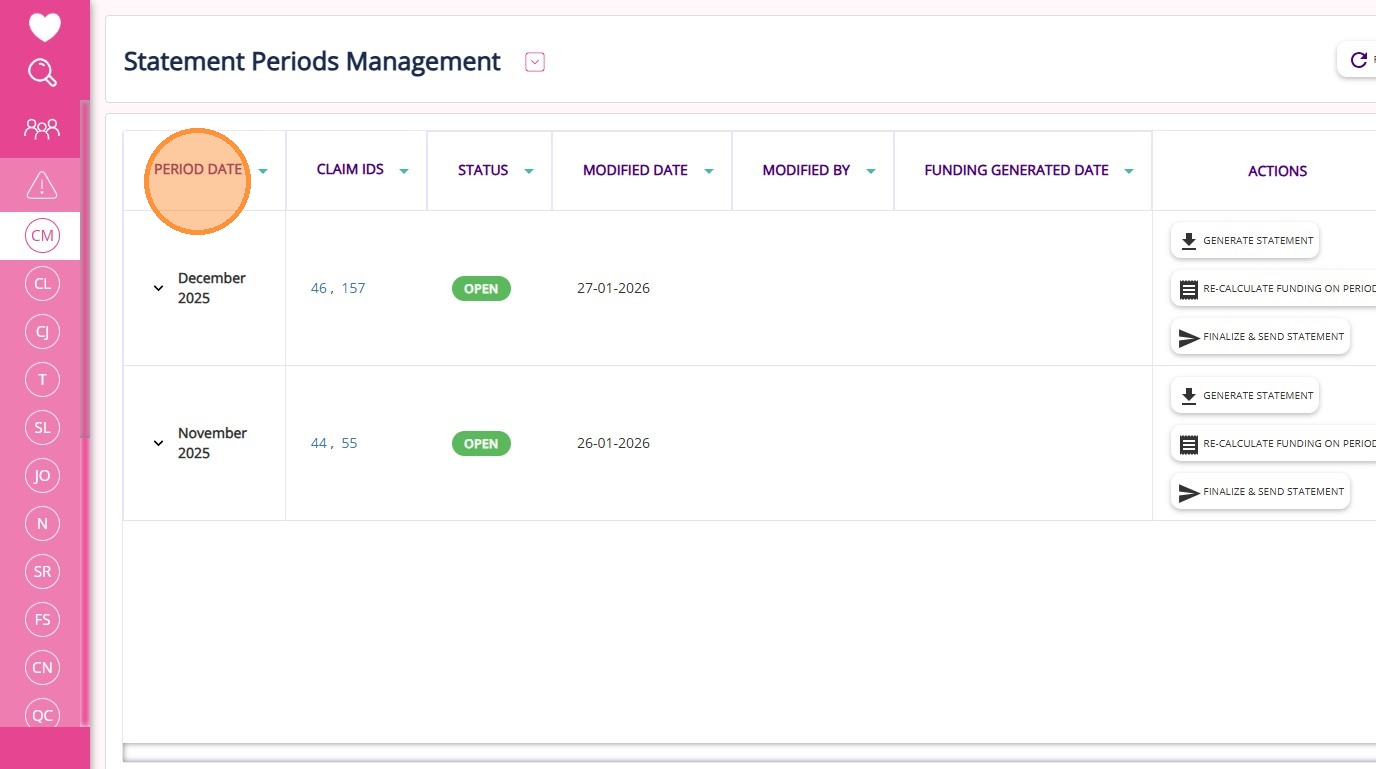
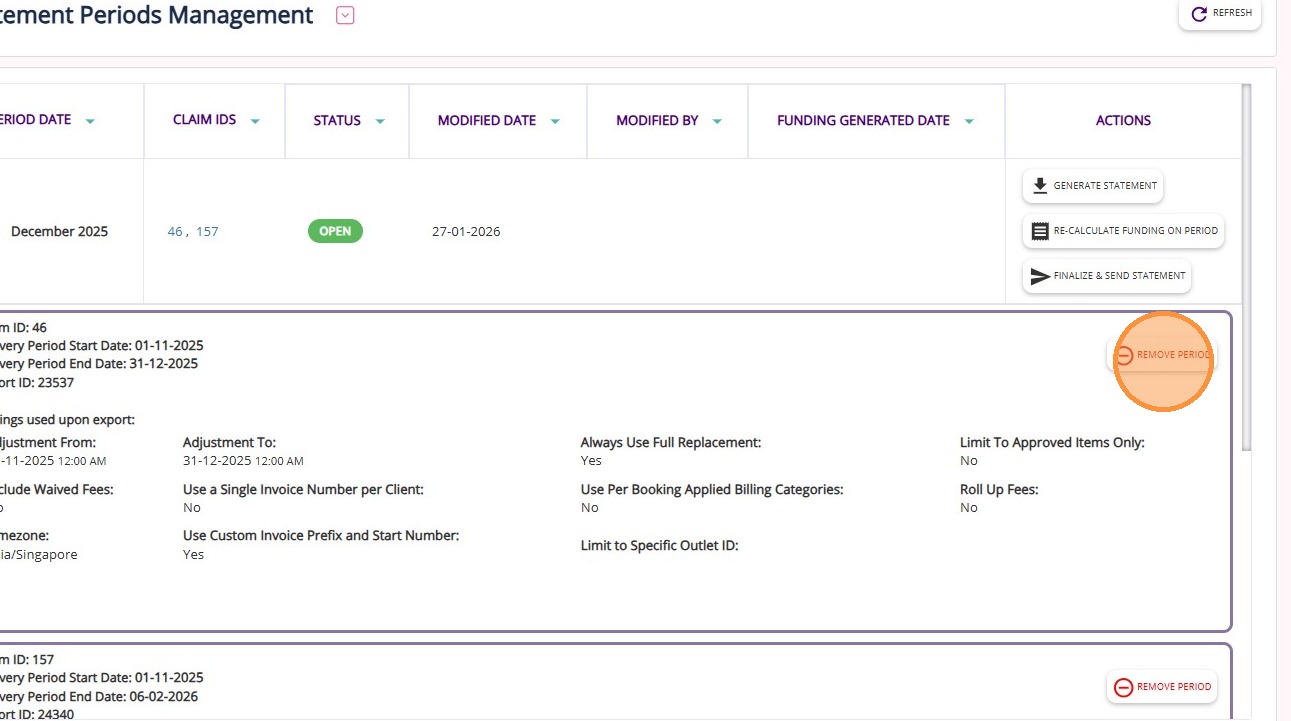
- Some periods may have multiple claims. To view detailed claims for a period, click the downward arrow to the left of the period.
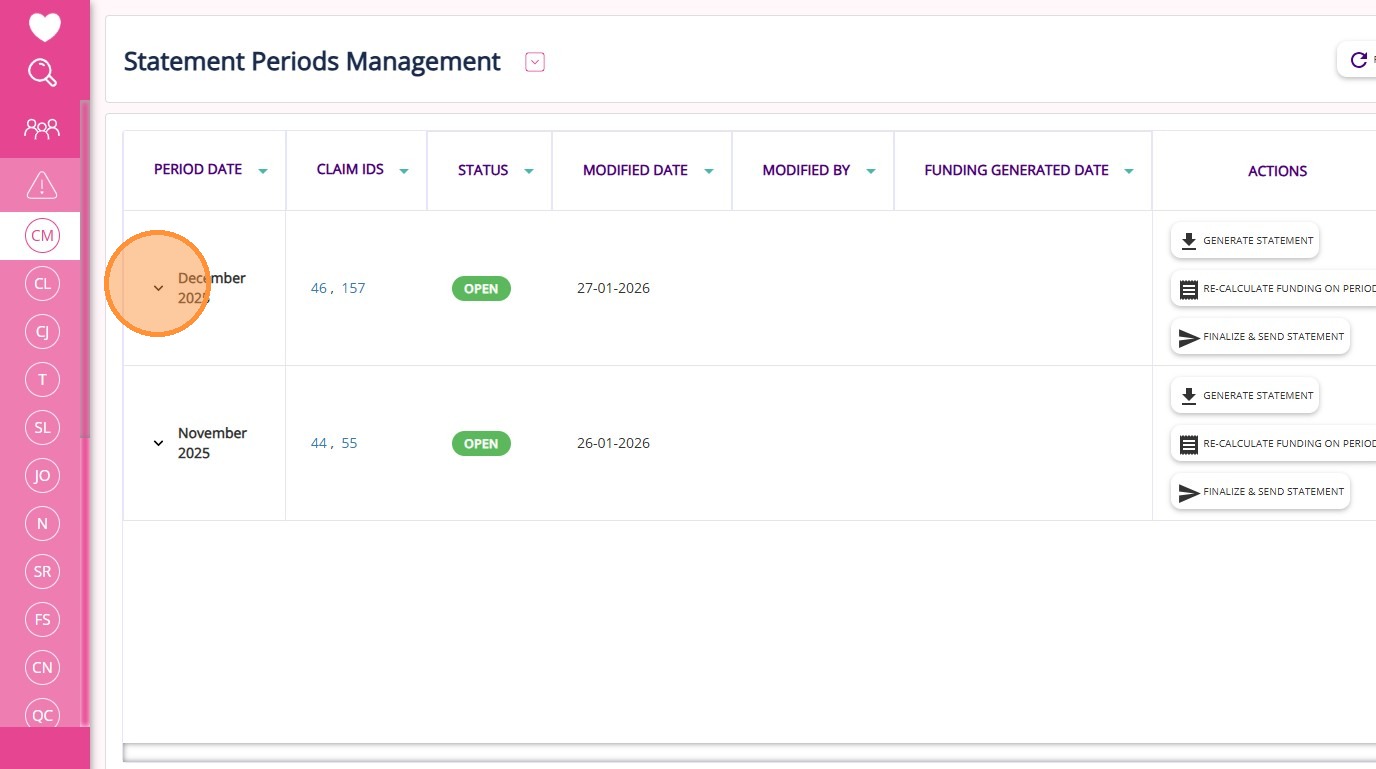
- This will expand the row and display all associated claims for that period. Each card details the information about the claim ID and the settings used during export, allowing you to check for accuracy.
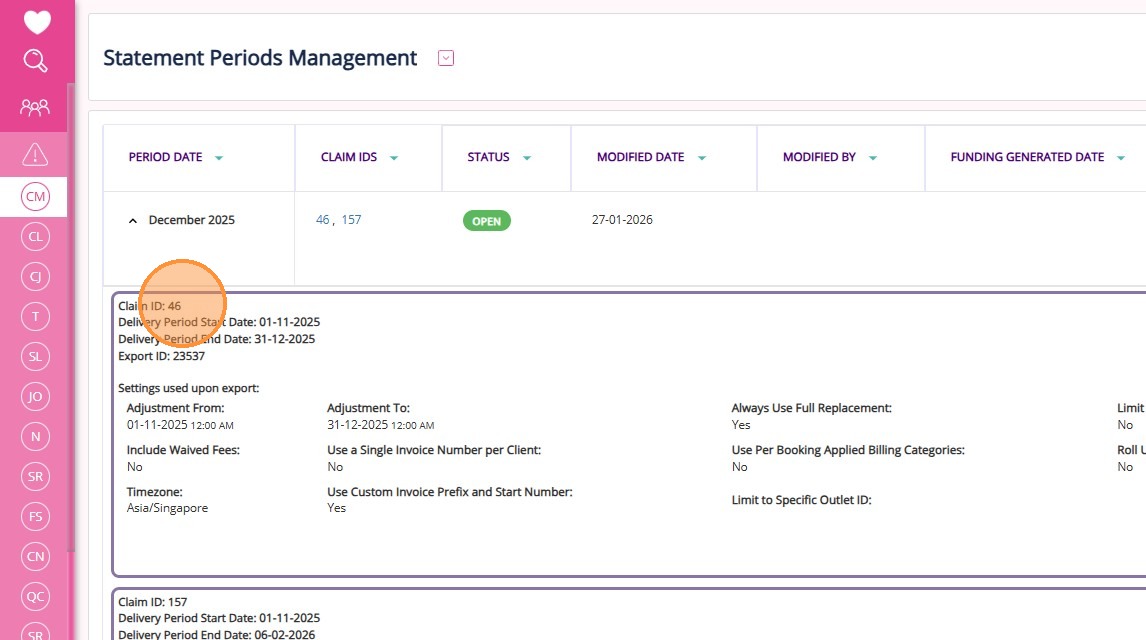
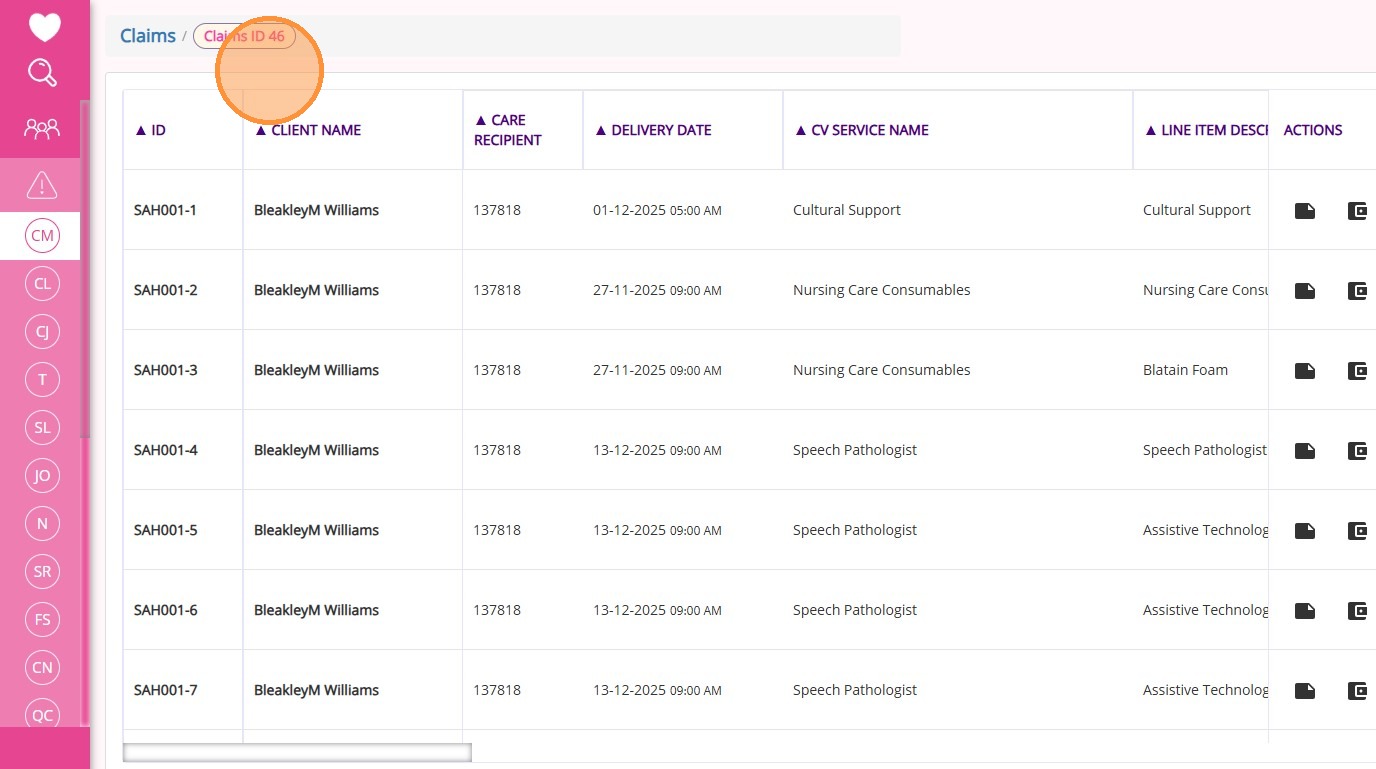
- You can also click each claim ID under the Claim IDs column to see details for a specific claim.
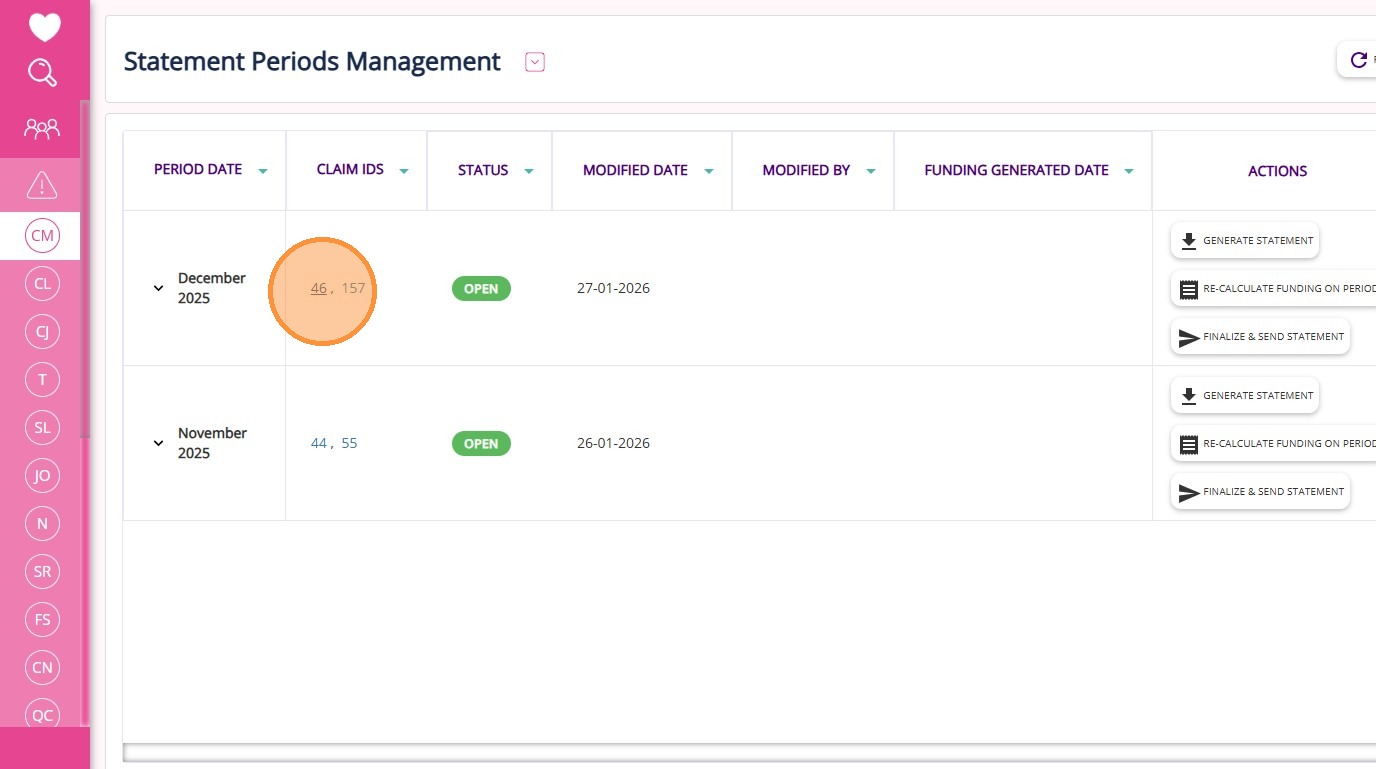
- When you click a claim ID, you will be redirected to a new tab displaying all details about the corresponding claim.
- If you notice an incorrect claim, you can remove it from the period by clicking the Remove Period button. This action is only possible if the status of the period is Open.
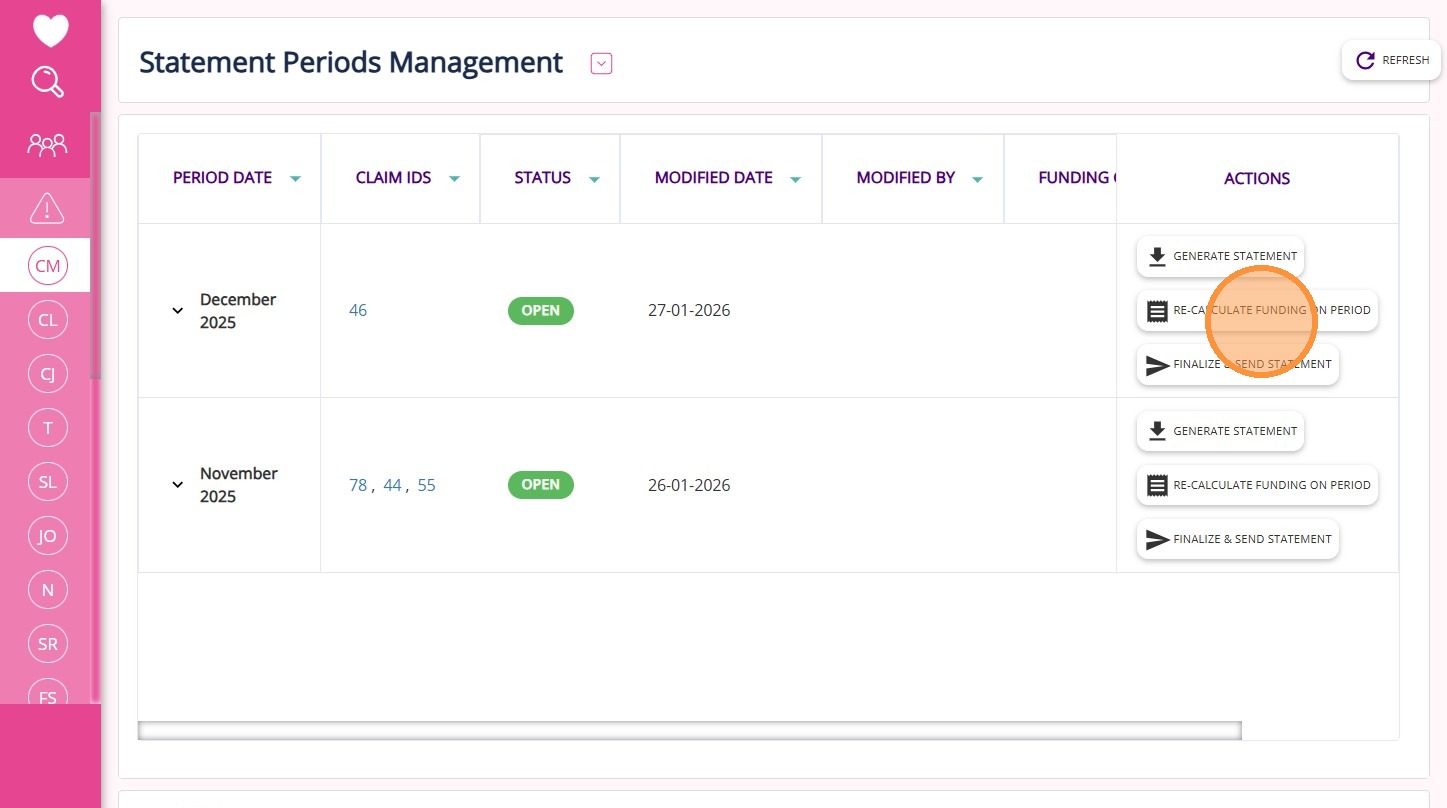
Step 3: Recalculate Funding on Period
See detailed steps here
Step 3: Recalculate Funding on Period
- Under the Actions column, click the Re-calculate Funding on Period button. This refreshes the funding data for all outlet IDs in the claims and ensures all clients are included, even if they had no claims for the month.
- If you fix a funding issue or update a client profile, you must click the Re-calculate Funding on Period button. Changes will only be reflected after you click the button.
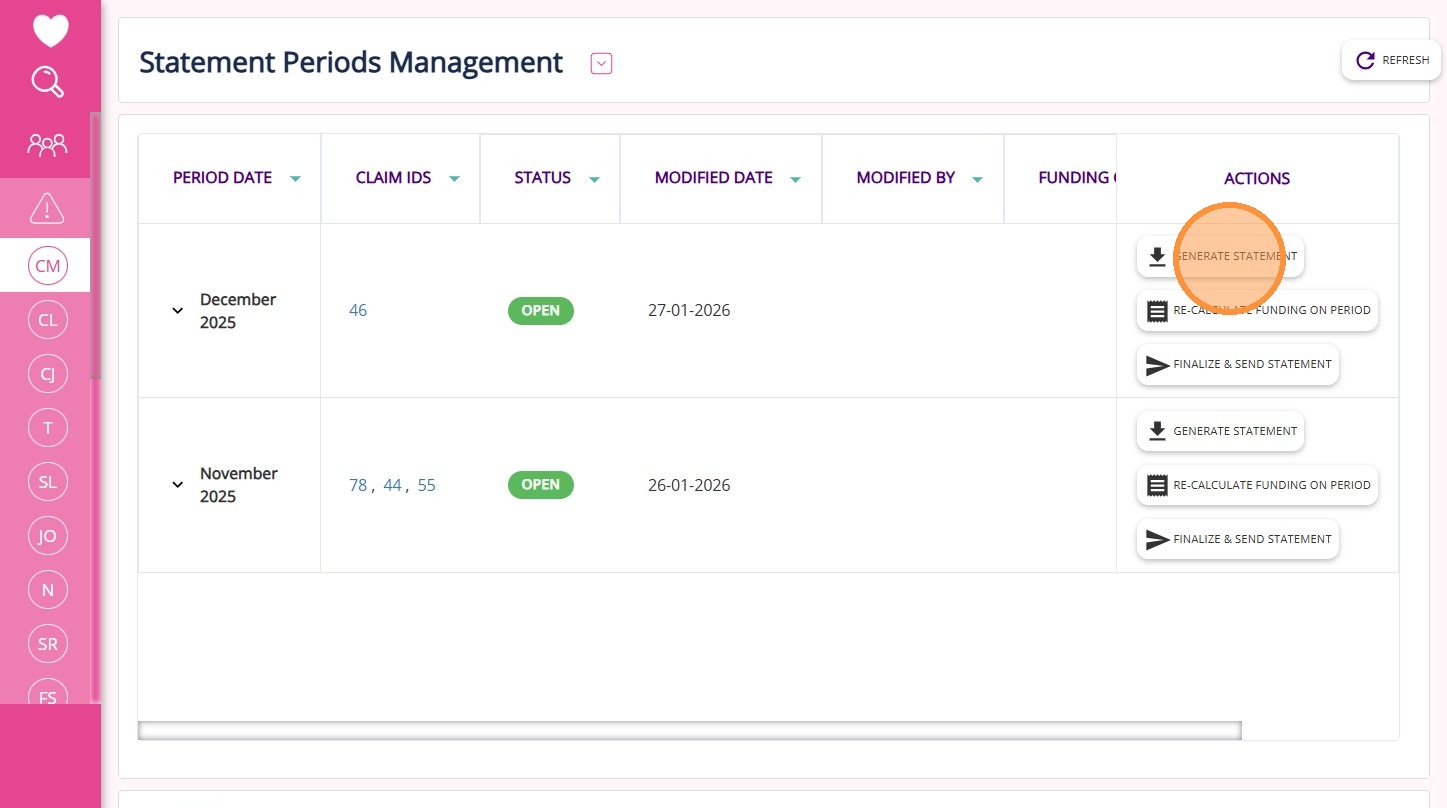
Step 4: Generate Statement
See detailed steps here
Step 4: Generate Statement
- Click Generate Statement to produce a zip file containing individual client statements for the period.
Note: The zip file may take some time to download, especially if you have many clients or a slower internet connection. Please be patient while the download completes.
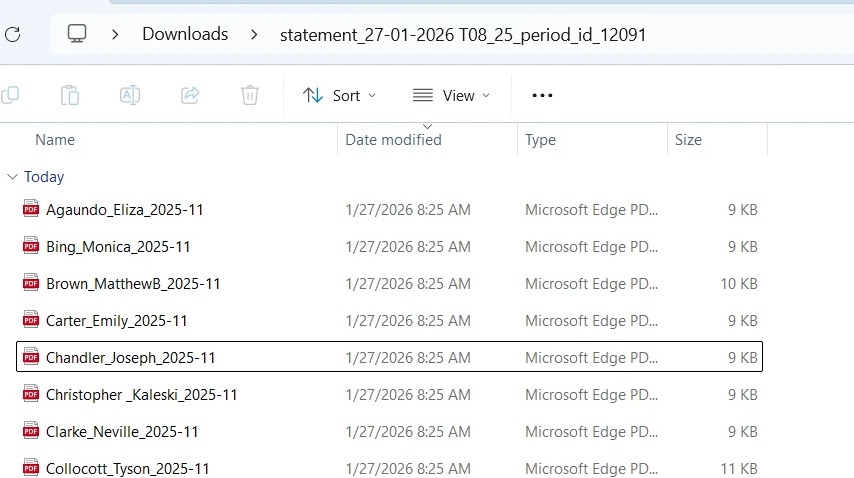
- Extract the zip file. Each statement is provided in PDF format and is named with the client and period (Example: Chandler_Joseph_2025-11).
Generate Statement Button vs Download Statement Button:
- Generate Statement button: You can use this for open periods to generate new statements and update funding data.
- Download Statement button: You can use this button for closed periods to download the final statements. You cannot generate new statements or recalculate funding for closed periods because the data is locked.
Step 5: Review Statements
- Review the generated statements for accuracy.
- If errors are found (such as missing claims or incorrect funding), update the relevant client profile or claim, recalculate funding, and then regenerate the statement.
 For more details on SAH statements, see Key Sections of the SAH Statements File.
Step 6: Finalize and Send Statements
See detailed steps here
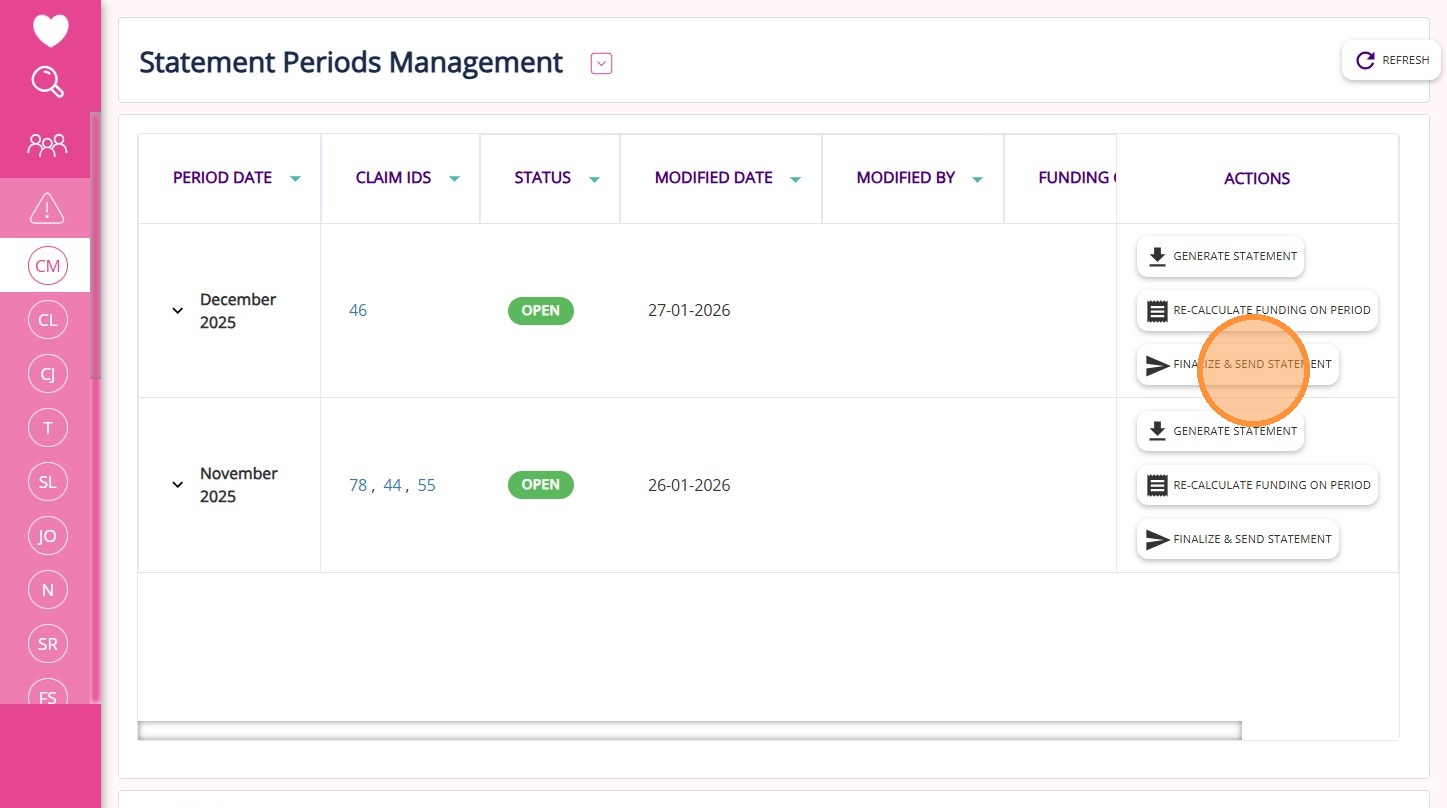
Step 6: Finalize and Send Statements
Click the Finalize & Send Statement button to lock the period and prepare statements for distribution.
Note: This action will not email the Statements to your clients. Instead, it will download a zip file containing the Statements, which you can then send or print as needed.
Additional Notes:
When you close a statement period:
- The system performs calculations in the background to set the opening balances for the next statement period
- It is important to finalize and close the previous period (Example: November) before starting statements for the next period (Example: December)
- This process allows for accurate carryover of balances and helps avoid discrepancies in client funding records.
This topic described the step-by-step process for generating SAH statements. For more information about SAH statement generation, contact the CareVision Support Team.
Related Articles
Support at Home Billing and Claiming Workflow
The Support at Home billing and claiming workflow in CareVision guides you through reviewing services, generating and checking your claim file, and submitting it to Services Australia. After you receive the Services Australia CSV payment statement, ...Key Sections of the SAH Statements File
It is important to review and understand the statement file to check that all details are accurate and to identify any potential issues. This topic describes the key sections in the statement file for Support at Home. Keywords: support at home ...Handling Negative Claim Adjustments from Service Cancellations
This scenario occurs when services that were previously scheduled or already claimed are later cancelled. These changes create adjustment transactions (credits), which appear as negative line items in the SAH Claim File generated from CareVision. Why ...Support at Home Care Management & Billable Case Notes
Effective care management helps organizations meet new regulations and support older adults living at home. From November 1, 2025, the Support at Home (SAH) program will change how organisations track and report care management. Instead of fixed ...Manage Transport Services for Support at Home
This topic describes how to configure and manage transport services for Support at Home. It explains how to correctly set up and link billing categories, services, and funding source templates to support a smooth quoting and export process. Keywords: ...
Request an Article or Guide
We are keen to know what you want to know more about? Let us know on chat or raise a ticket for an article or topic you would like covered in more detail. We have a team of technical writers and learning content creators keen for your suggestions.