Override Funding Source in the Claims Management Dashboard
The Override Funding Source functionality allows you to replace the original funding source assigned to a claim line.
When a funding source override is required
A claim line may require a funding source override when it displays one of the following warnings:
Invalid Funding Period : The claim date is not covered by the funding period assigned to the booking.
AT/HM Funding Mismatch : The selected funding source does not match the booking type, such as Assistive Technology (AT) or Home Modifications (HM).
Missing Outlet ID : The funding source does not have the required outlet ID.
Identifying claim lines that require an override
Rows containing these warnings are highlighted in red.
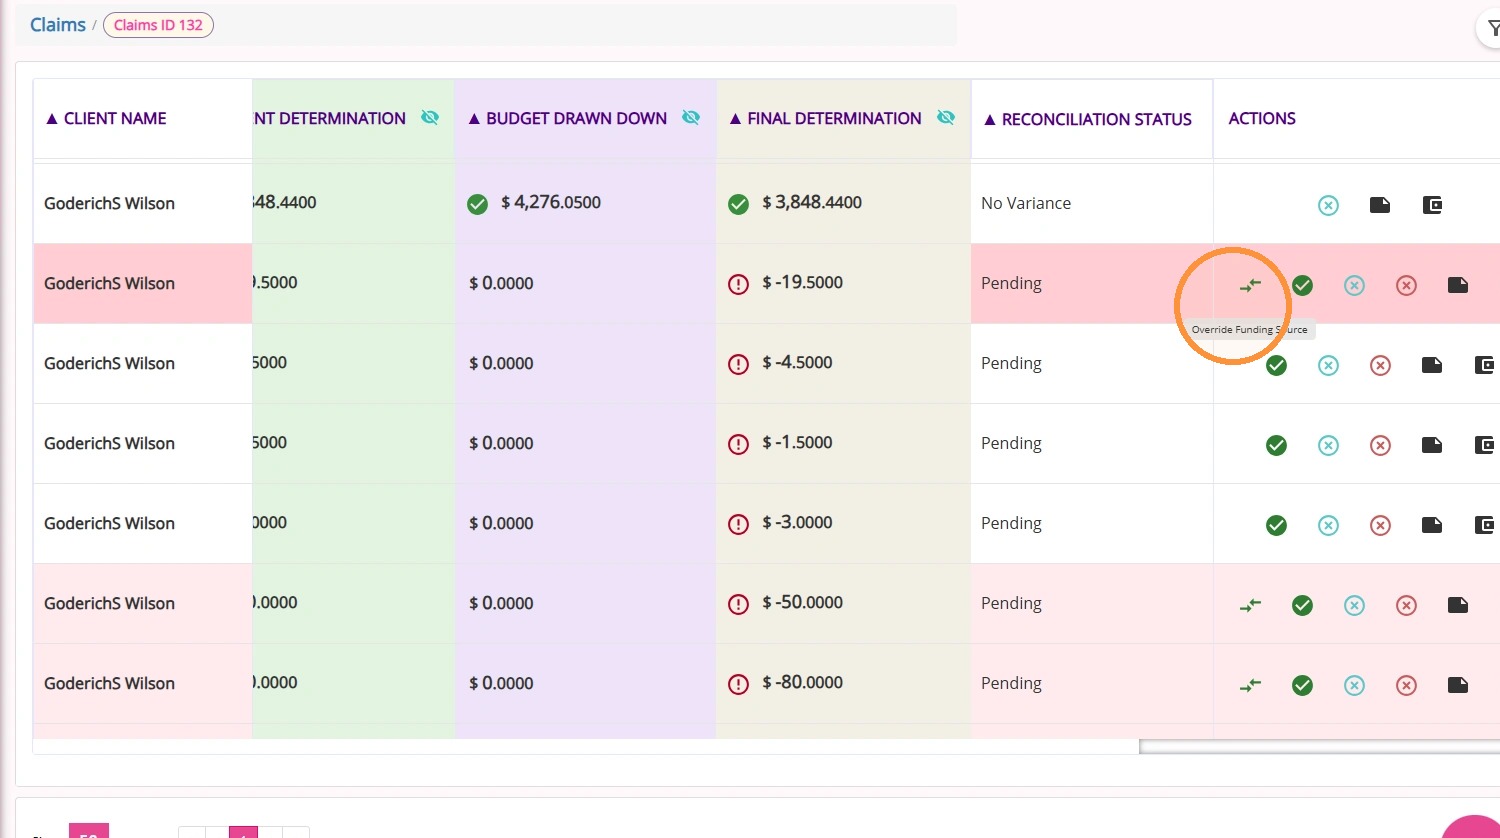
The Override Funding Source button only appears when a claim line has an issue that can be corrected using this function.
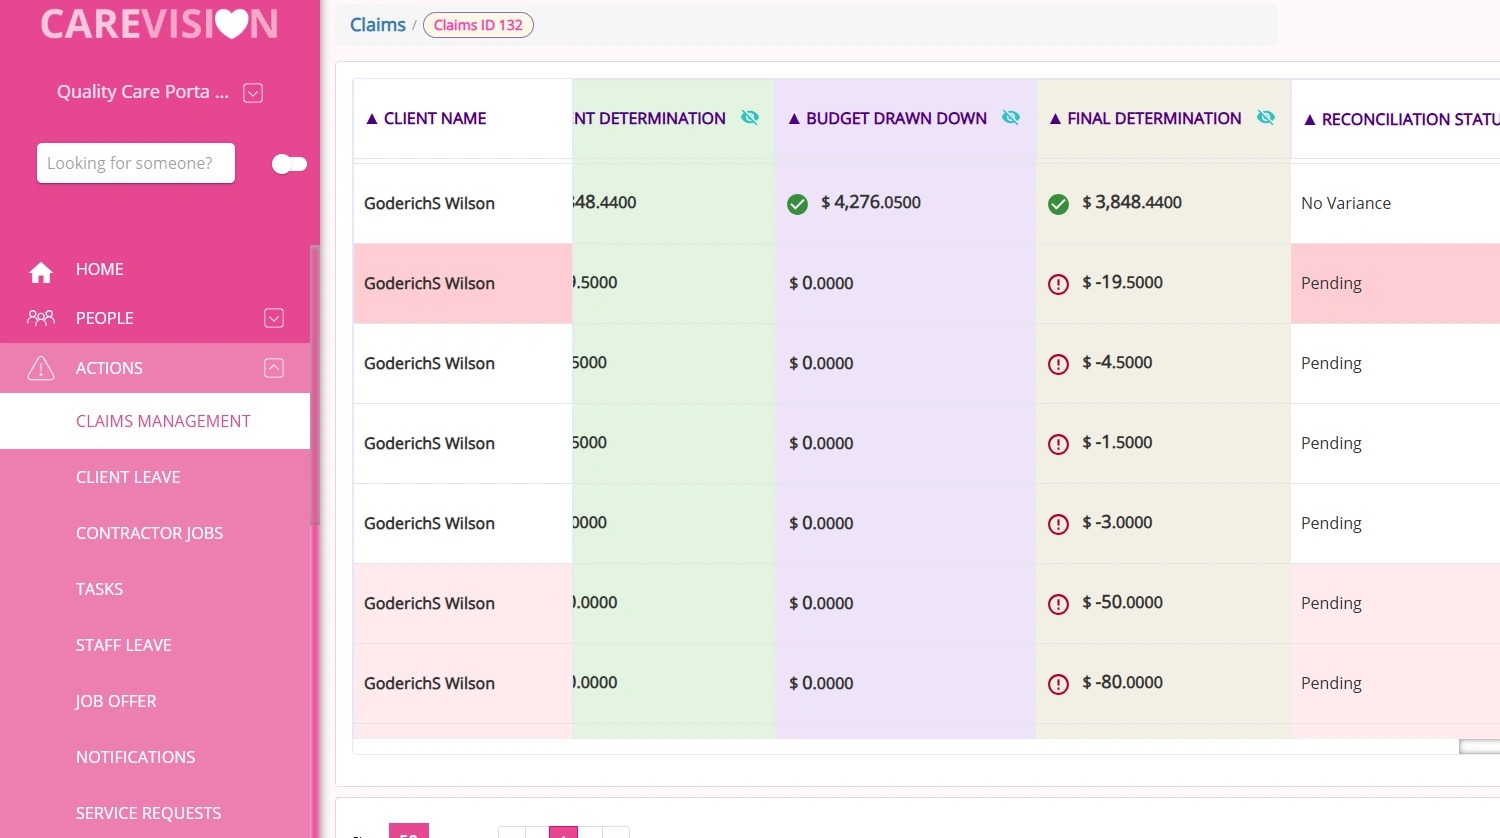
- Open the Claims Management Dashboard.
- Click the relevant Claim ID to display the Claim IDs section.
- Locate the affected claim line, which should be highlighted in red.
- In the Actions column, find the icon showing two green arrows at different levels pointing towards each other. This is the Override Funding Source button.
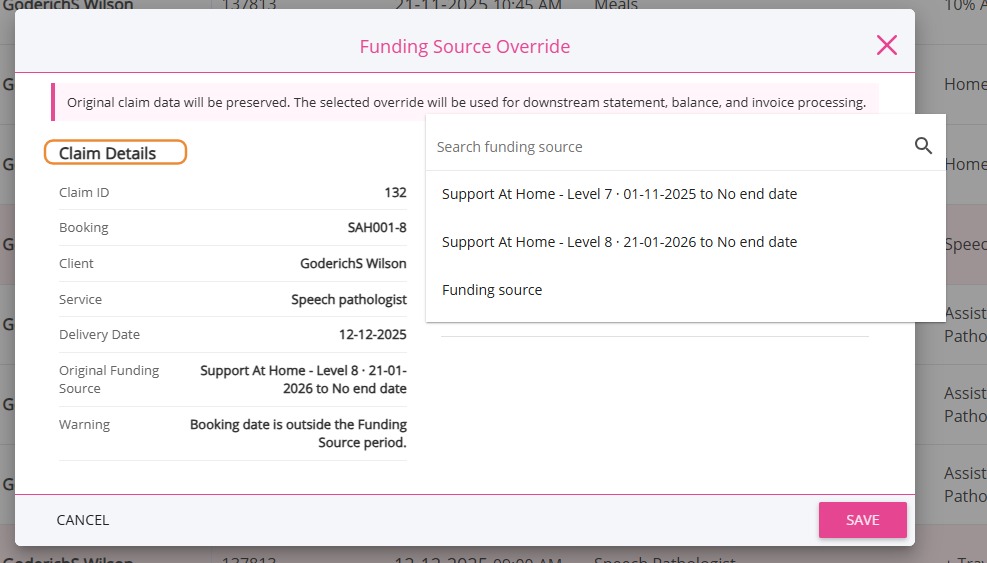
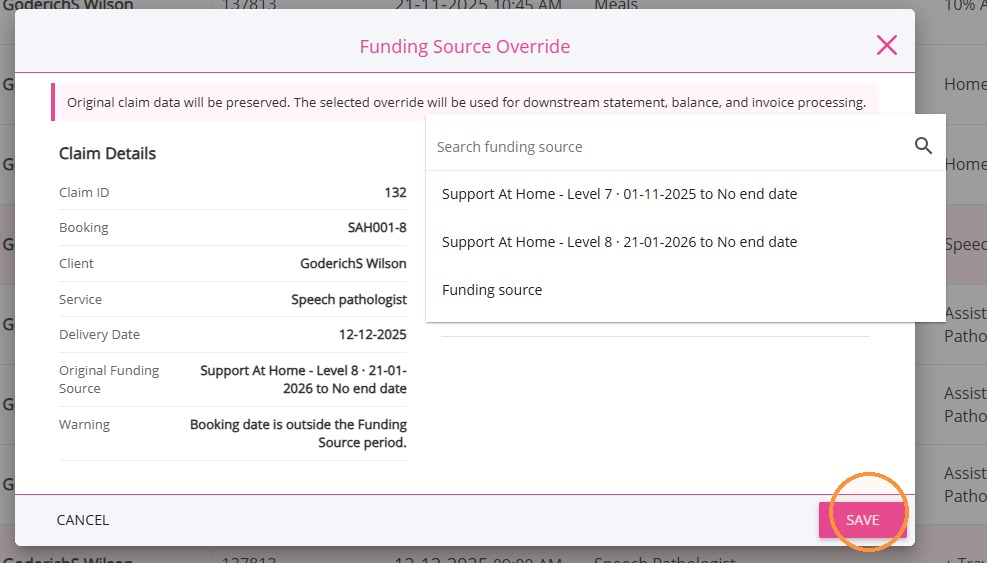
- Claim ID: The unique identifier assigned to the claim.
- Booking ID: The unique identifier for the booking associated with the claim.
- Client Name: The client associated with the booking and claim.
- Service: The service provided to the client and associated with the claim line.
- Delivery Date: The date the service was delivered to the client.
- Original Funding Source: The funding source currently assigned to the claim line.
- Warning: The issue that caused the claim line to be flagged.
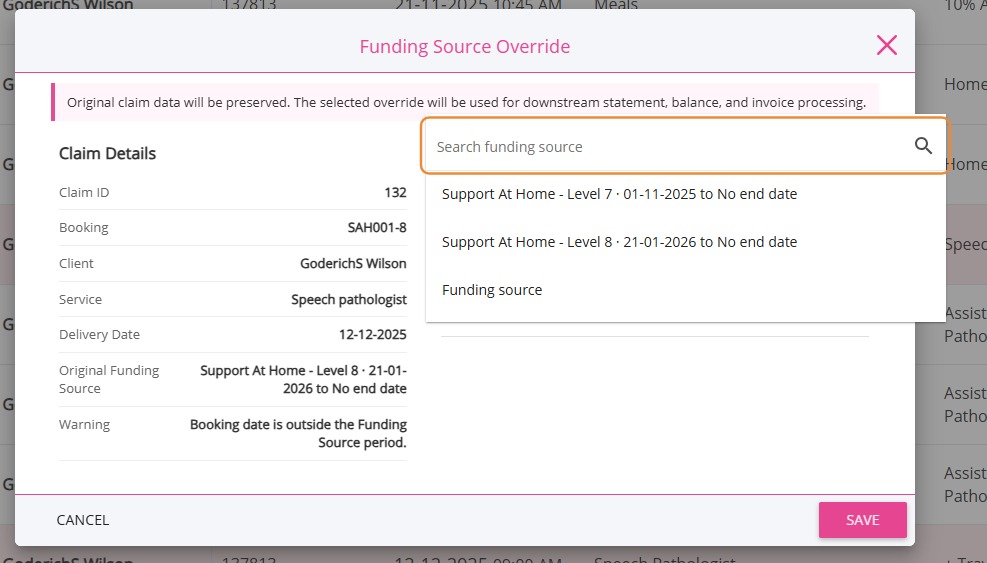
- You are updating the correct claim line.
- The new funding source is appropriate for the booking type.
- The funding period covers the claim date.
- Click the Override Funding Source button again.
- Review the Override Details.
- Confirm that the new funding source has been recorded correctly.
- Generate the statement again. See How to Generate SAH Statements
- Confirm that the affected claim now appears on the statement.
- Check that the statement calculations and funding-source allocation are correct.