Employment Hero Integration Guide
The Employment Hero and CareVision integration streamlines payroll processing by automatically transferring employee data, such as timesheets and pay details between systems. Information syncs from CareVision to Employment Hero for employee records. This reduces manual operations, minimizes errors, and ensures payroll information remains accurate.
This document describes the process to set up, synchronize, and manage staff and payroll data between Employment Hero and CareVision.
Keywords: employment hero integration, link employment hero to carevision, employment hero payroll, payroll processing guide, employment hero setup, staff pay details employment hero, generate payroll carevision
I. Prerequisites
Before integrating Employment Hero with CareVision, ensure the following requirements are met:
1. Log in to Employment Hero Portal
Request access credentials from the Employment Hero support team.
Log in to the Employment Hero portal using your credentials as business administrator.

Enable two-factor authentication (2FA) on the Employment Hero login page.

2. Log in to CareVision Portal
Request access credentials from the CareVision support team.
Log in to the CareVision portal using your credentials.

- redirect_url
- base_url
- client_id
- client_secret
- accounts
- organization_ids
- business_id
- taxFileNumber
- bankAccount1_BSB
- bankAccount1_AccountNumber
- bankAccount1_AllocatedPercentage
- superFund1_ProductCode
- superFund1_FundName
- superFund1_MemberNumber
- superFund1_AllocatedPercentage


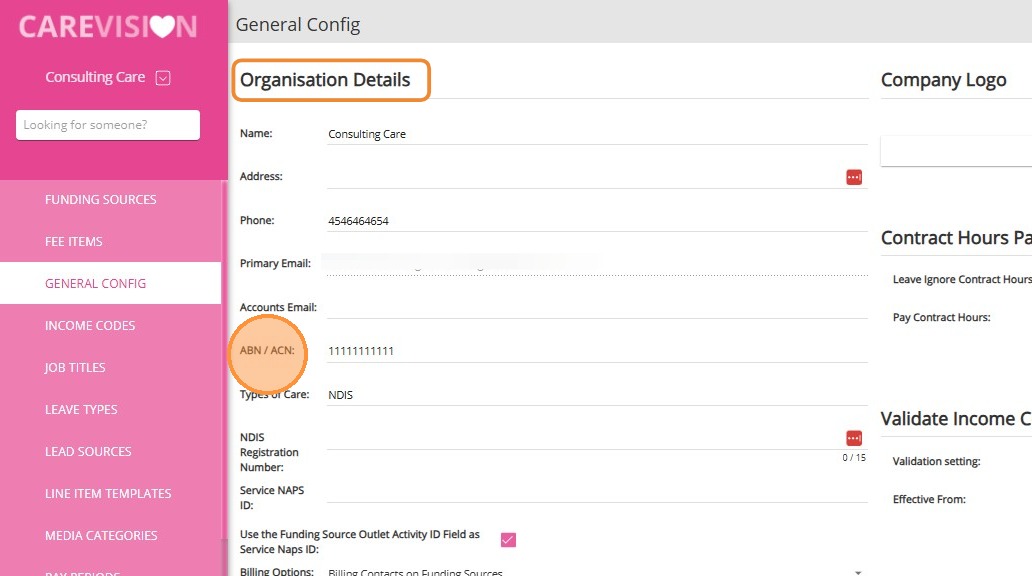
- In CareVision, go to Settings in the left navigation menu.

- Click General Config.

- Under Organisation Details, find the ABN/ACN field and enter the ABN registered in Employment Hero.
- In Employment Hero, go to the left navigation menu and click Business.

- Click Payroll Settings.

- Under Business Details, check the ABN field and ensure it matches the ABN entered in CareVision.

- Configure the careorganizations_jobclassifications.job_classification field as described in the Data Mapping Between CareVision - Employment Hero table.

- Ensure that Job Classifications in CareVision align with Employment Agreements in Employment Hero.

- In Employment Hero, go to the left navigation menu and select the Business section.

- Click Payroll Settings.

- Scroll down to Employment Agreements.

- Verify that the Employment Agreements section aligns with Job Classifications in CareVision.

- In Employment Hero, navigate to Business > Payroll Settings.

- Click Manage Awards.

- Search for Social, Community, Home Care and Disability Services Industry Award 2010 [MA000100]. Make sure the SCHADS Award is installed in Employment Hero. If it is not already installed, proceed to install it.


- The employee’s primary pay category
- A specific pay category
- A leave category


1. Configure the cost_centresfield as described in the Data Mapping Between CareVision - Employment Hero table.
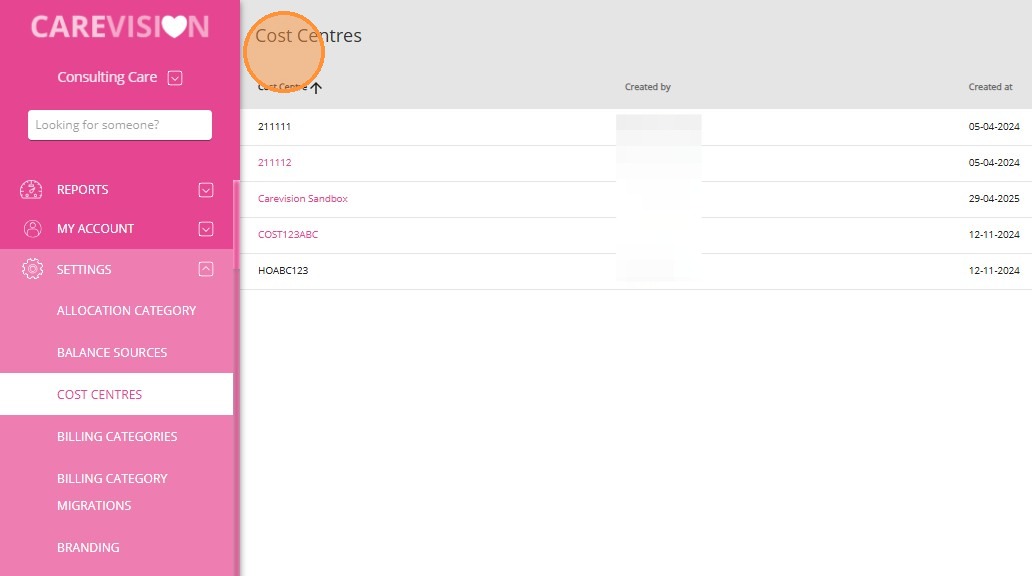
Go to Settings in the left navigation menu in CareVision.

Click Cost Centres.

Update or create new cost centres to ensure their names exactly match the location names in Employment Hero. Any cost centre assigned to staff must use the exact text as it appears in Employment Hero.
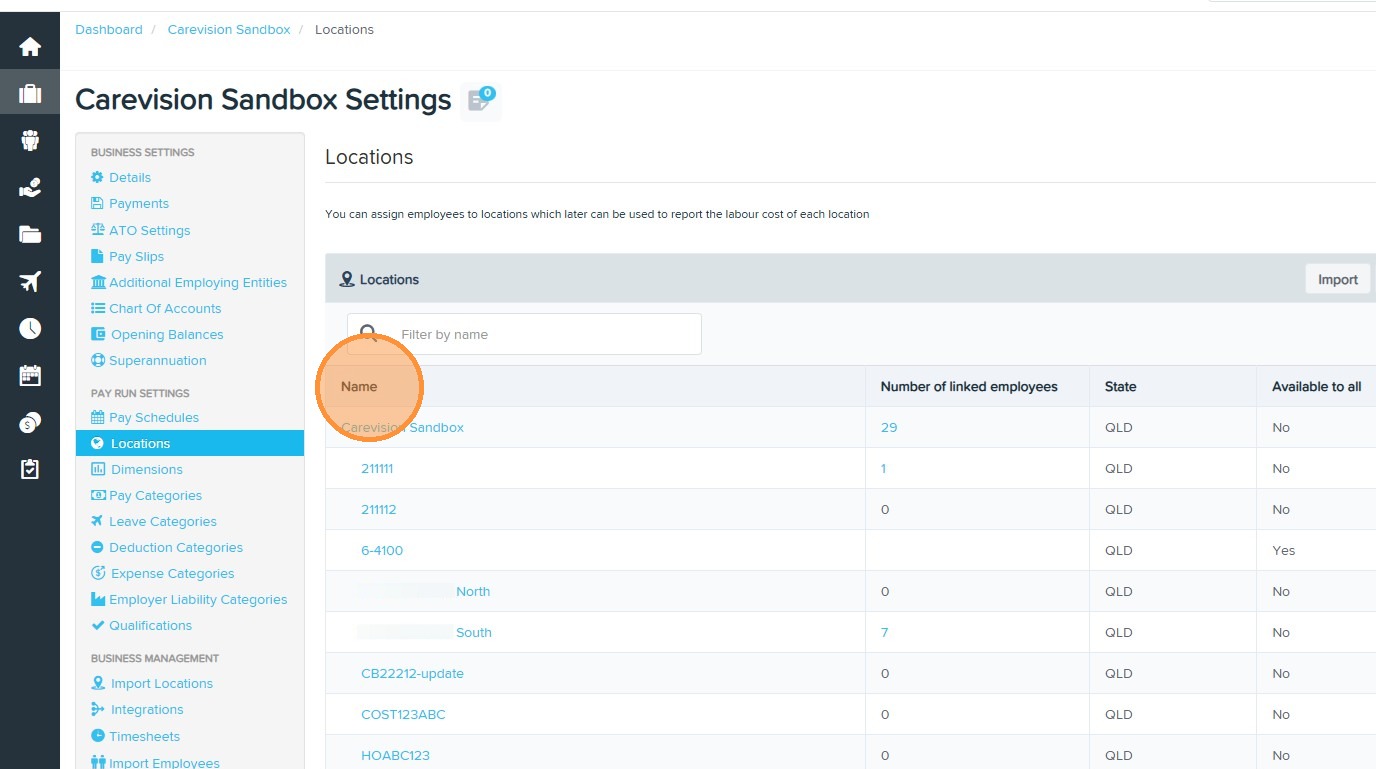
In Employment Hero, go to the left navigation menu and click the Business section.

Click Payroll Settings.

Click Locations.

Review the Locations in Employment Hero, which are used for costing, payroll tax reporting, and public holiday settings.
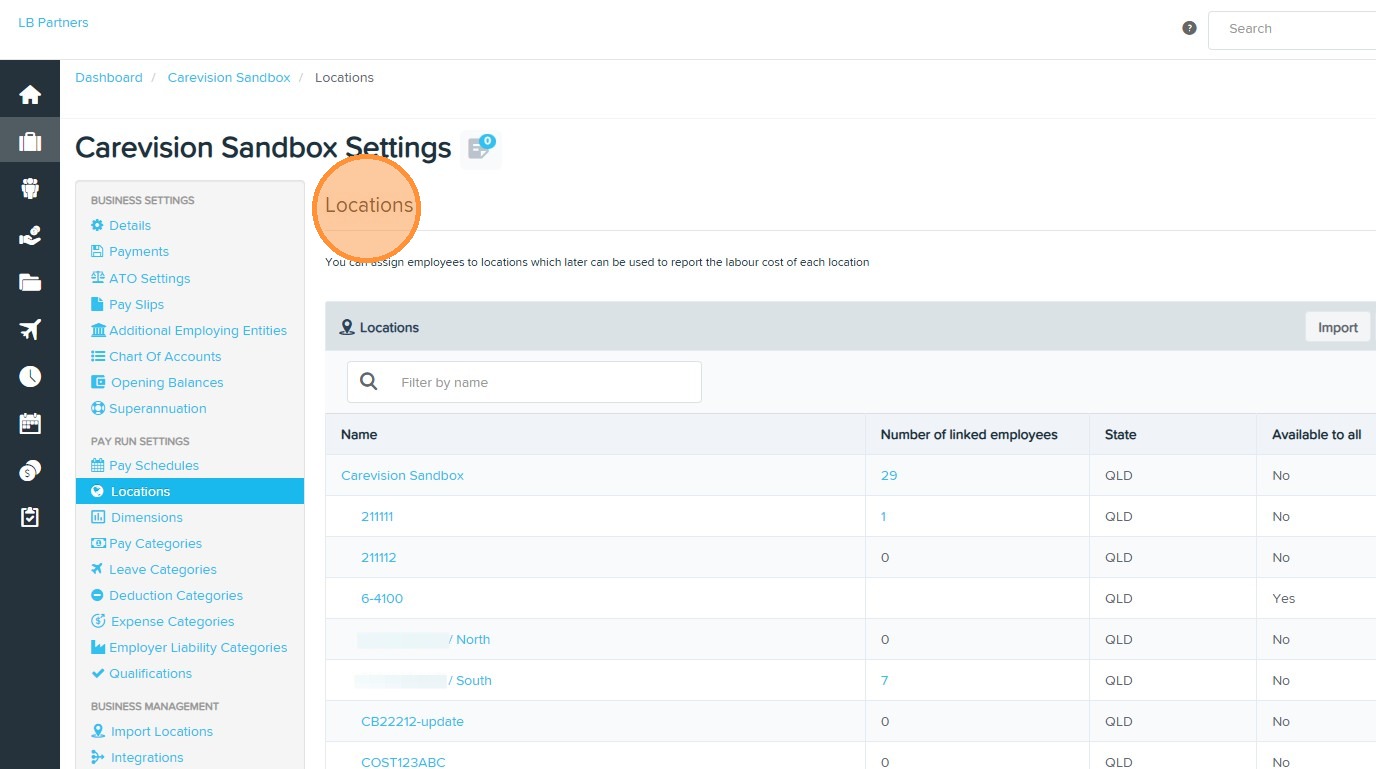
Ensure all cost centre names in CareVision match the corresponding location names in Employment Hero.
A. Set Up Leave Types
- Go to Settings in CareVision and select Leave Types.
- In Employment Hero, go to Work Types and find the External ID.
- Enter the External ID from Employment Hero into the Allowance Code field in CareVision.

B. Set Up Kilometer Reference Code
In CareVision, go to General Config and navigate to the Organisation Reference Codes section.
In Employment Hero, locate the External ID.
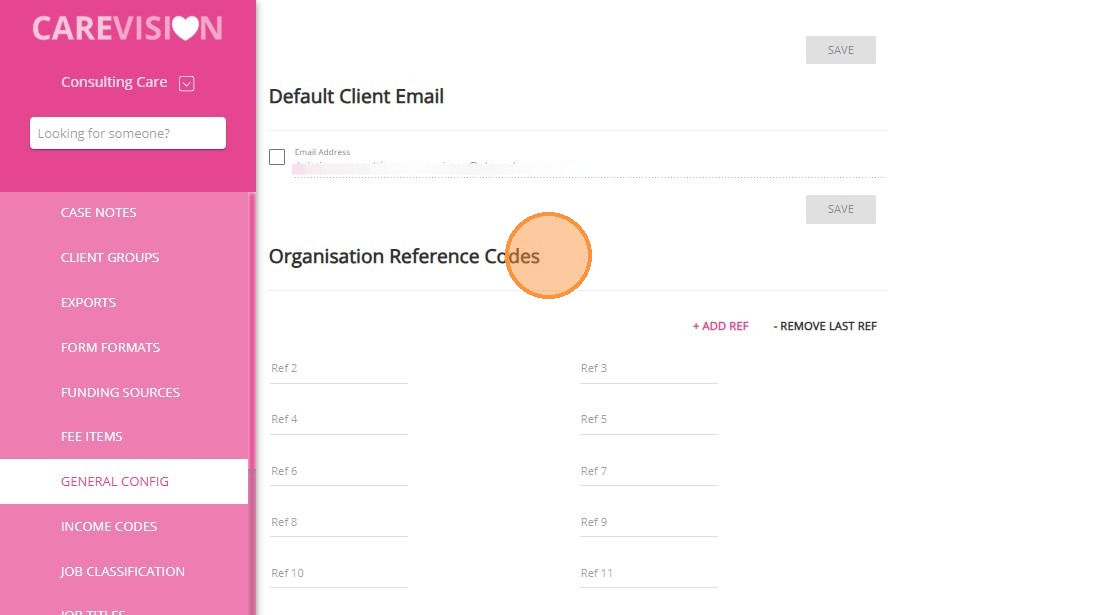
Enter the External ID from Employment Hero into Ref 23 in CareVision.

- Organisation-Level Setup: The configuration applies across the entire organisation.
- Billing Category-Level Setup: If you need a specific billing category to have a different rate paid to staff, you can configure it at the billing category level for that exception.
- The billing category-level setting takes precedence. If no billing category-level setting is found, the organisation-level setting will be used.
C. Set Up Sleepover
In CareVision, go to General Config and navigate to the Organisation Reference Codes section.
In Employment Hero, locate the External ID associated with the sleepover work type.
Copy the External ID from Employment Hero and enter it into Ref 15 in CareVision.

- Organisation Level: The External ID entered in Ref 15 applies to all billing categories across the organisation. If Employment Hero uses the same External ID for both sleepover and travel, enter this shared External ID into Ref 15 in CareVision. ensuring it applies to both categories as needed.
- Billing Category Level: If a specific billing category requires a different External ID, you can enter a separate configuration at this level. The billing category-level setting takes precedence. If no billing category-level setting is found, the organisation-level setting will be used.
d. Set Up Standard Work Type ID
Enter the appropriate value in Ref 24 for standard time-based output based on your organisation. This assigns a work type ID to standard time-based billing categories, as reflected in the Work Type External ID column in Employment Hero.

e. Set Up Breaks
In specific cases, breaks need to be recorded and identified using a specific code. CareVision ensures these codes are included when when sending timesheets to Employment Hero, ensuring paid breaks are processed correctly.
Obtain the External ID for each type of Standby Break from Employment Hero Payroll. Categorize these breaks as needed (afternoon, lunch, etc.).
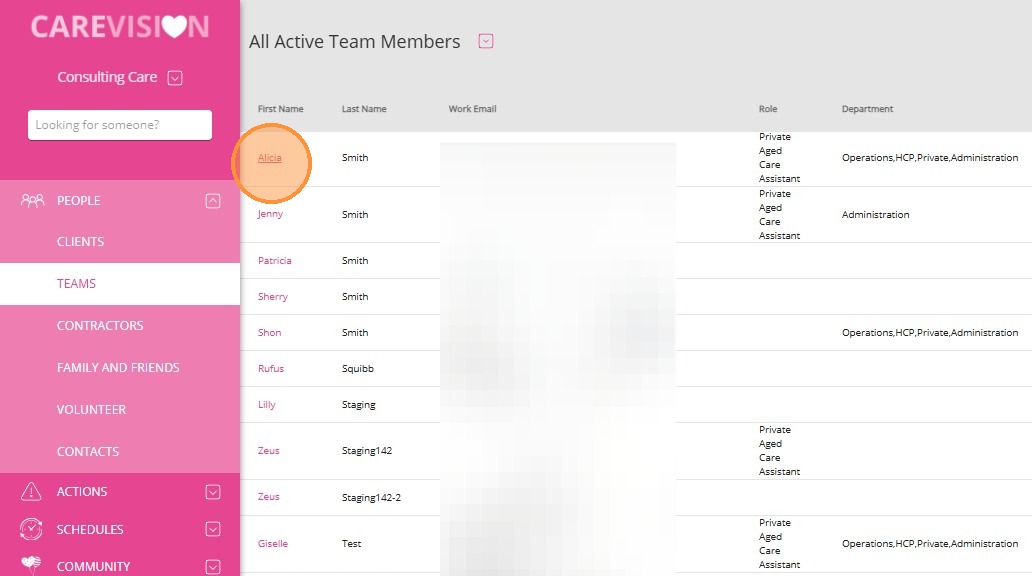
In CareVision, click Schedules from the left menu bar.

Click Teams.

Set filters as needed.

Click Apply.

The list of staff will appear on the left side. Select the relevant staff member from the staff list on the left side of the screen.

Click the plus (+) icon next to the staff member’s name.

Choose Create Scheduled Break to add a break for this staff member only.

Alternatively, select Create Scheduled Break Template to create a reusable template for multiple staff.

The Create Scheduled Break window is displayed. Complete all required fields.

In the Break Code field, enter the corresponding External ID (obtained from Employment Hero Payroll) for each break.

Once all required fields are completed, click Save.

- There is no organizational-level setup for paid breaks in CareVision. You must follow the steps above for each staff member or use templates as needed.
- CareVision automatically computes and streamlines break payments when timesheets are sent to Employment Hero. The correct rate is applied based on the Break Code.

II. Link Employment Hero to CareVision
To ensure seamless payroll processing between CareVision and Employment Hero, establish the integration between the two systems.
In the left navigation menu, click Settings.
Click Integrations.

Find Employment Hero and click Link My Account.

Log into Employment Hero when prompted to complete the integration.

A success message will confirm your account is linked.
After integration, the system automatically syncs all staff records, ensuring that staff profile details and pay information in CareVision are accurately reflected in Employment Hero. We recommend that you check the sync data before and after the integration to ensure that all information has been accurately transferred.
How It Works When Your Account Is Already Set Up on Employment Hero
If your account is already set up on Employment Hero and you enable this integration, the following scenarios will occur:
- The integration will automatically check for existing Employment Hero payroll IDs.
- If a payroll ID matches an existing record in Employment Hero, the integration will update that record rather than create a new one.
- If a payroll ID does not exist, a new record will be created in Employment Hero.
III. Process Payroll

- Click Teams.

- Select the staff member whose profile you want to update.

- Make sure that all required information is completed for each staff profile. Some of the most important fields include:
- Employee Number
- Employment Start Date
- Payroll Employee ID


- On the left menu bar, click Actions and then click Service Review.

- In the upper right, set the From date to the start of your pay period.

- Set the To date to the end of your pay period.

- Click the Refresh button to load the bookings.

- The Service Review board will display all bookings for the period you select.

- Review the booking outputs that may impact payroll.

- Bookings with issues are indicated by booking IDs highlighted in red. For each highlighted booking ID, click the downward arrow to expand and view the alert details.

- Review and resolve booking issues.

- After you have verified that a booking is correct, you can approve it. Under the Actions column, click the checkbox to approve a booking.

- A prompt will appear asking you to confirm whether you want to approve the booking. Click Approve to proceed.

- In the left menu, click Settings.


- Set the Structure field to KeyPay/Employment Hero.


- Turn on the Limit To Approved Items Only toggle if you want to limit your export to include only the approved items in the service review.

- (Optional) Turn on the toggle Override Adjustment Period to allow additional days after your export period for capturing any late changes. This ensures that all updates up to the selected adjustment to date are automatically included, helping to keep your reports accurate and complete. When you turn on this toggle, specify the Adjustment From (Inclusive) and Adjustment To (Exclusive) fields.
- Adjustment From (Inclusive): June 29, 2025
- Adjustment To (Exclusive): July 2, 2025


- The Timesheet file includes data on hours worked by staff for each shift. This file contains columns such as Employee External ID, Start Date and Time, End Date and Time, Break Start Date and Time, Break End Date and Time, Location External ID, Work Type External ID, Rate, Comments, and Units.

- The Mileage file provides information on kilometers traveled by staff, including callout distances. It contains columns for Employee External ID, Date, Units, and Work Type External ID.

- Then, click Generate Payroll to proceed with submitting the payroll to KeyPay/Employment Hero.

- Review the imported timesheets to confirm all data from CareVision has synced correctly.
- Check for any missing, duplicated, or incorrect timesheet entries and resolve any issues as needed.
- When all timesheets are accurate, continue with your usual pay run process in KeyPay/Employment Hero.
For more information about Employment Hero and CareVision integration, contact the CareVision Support Team.
Related Articles
How to Generate TechOne Payroll Export Files through Employment Hero Integration
This topic describes how payroll admin users and coordinators can generate TechOne payroll export files through Employment Hero integration. The payroll workflow involves three key systems, each with a distinct role in managing bookings, timesheets, ...Processing Pay Runs to Employment Hero
Before you process a pay run, you must review and approve timesheets in CareVision. Once timesheets have been submitted from CareVision, payroll admin users should complete the required steps in Employment Hero to process the pay run. This topic ...LanternPay (HICAPS) Integration Guide
The LanternPay (HICAPS) integration allows care organisations to submit payment requests directly to the NDIA for services provided to NDIS Agency Managed participants. Registered NDIS organisations can connect their HICAPS account in CareVision to ...JobAdder and Carevision Integration
JobAdder - CareVision Integration Background The JobAdder - CareVision integration will allow the organizations to simplify the onboarding process of staff professionals in CareVision once they are hired through JobAdder. Personal details of the ...LanternPay Integration
Prerequisites Before doing the actual integration to LanternPay, we need to make sure that we have all the required credentials first. We also need to properly set up the client's records within CareVision. Here are some of those requirements: ...