A Care Plan is created when a client accepts a quote for services, and it forms the basis for scheduling and service delivery. If any warnings are detected in a client’s Care Plan, follow these steps to resolve them:
1. In the client profile, go to Care Plans/Scheduled Service.
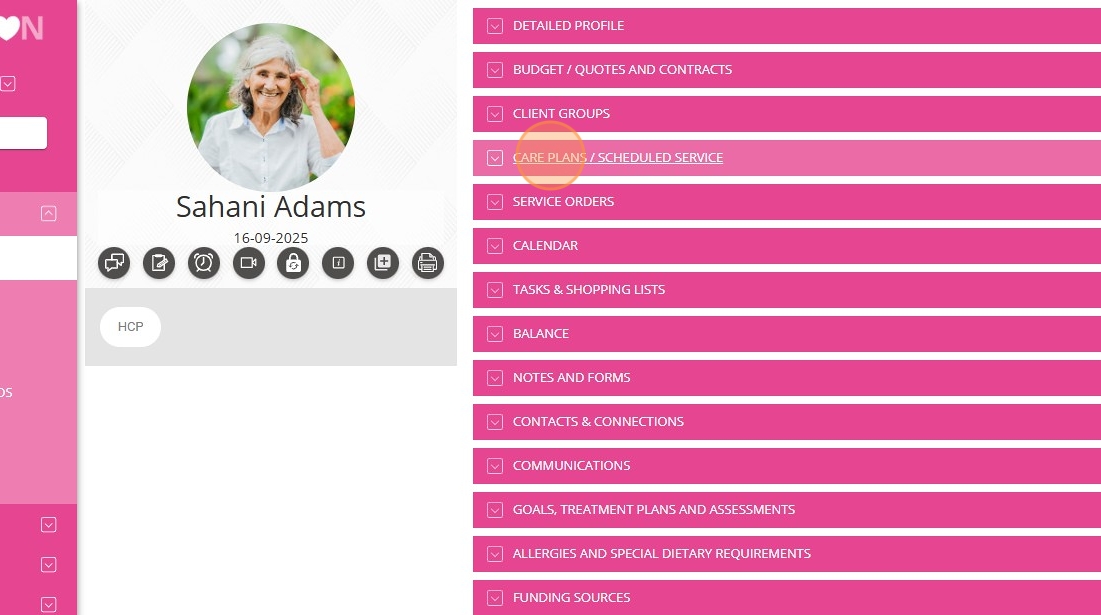
2. Click Update Service Schedule.
3. Warnings are displayed in two ways:
Display Option 1:
- At the top of the Service Schedule section, a system prompt lists all issues for all Care Plan items.
- Click "here" in the warning link to review all details about the issues.
- A koala bear icon will appear, and next to it, all flagged issues will be listed.
Display Option 2: To view issues for a specific Care Plan item, click the arrow to expand the item.
- The system will display any warnings for that item.
- Click "here" in the warning link to review all details about the issues.
- A koala bear icon will appear, and next to it, all flagged issues will be listed.
4. For example, if the Start Location is incomplete, the system will flag it as having invalid/incomplete fields in the Start Location.
5. To resolve this, scroll down to the Schedule & Rates section and complete the required fields for Start Location.
6. Click Save to save the location information.
7. Then, click Save again to update the entire Care Plan.
8. Confirm the update by clicking Yes.
9. Once resolved, the warning for incomplete fields in the Start Location will no longer appear.
10. Review and resolve any remaining flagged information to ensure the Care Plan is accurate and complete.
Some warnings are displayed in green font, indicating they may not apply to all organizations. For example, line items like Callout Distance are not required if your organization does not pay staff or bill clients for them. To prevent these warnings, you can add a non-billable billing category or line item with a value of 0.
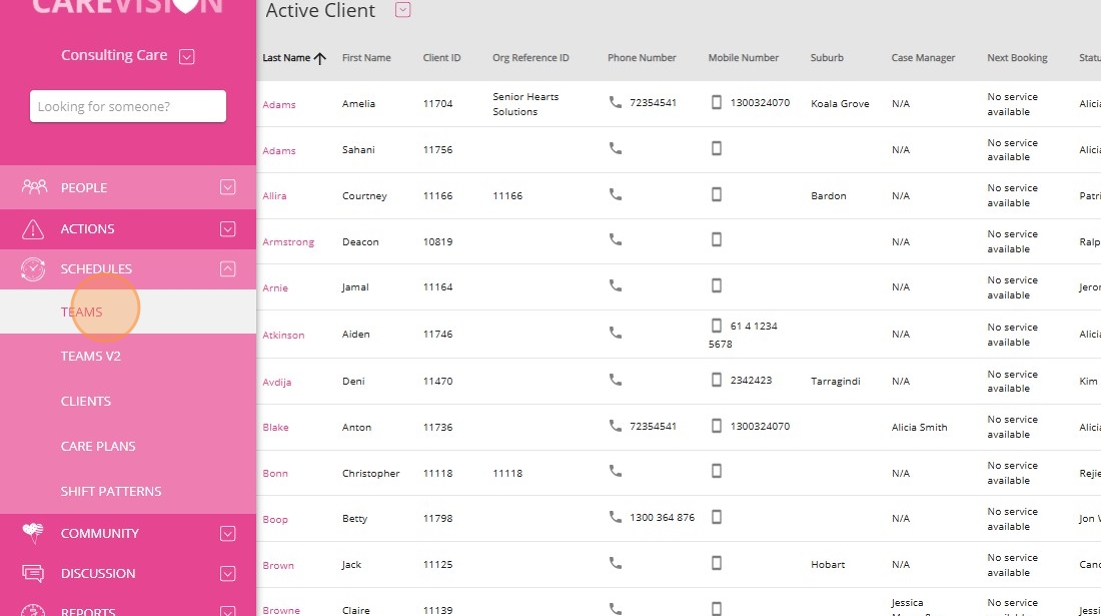
II. Common booking issues flagged in the Teams Scheduling Area
The system flags issues in the scheduling area so you can resolve them before allocating and publishing bookings. If you see any warnings in the Teams Scheduling Area, follow these steps:
1. In the left navigation pane, click Schedules.
2. Select Teams or Teams V2.
3. Specify any necessary filters and click Apply.
4. Review the bookings. Bookings with issues are typically shown with a solid red background and dark red diagonal lines. For any flagged booking, click the “i” button in the lower right corner to view details about the issue.
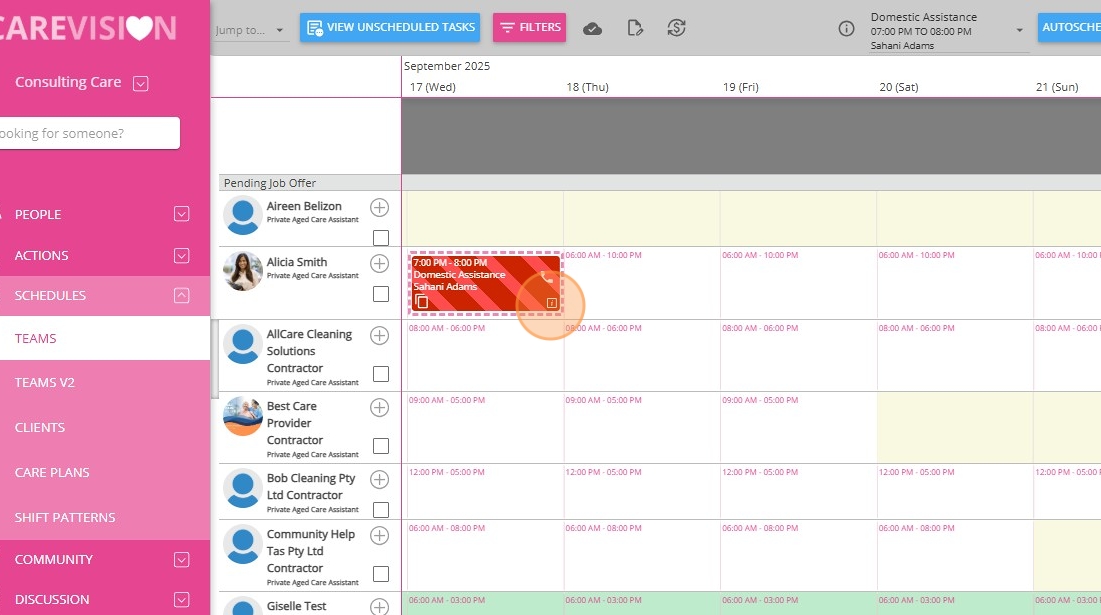
5. For example, if the booking is missing a start location, the system will display a warning.
6. To resolve, scroll down to the Locations section.
7. Enter the required location details in the appropriate fields.
8. Click the Save icon to save your changes.
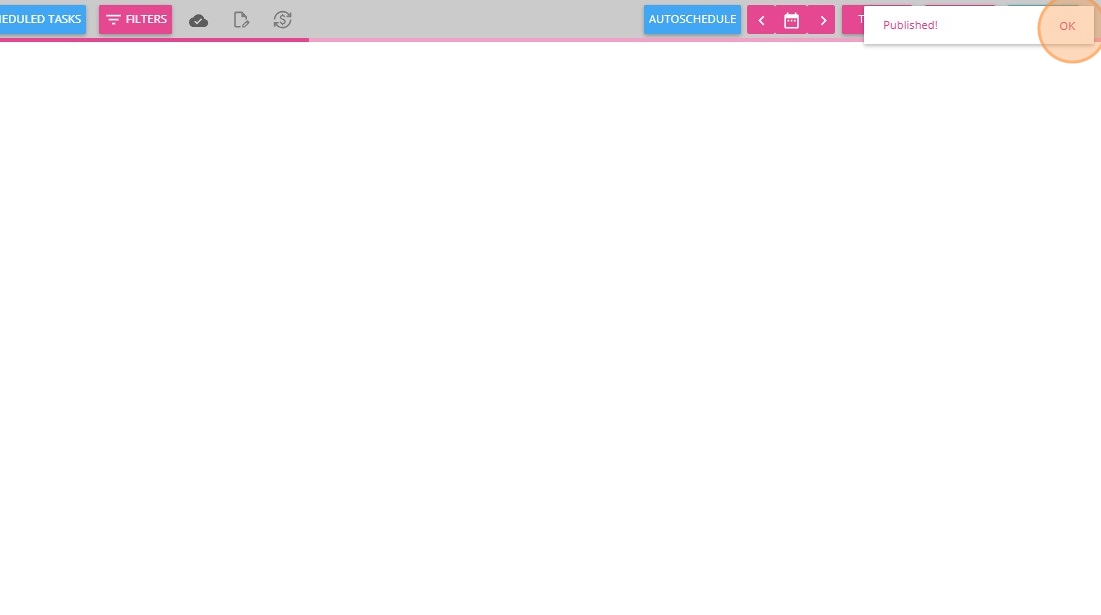
9. Click Publish to publish the booking with the updated information.
10. When the success message appears, click OK.
11. Verify the issue is resolved by clicking the “i” icon on the booking again.
The warning about the missing start location should no longer appear.
III. Common booking issues flagged in the Service Review Board
As part of the billing process, we recommend reviewing all bookings in the Service Review board to ensure accuracy and resolve any outstanding issues.
1. On the left menu bar, click Actions.
2. Select Service Review.
3. In the upper right of the Service Review board, set the From date to the start of your pay period.
4. Set the To date to the end of your pay period.
5. Click the Refresh button to load the bookings.
6. The Service Review board will display the bookings that match the period and filters you have selected.
- Bookings with issues are indicated by booking IDs highlighted in red.
7. For each red booking ID, click the downward arrow next to the booking ID to expand and view the alert details.
8. Review the name and details of the issue provided in the alert.
9. Click the provided link to resolve the issue directly.
Examples
1. Resolving a ‘Missing Sleepover Line Item’ Issue
If a booking is flagged for a missing sleepover line item, it means the Sleepover? box is checked, but no sleepover details have been added. Follow these steps to resolve the issue:
1. Click the link in the alert to go directly to the affected booking.
2. In the Line Items section, click Add Line Item under the Sleepover section.
3. Specify the Bill Using field.
Specify the billing method by selecting either Scheduled Time, Actual, or Manual, based on your business requirements.
4. Scroll to the lower part of the Edit Booking page and specify your changes in the What have you changed in this version field.
The No Sleepover Line Item alert should no longer appear for this booking.
2. Resolving a ‘Missing Sleepover Billing Category’ Issue
If a booking is flagged for a missing sleepover billing category, it means the Sleepover? box is checked but no sleepover billing category has been selected. To resolve this:
1. Click the link in the alert to open the affected booking.
2. Go to the Billing Categories and Funding Sources section.
3. In the Sleepover section, select the appropriate sleepover billing category.
4. Scroll to the bottom of the Edit Booking page and describe your changes in the What have you changed in this version field.
The No Sleepover Billing Category alert should no longer appear for this booking.
For other issues that appear in the Service Review Board, refer to the table below for solutions or watch the video above for a tutorial.
Table of Issues in the Service Review Board
| |
Missing Visit Duration Line Item | Steps: Click the link in the alert to resolve the issue directly. Go to the Line Items section and click Add Line Item under the Visit Duration section. Check the Bill Using and Pay Using fields and ensure they are set to Scheduled Time. Most organisations use this setting by default. Scroll to the lower part of the Edit Booking page and specify your changes in the What have you changed in this version field. Click Save.
|
The Visit Duration line item is missing. Visit Duration represents the time between check-in and check-out. It is important for accurate billing and payroll calculations, as it reflects the actual time spent delivering the service. |
Missing Line Items | Steps: Click the link in the alert to resolve the issue directly. Go to the Line Items section and click Add Line Item as needed. Complete other required fields. Scroll to the lower part of the Edit Booking page and specify your changes in the What have you changed in this version field. Click Save.
Form more information, see the Track Manual Line Items documentation. |
The booking does not have the required line items, such as Manual Line Item, Visit Duration, Distance Travelled with Client, Callout Distance, or Sleep Over. Check and add any missing line items as needed. |
Missing Funding Source | Steps: Click the link in the alert to resolve the issue directly. Go to the Billing Categories and Funding Sources section. Select the appropriate funding source. Scroll to the lower part of the Edit Booking page and specify your changes in the What have you changed in this version field. Click Save.
For more information, see the Configuring Funding Source Templates documentation. |
The booking does not have a funding source assigned. A funding source is required for billing. Check and assign the appropriate funding source. |
Missing Billing Categories | Steps: Click the link in the alert to resolve the issue directly. Go to the Billing Categories and Funding Sources section. Check the Funding Source section to ensure the client is using the correct funding source. Scroll down to each flagged billing category. An exclamation mark indicates that the billing category is not available under the client’s current funding source. To resolve the issue, go to the client’s profile and navigate to the Funding Sources section. Click the current funding source to edit it. Go to the Billing Categories field. Search for the flagged billing category. Check the flagged billing category to include it in the current funding source. Then, return to the Service Review board where you are editing the booking. You will see that the flagged billing category no longer has an exclamation mark, indicating it is now included in the client’s funding source. Under the Status column, check the box if you believe it is appropriate to apply the billing category to the client’s booking. Use your discretion and ensure the selection is accurate. Repeat the same steps for any other billing categories that are flagged. Scroll to the lower part of the Edit Booking page and specify your changes in the What have you changed in this version field. Click Save.
For more information, see the Understanding the different types of Billing Categories documentation. |
The booking does not have billing categories assigned, which are needed to apply the correct rates and billing rules. Billing categories help ensure charges for time, travel, call outs, sleepovers, and recurring fees are accurate. Review the booking and add the required billing categories. |
No Time Category Billing Category is Applied | Steps: Click the link in the alert to resolve the issue directly. Go to the Billing Categories and Funding Sources section. In the Time Category section, locate the relevant billing category for the booking. Under the Status column, check the box if you believe it is appropriate to apply the billing category to the client’s booking. Use your discretion and ensure the selection is accurate. Scroll to the lower part of the Edit Booking page and specify your changes in the What have you changed in this version field. Click Save.
For more information, see the Understanding the different types of Billing Categories documentation. |
There is no selected Time Category in the Billing Categories and Funding Sources section. |
Not Related Service and Billing Categories | Steps: Click the link in the alert to resolve the issue directly. In the Delivery Details section, check the Service/Product field to identify the service included in the client’s booking. Go to the Billing Categories section to verify that the billing categories are appropriate for the service included in the client’s booking. Under the Status column, check the box if you believe it is appropriate to apply the billing category to the client’s booking. Use your discretion and ensure the selection is accurate. Scroll to the lower part of the Edit Booking page and specify your changes in the What have you changed in this version field. Click Save.
For more information, see the Understanding the different types of Billing Categories documentation. |
The selected service for the booking does not match one or more assigned billing categories. This may prevent correct billing for the service |
Not Related Funding Source and Billing Categories | Steps: Click the link in the alert to resolve the issue directly. Check the Funding Source section to ensure the client is using the correct funding source. Check the alerts in the Billing Categories section and scroll to each flagged category. An exclamation mark indicates that the billing category is not available under the client’s current funding source. To resolve the issue, go to the client’s profile and navigate to the Funding Sources section. Click the current funding source to edit it. Go to the Billing Categories field. Check the flagged billing category to include it in the current funding source. Then, return to the Service Review board where you are editing the booking. You will see that the flagged billing category no longer has an exclamation mark, indicating it is now included in the client’s funding source. Under the Status column, check the box if you believe it is appropriate to apply the billing category to the client’s booking. Use your discretion and ensure the selection is accurate. Repeat the same steps for any other billing categories that are flagged. You may also see an alert with an exclamation point stating This billing category is from a contractor, which means it is not included in the client’s current funding source and cannot be billed. To resolve this, either update the client’s funding source to include the contractor’s billing category, or select a different billing category that matches the client’s funding source. Scroll to the lower part of the Edit Booking page and specify your changes in the What have you changed in this version field. Click Save.
|
The chosen funding source for the booking does not match one or more assigned billing categories. |
Archived Billing Categories | Steps: Click the link in the alert to resolve the issue directly. Identify the billing category with an alert. When you click the description, it indicates, The billing category is not in client’s funding source. This billing category is already archived, meaning the billing category is no longer available for use. If the billing category has been archived, deselect it to remove it from the booking and ensure it is no longer applied. Review the booking to confirm that only active billing categories are selected. Scroll to the lower part of the Edit Booking page and specify your changes in the What have you changed in this version field. Click Save.
|
The booking uses a billing category that has been archived and should not be applied. Archived categories cannot be used for current billing. |
Unallocated Booking | Steps: Click the link in the alert to resolve the issue directly. In the Delivery Details section, find the Allocated To field and select the appropriate staff member from the dropdown to allocate to the booking. Complete any other required fields as prompted. Scroll to the lower part of the Edit Booking page and specify your changes in the What have you changed in this version field. Click Save.
|
This issue occurs when no staff member has been assigned to the booking. Without an assigned staff member, the service cannot be delivered or billed. |
Once all issues for a booking are resolved, the booking ID will change to black.
While those in red still have issues. Follow the steps in this article to resolve any remaining issues.