Configure Care Domains
A care domain refers to a specific area of care, such as mobility, nutrition, or hygiene relevant to a client’s needs. The available domains may vary depending on the organisation’s service focus (for example, aged care, disability support, or home care), ensuring that goals, treatment plans, and assessments are aligned with each client’s context.
This topic explains how to create a care domain, populate its standard content, and link relevant forms to it.
Prerequisites
Before starting, make sure that:
- The care domain’s scope has been defined.
- Review the Care Domain’s scope and category.
- Confirm that the relevant form formats have been created.
- Decide which services should be related to the Care Domain.
- Confirm the standard review frequency.
- Test the Care Domain and linked forms against a client record.
Configure Care Domains
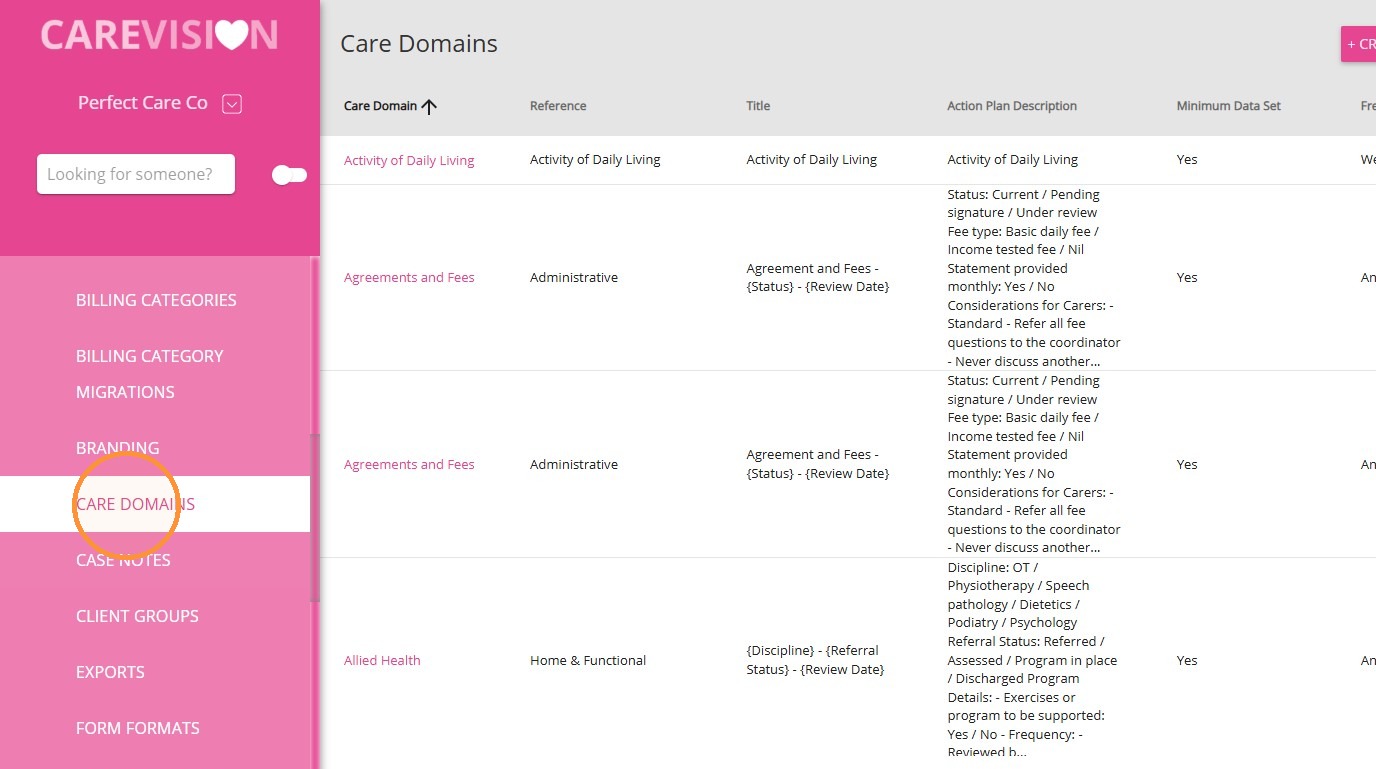
1. Go to Settings > Care Domains to view and manage Care Domains.
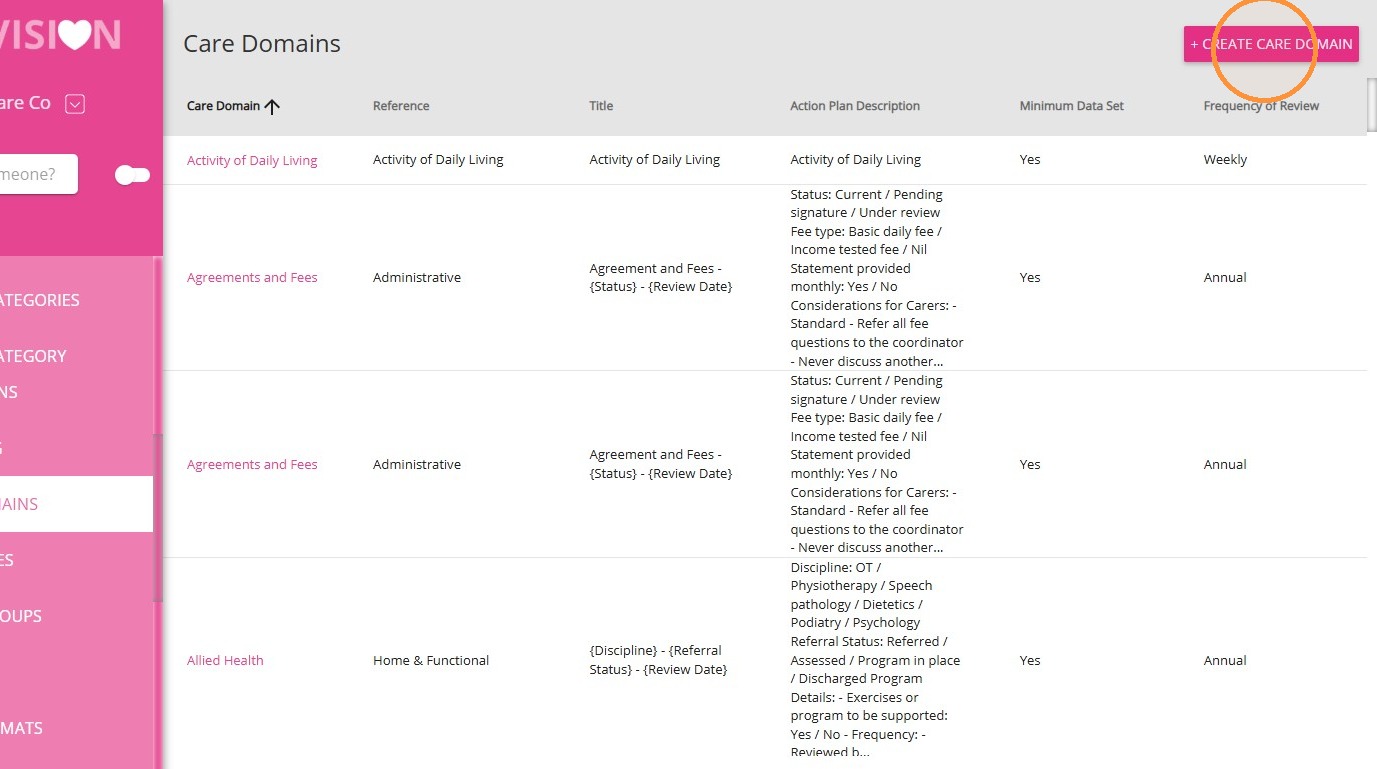
2. Click +Create Care Domain to open the setup page.
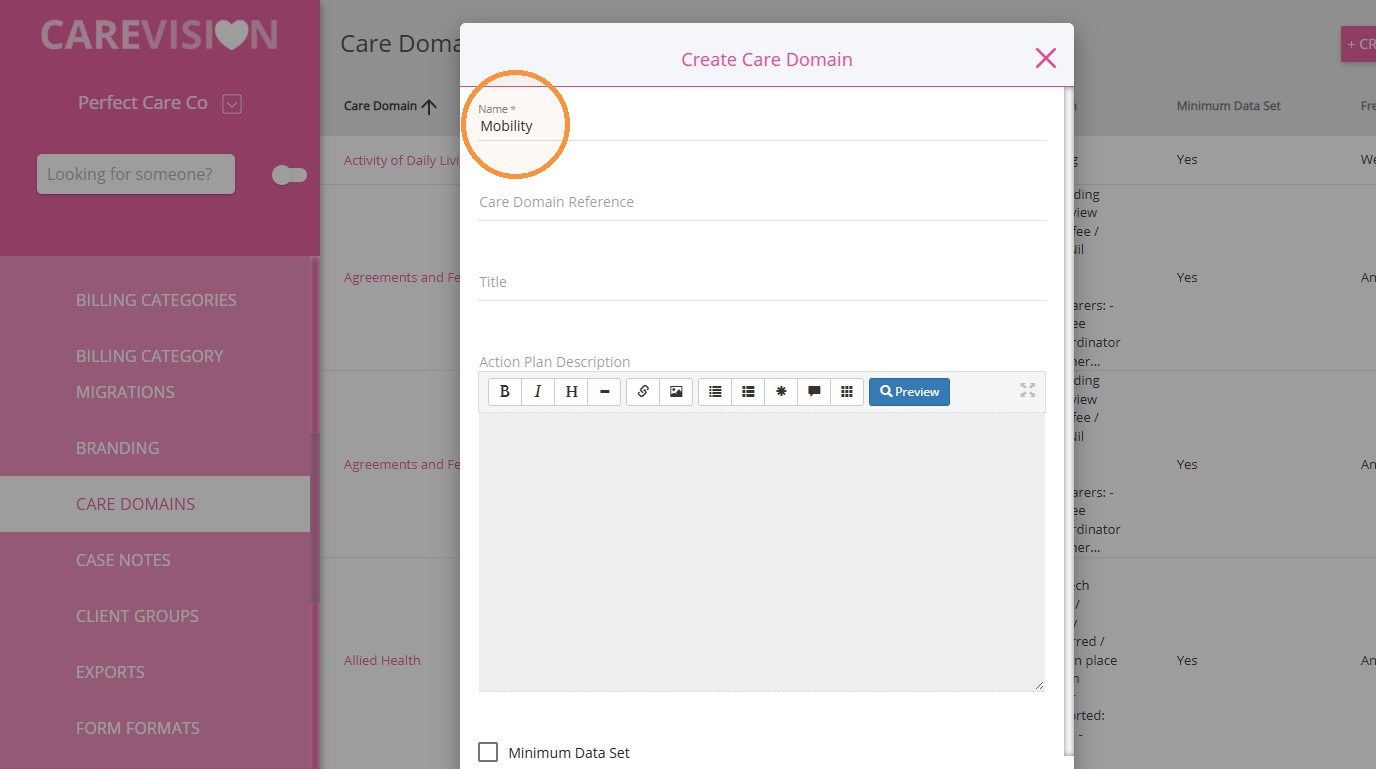
3. Enter a Name that clearly identifies the area of care.
Example: Mobility
Example: Mobility
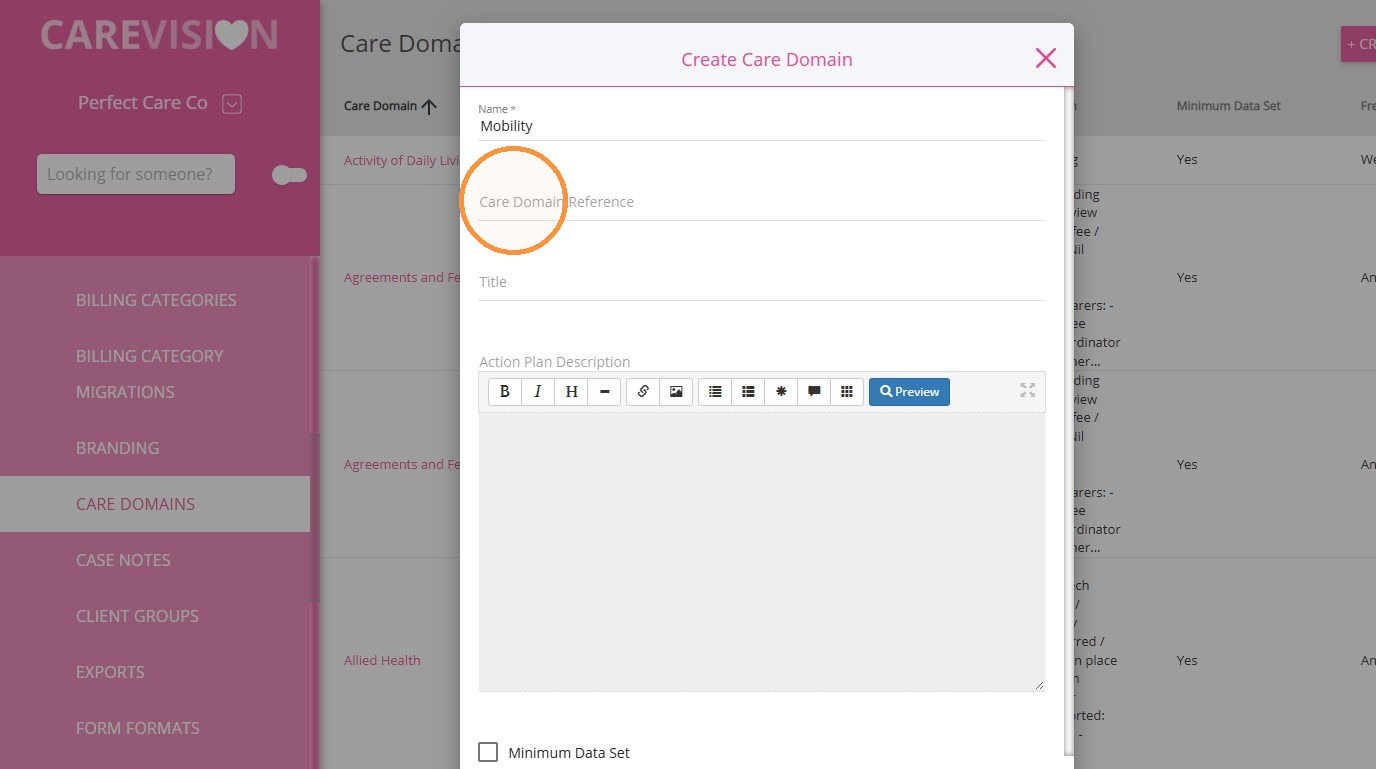
4. (Optional) Enter a Care Domain Reference to identify the category in which the Care Domain belongs, such as clinical monitoring, intake and enrolment, or care planning.
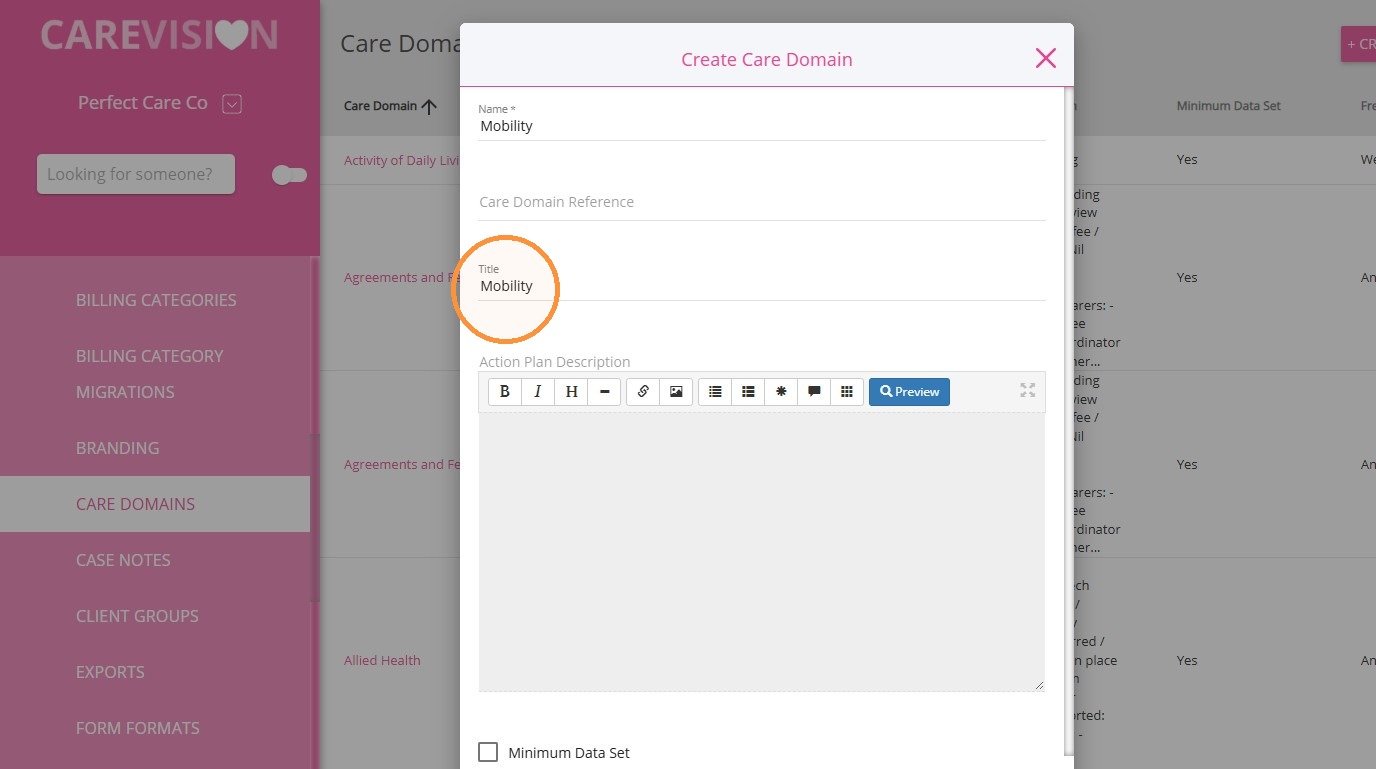
5. (Optional) Add a Title template that will populate when staff add the Care Domain to a client record.
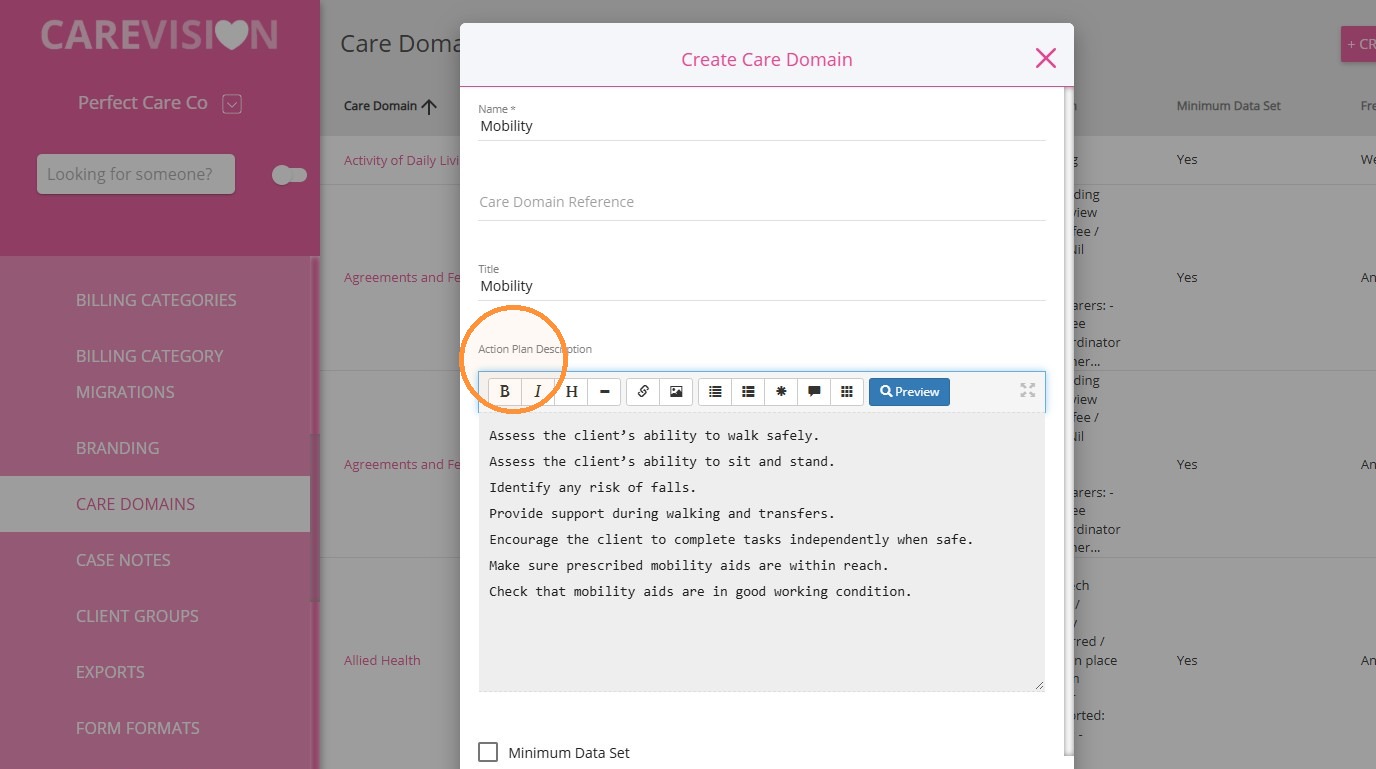
6. Add an Action Plan Description containing standard prompts and instructions. When the Care Domain is added to a client, staff should complete the template, remove irrelevant content and update it to reflect the client’s needs.
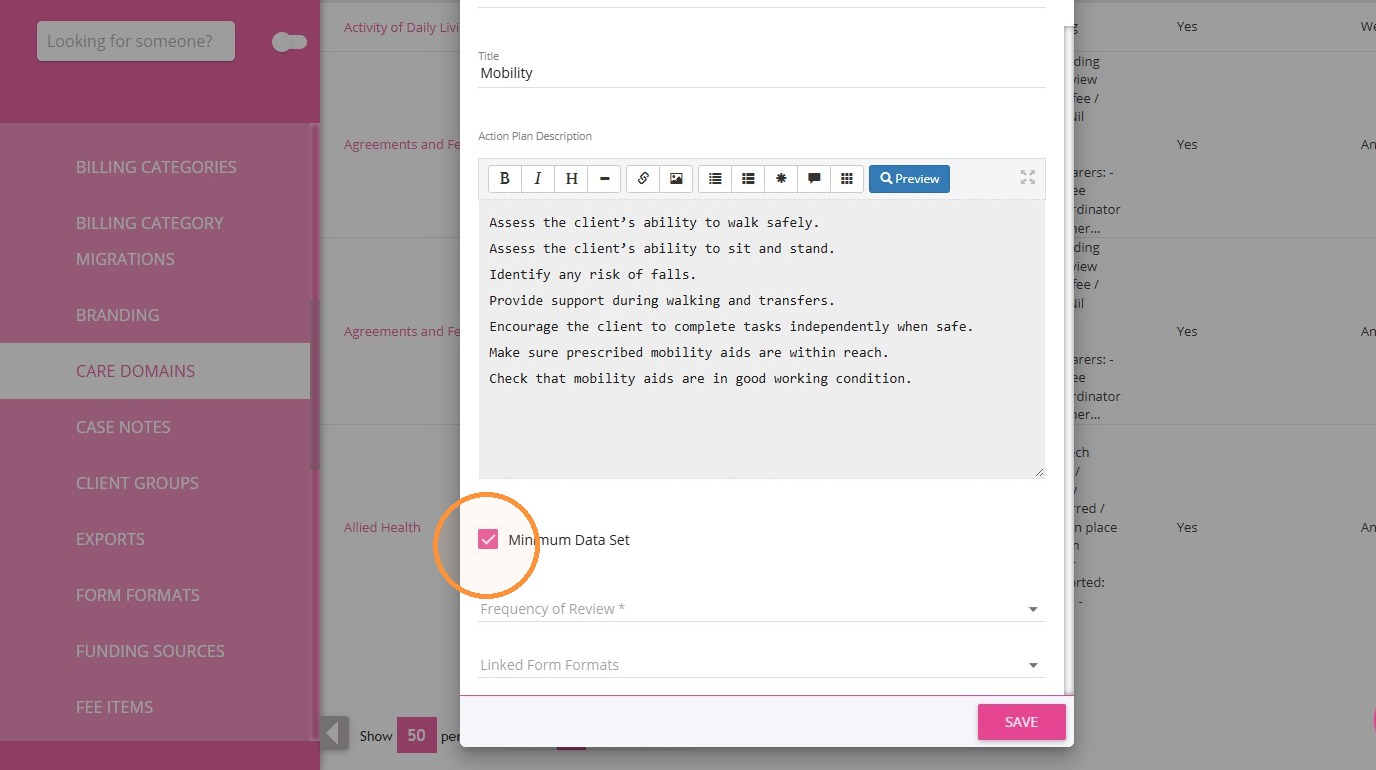
7. Select Minimum Data Set if the Care Domain needs to be associated with multiple goals, conditions or treatment plans.
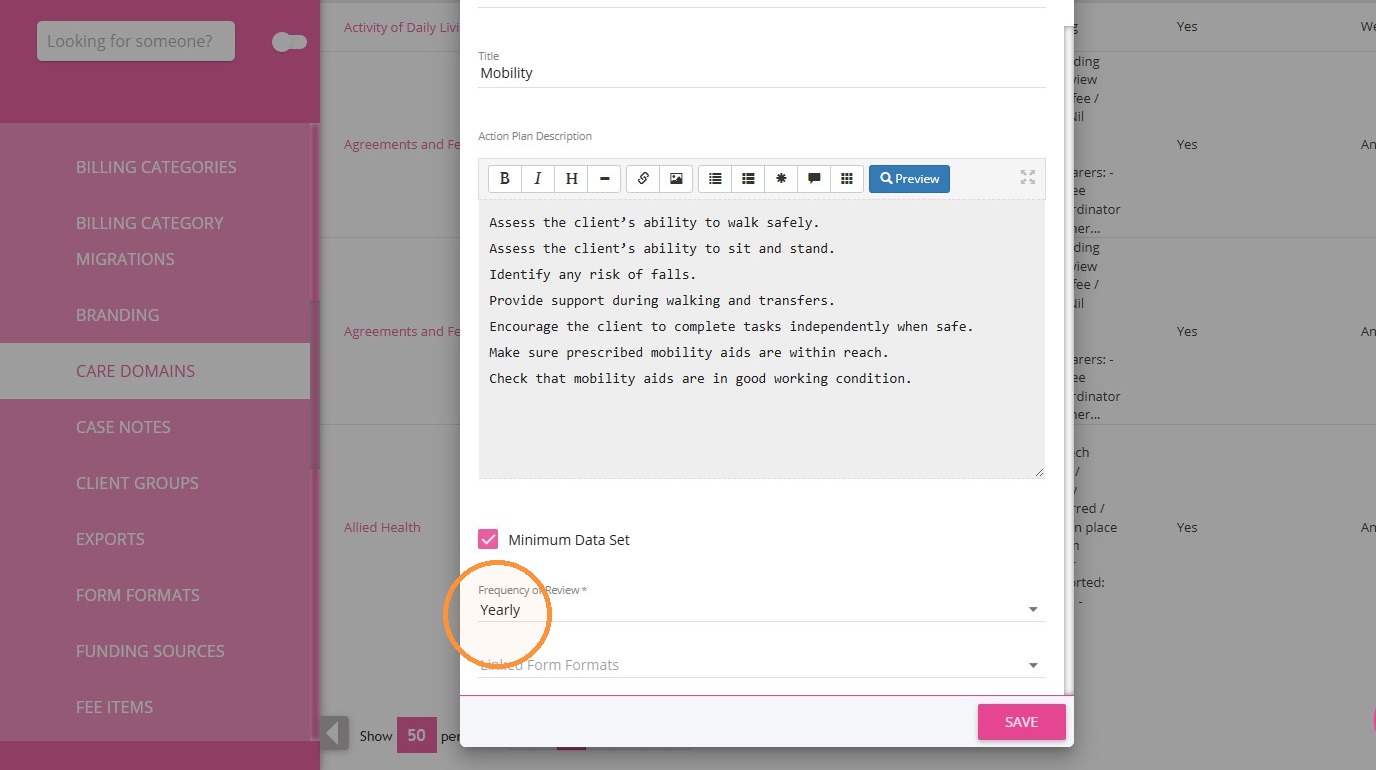
8. Select a Frequency of Review to set how often the Care Domain should be reviewed. Available options are Daily, Weekly, Fortnightly, Monthly (Date-Based), and Monthly (Week-Based).
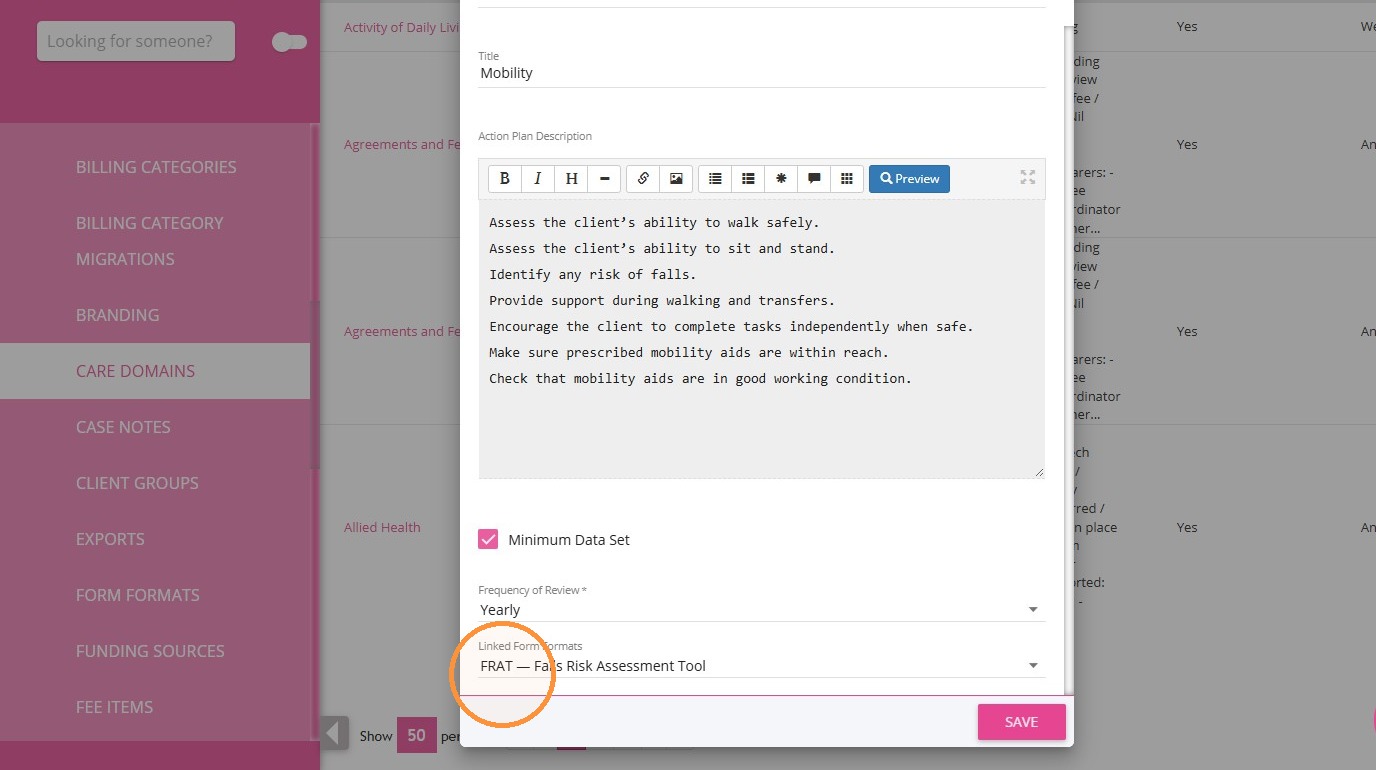
9. Go to Linked Form Formats and select the forms that support the Care Domain. Multiple forms can be linked.
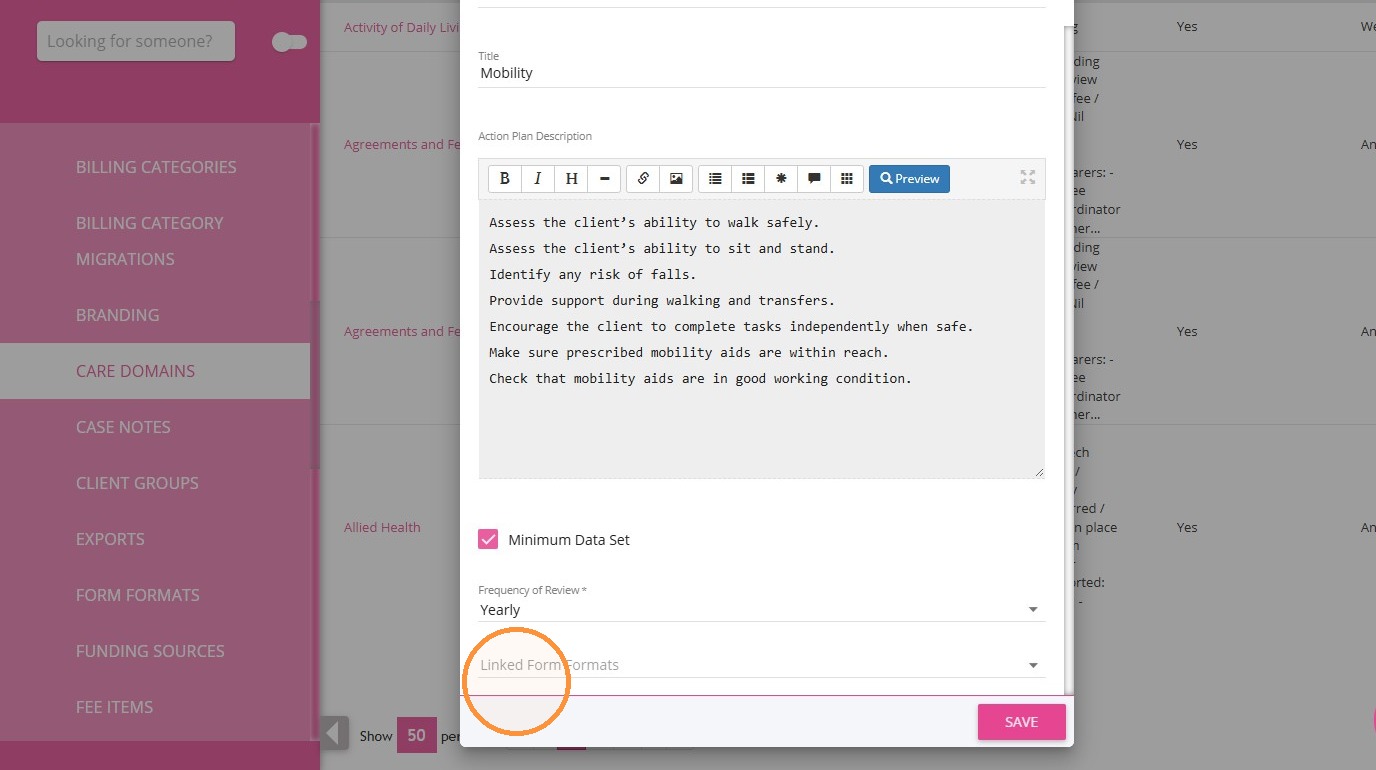
10. Example: Link the FRAT (Falls Risk Assessment Tool) form to the Mobility Care Domain.
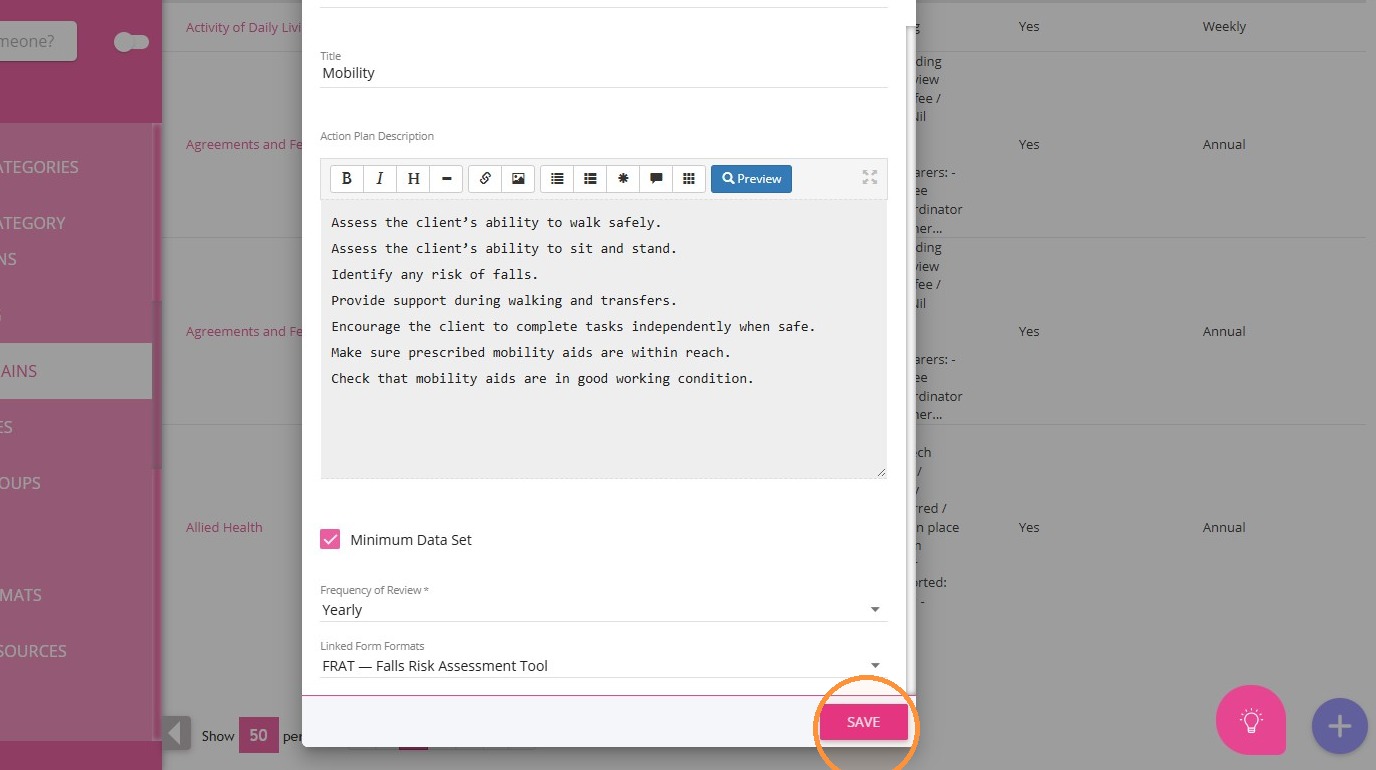
11. Click Save to make the Care Domain available in client care records.
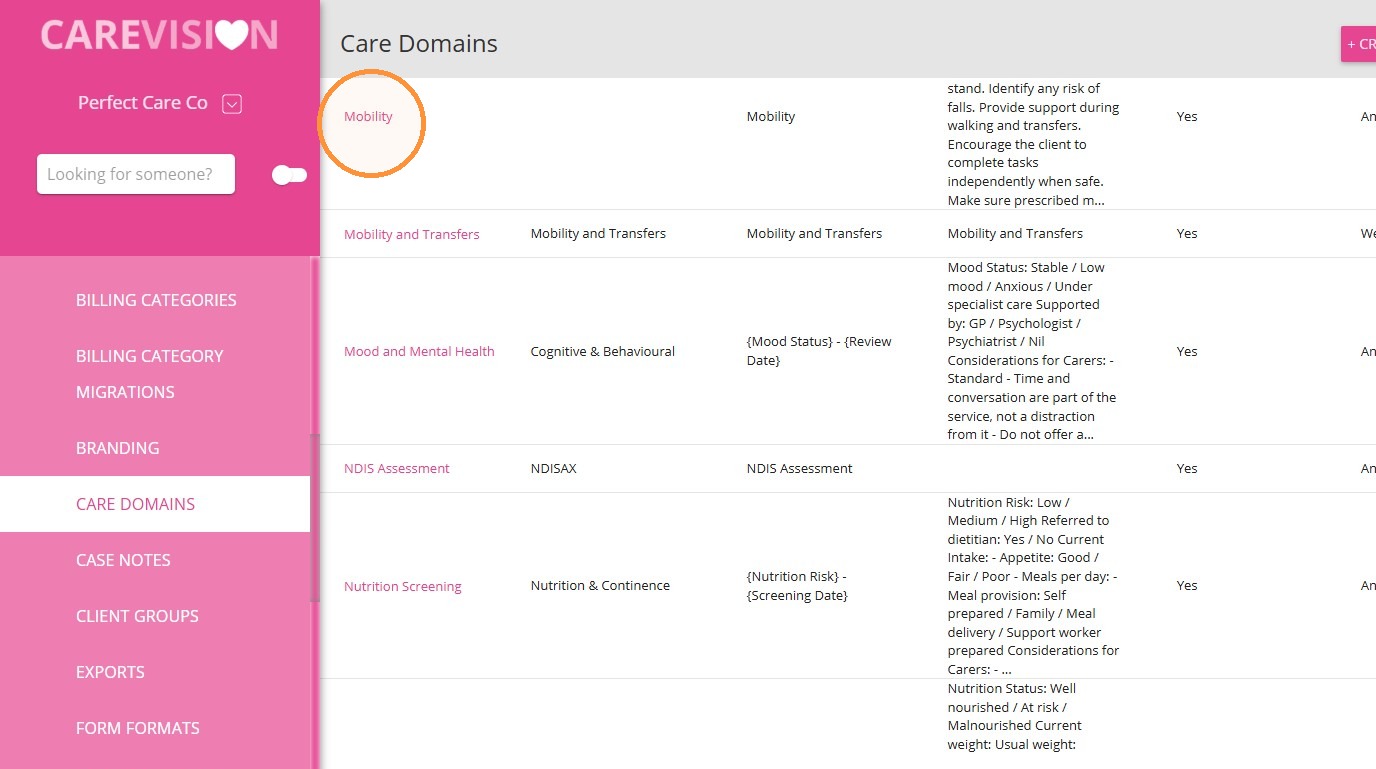
12. The Care Domain will appear in the list after it is saved.
Applying Care Domains to Client Records
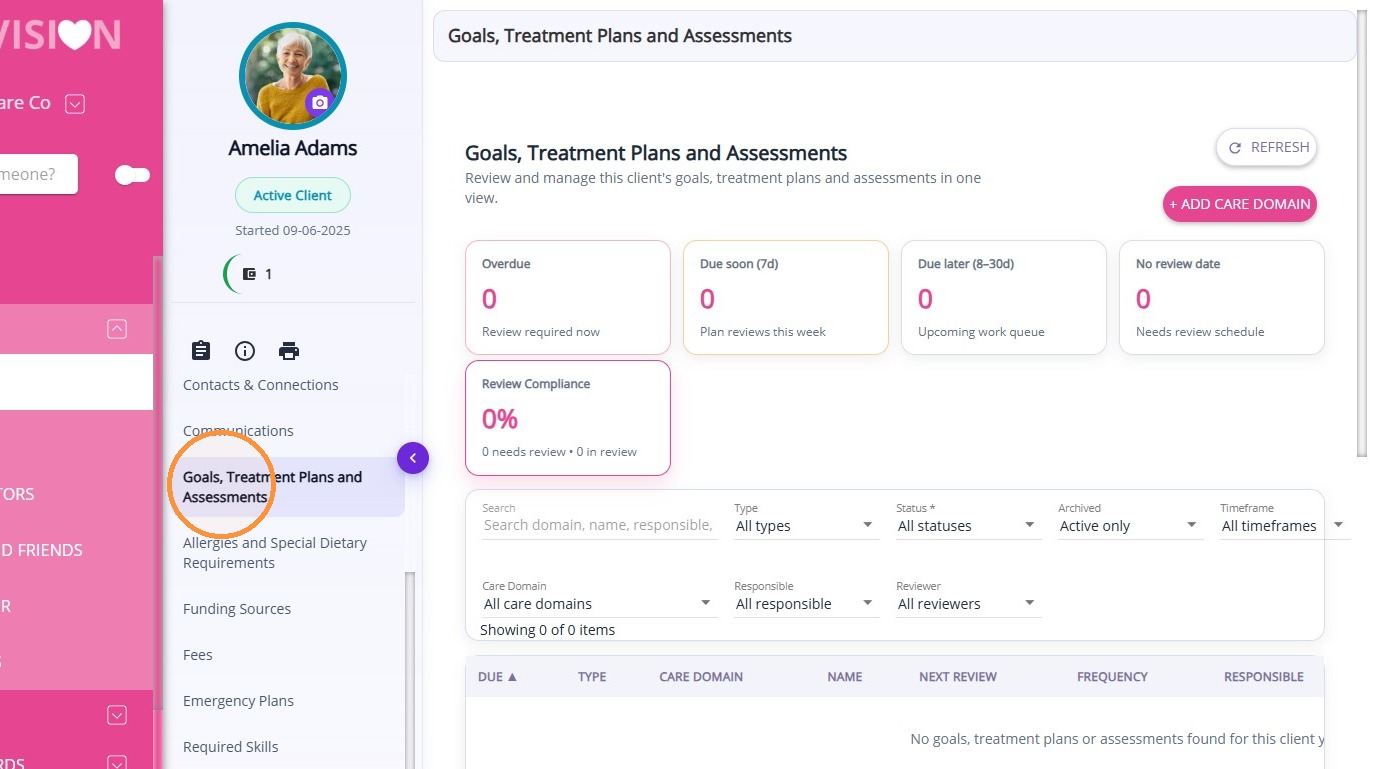
1. Open the client profile and select Goals, Treatment Plans and Assessments.
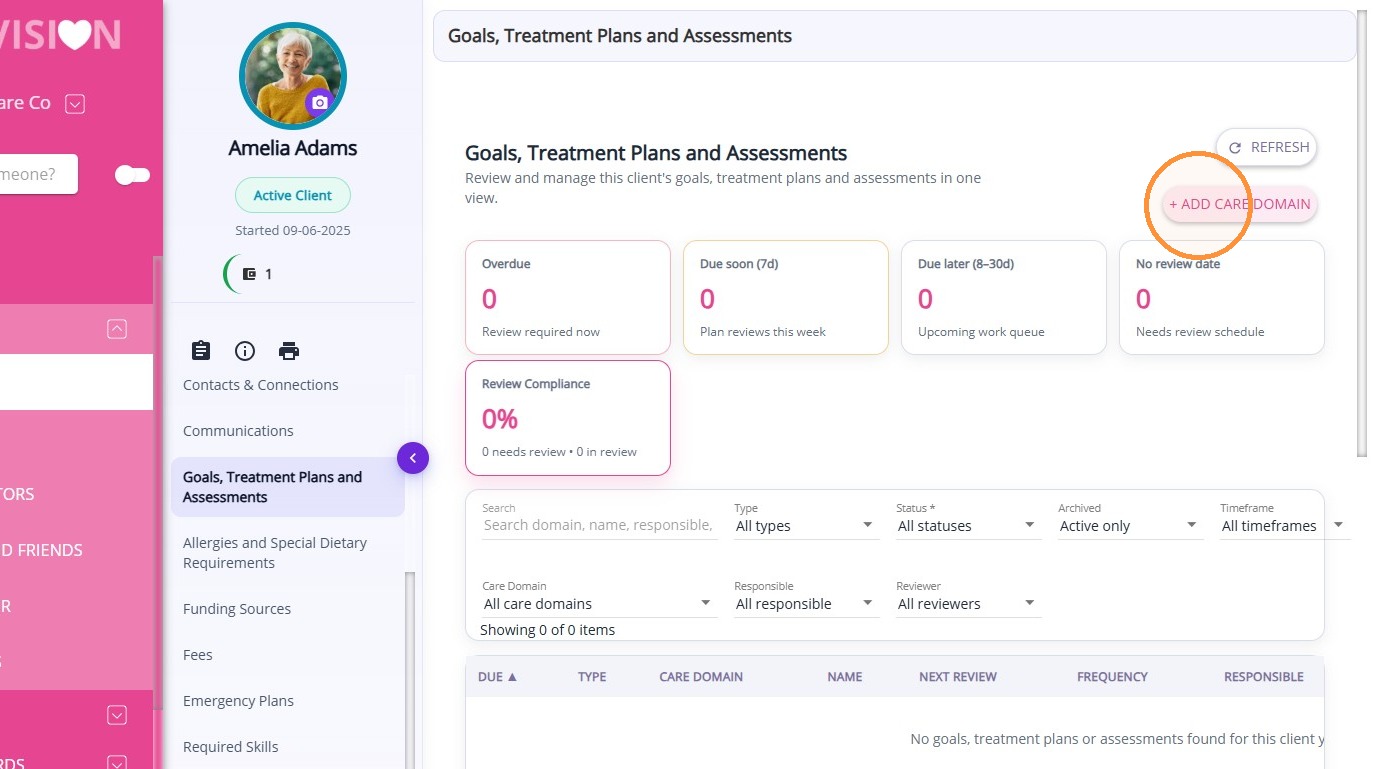
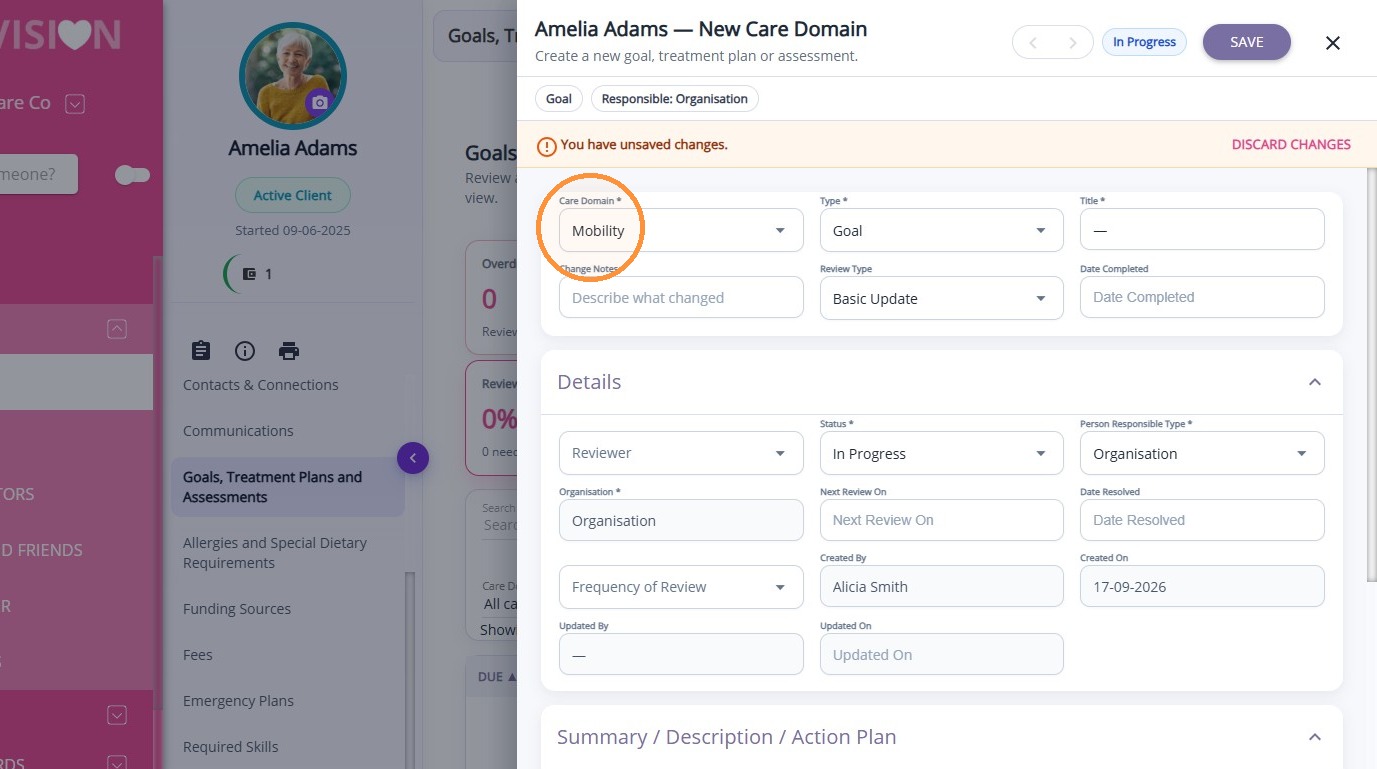
2. Click +Add Care Domain and select the relevant Care Domain.
Example: Mobility
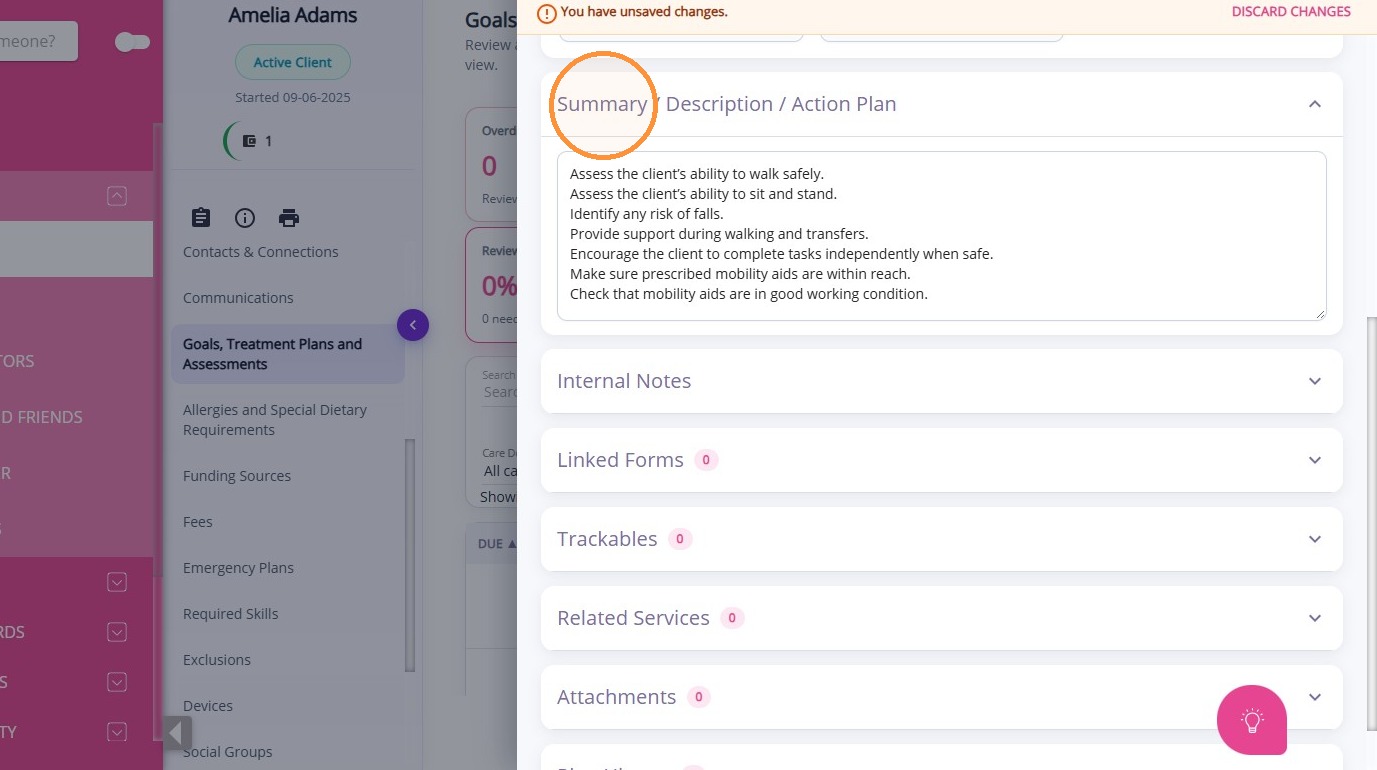
3. Review the populated Summary / Description / Action Plan. Update it to reflect the client’s individual needs.
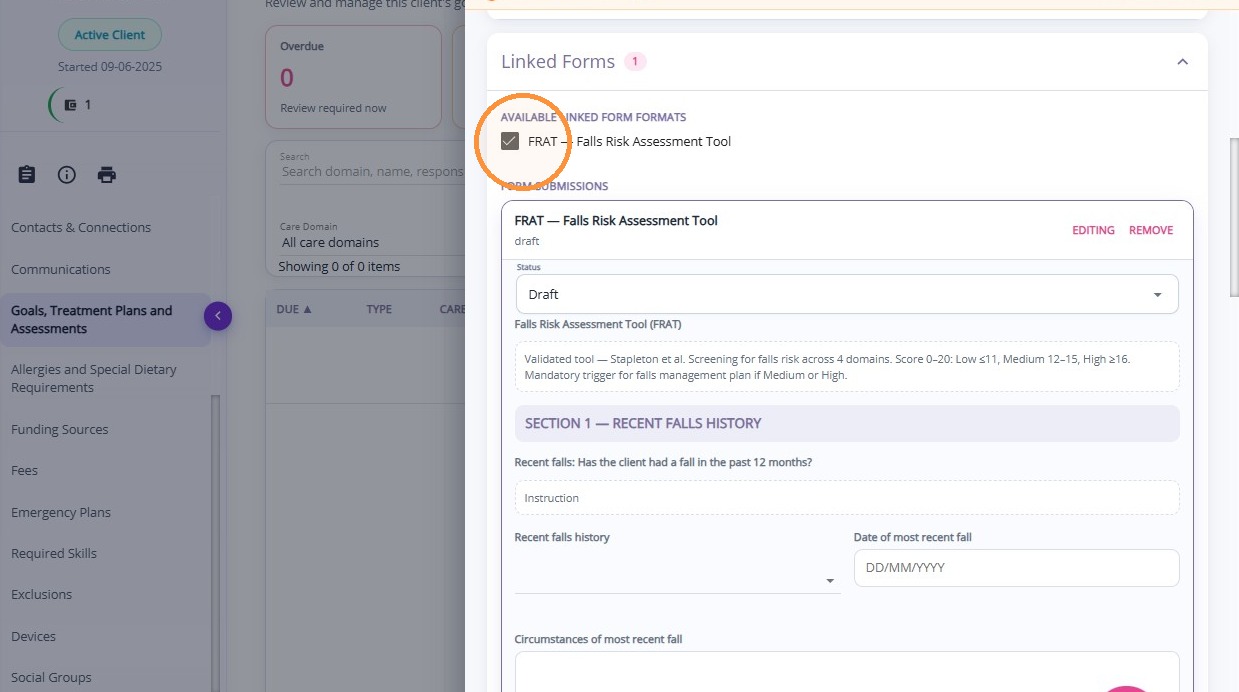
4. Go to Linked Forms and select the relevant form.
Example: Add and complete the FRAT form for the Mobility Care Domain.
Example: Add and complete the FRAT form for the Mobility Care Domain.
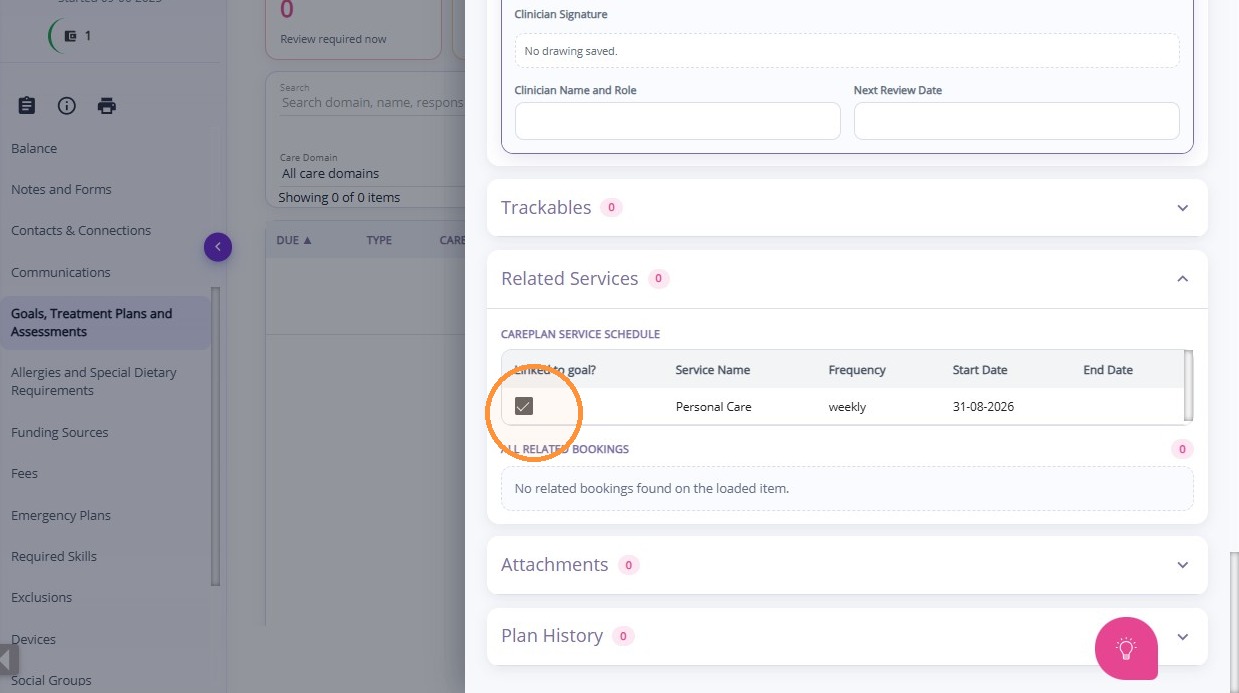
5. Add the services whose staff need to view or act on the Care Domain.
6. Complete any other fields required for the client’s circumstances.
7. The Care Domain and completed form content will be saved to the client record. A completed or modified linked form will also appear in the client’s Forms list.
When the Care Domain and linked form are saved:
- The Care Domain is added to the client record.
- The completed form content is saved.
- The form is added to the Forms list on the client profile.
- The selected Reviewer becomes responsible for following up the review.
- The next review date is recorded to track when another review is required.
The Care Domain is added to the client record.
The completed form content is saved.
The form is added to the Forms list on the client profile.
The selected Reviewer becomes responsible for following up the review.
The next review date is recorded to track when another review is required.
Staff Visibility
If service-based visibility is enabled, field staff will only see the Care Domain when they deliver a service linked to it. Staff who can see the Care Domain can read the action plan and open the linked form.