Xero Invoice Export
This topic describes how to export Xero invoices using custom settings, resolve data sanitation issues, review export history, and view generated invoices.
Keywords: xero invoices, export settings, data sanitation, account codes, billing exports history, invoice prefix, date range export, branch selection, organization reference, client invoices
I. Export Xero Invoices Using Custom Settings
1. In the left navigation pane of the portal, go to Settings then select Exports.
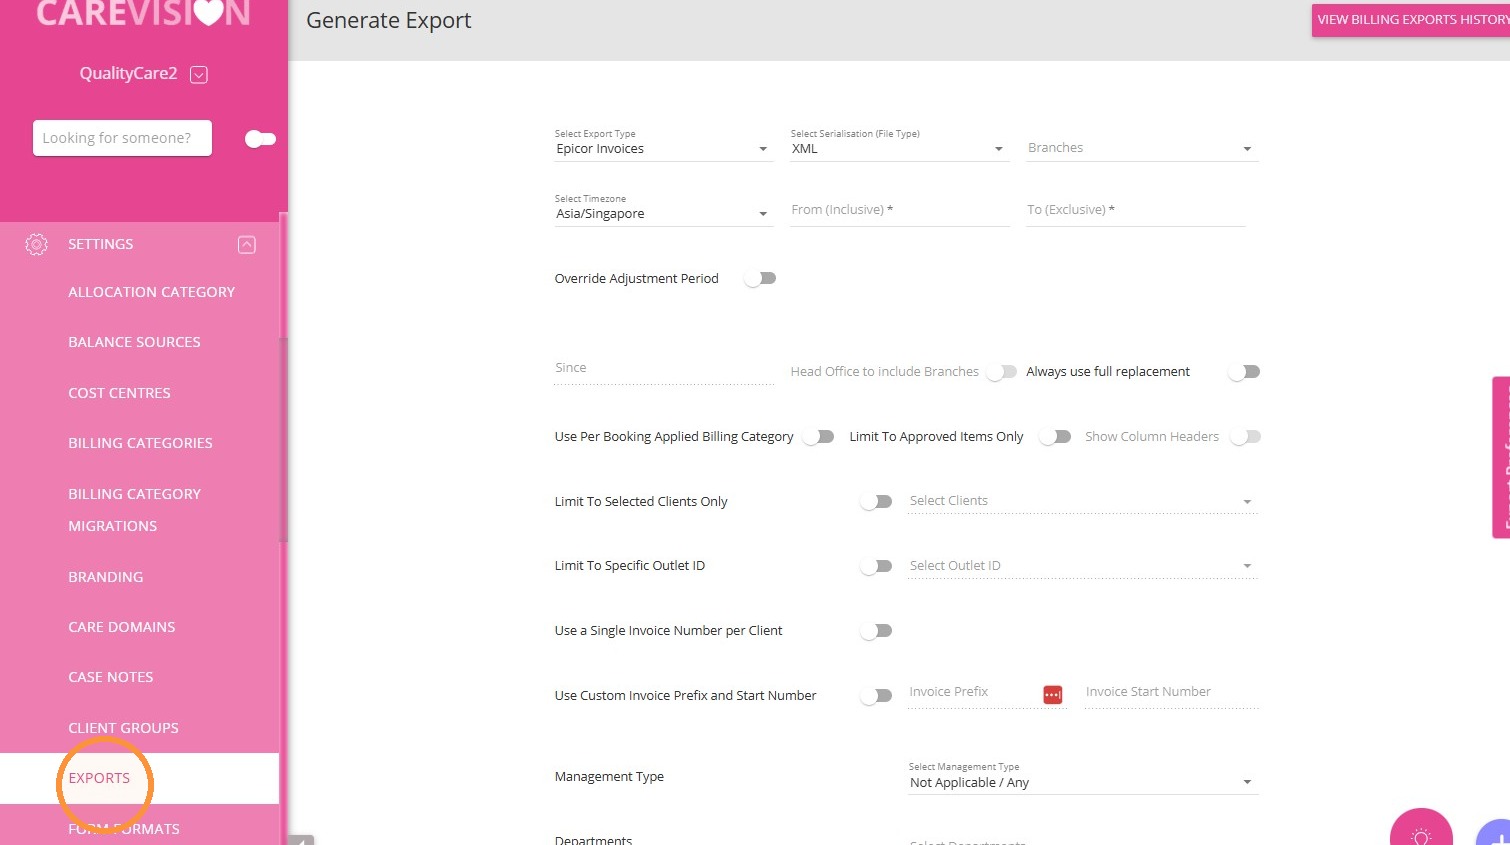
2. Complete the field values based on your export requirements.
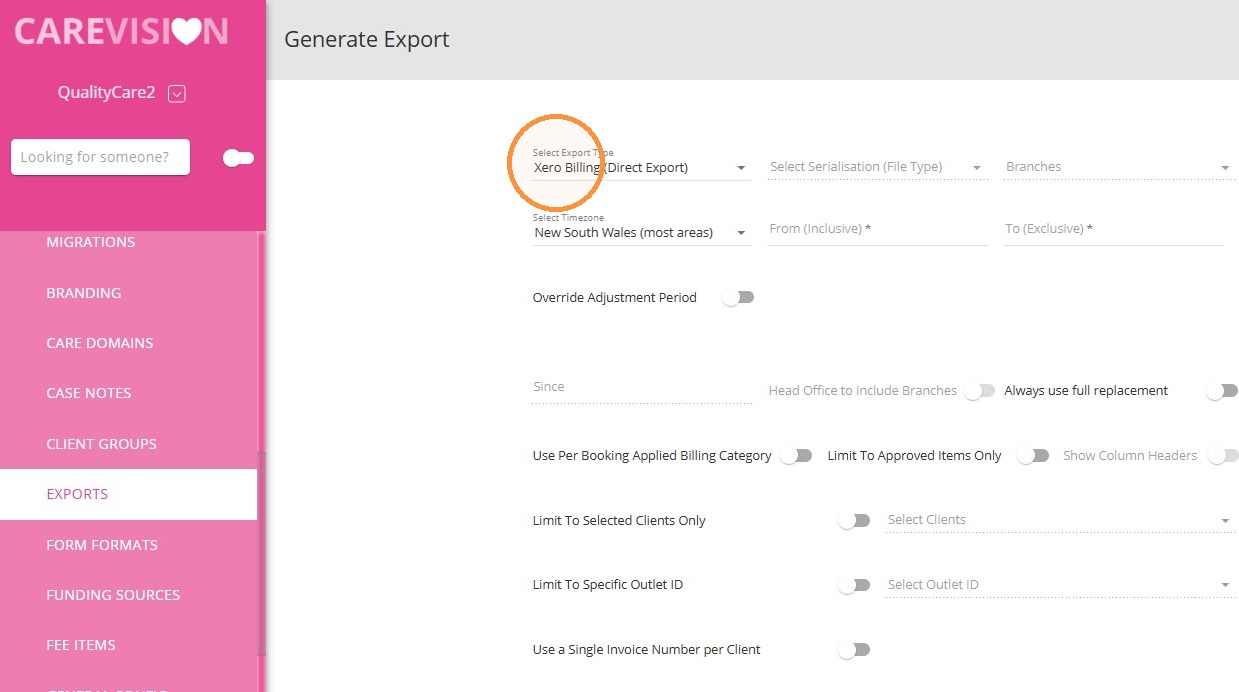
- Select Export Type: Defines the system the data will be exported to. Set to Xero Billing (Direct Export).
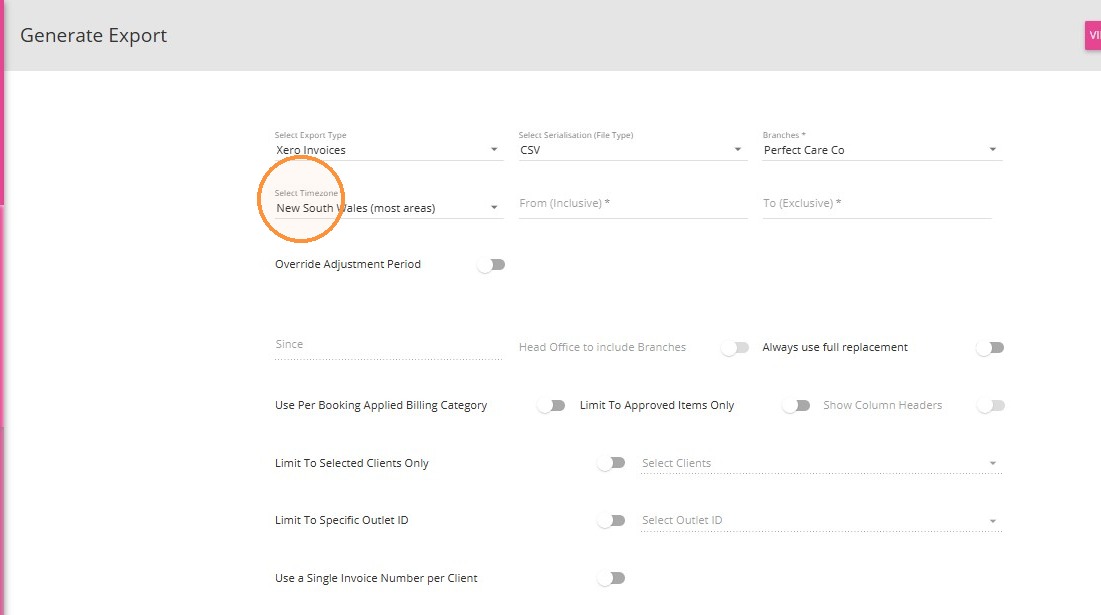
- Select Timezone: Determines the timezone applied to the export. Set to an Australian timezone.
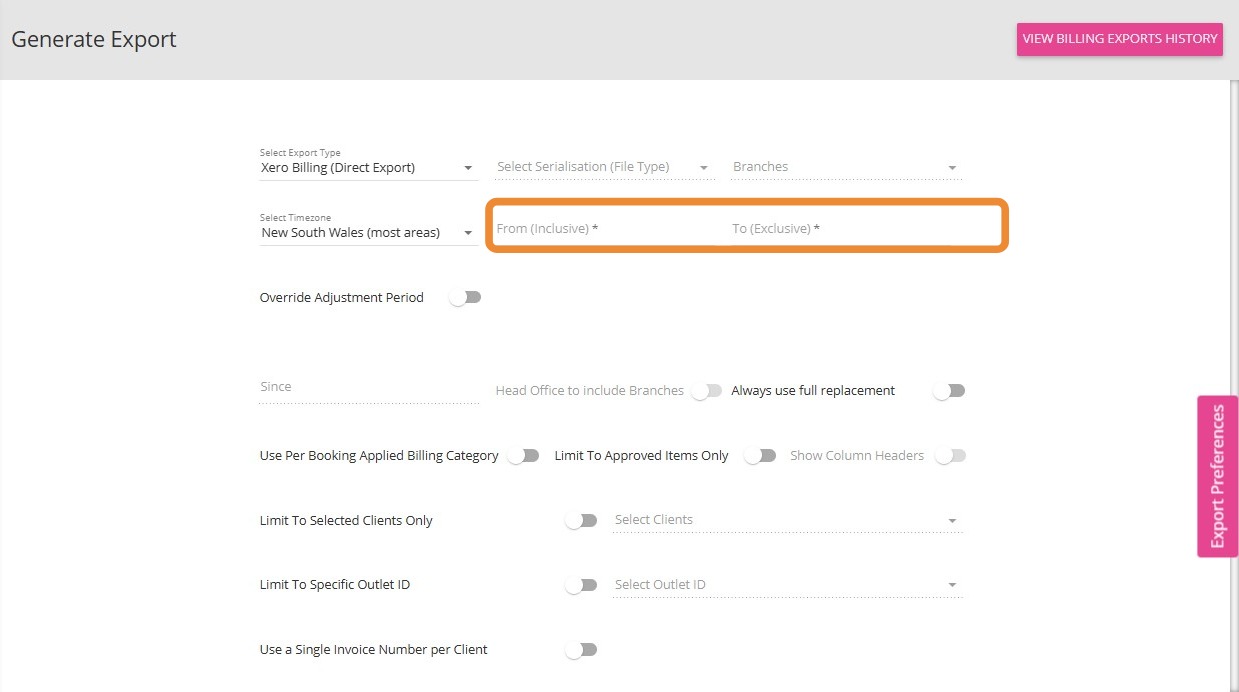
- Enter the date range for the export by specifying the start and end dates:
- From (Inclusive) – Enter the start date for the export range. This date will be included in the export.
- To (Exclusive) – Enter the end date for the export range. “Exclusive” indicates that this date is not included in the export. Therefore, the export will include data up to the day prior to this date.
- (Optional) Turn on the Override Adjustment Period toggle to allow extra days after your export period for capturing late changes. This ensures all updates up to your selected Adjustment To date are automatically included, keeping your reports accurate and complete.
- Specify the Adjustment From (Inclusive) and Adjustment To (Exclusive) fields, along with the appropriate start and end times.
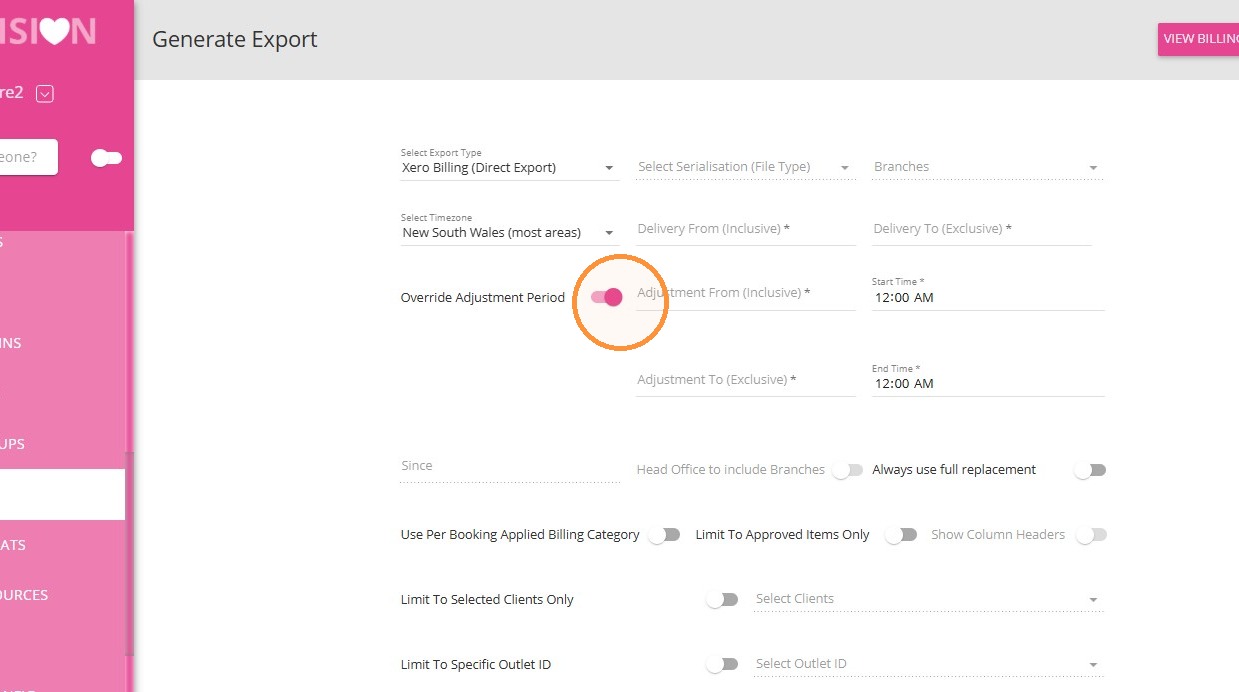
 Note: Always set the Adjustment From (inclusive) date and time for the new billing period to exactly match the Adjustment To (exclusive) date and time from the previous billing period. This ensures seamless billing with no gaps or overlaps, preventing both missed charges and double billing.
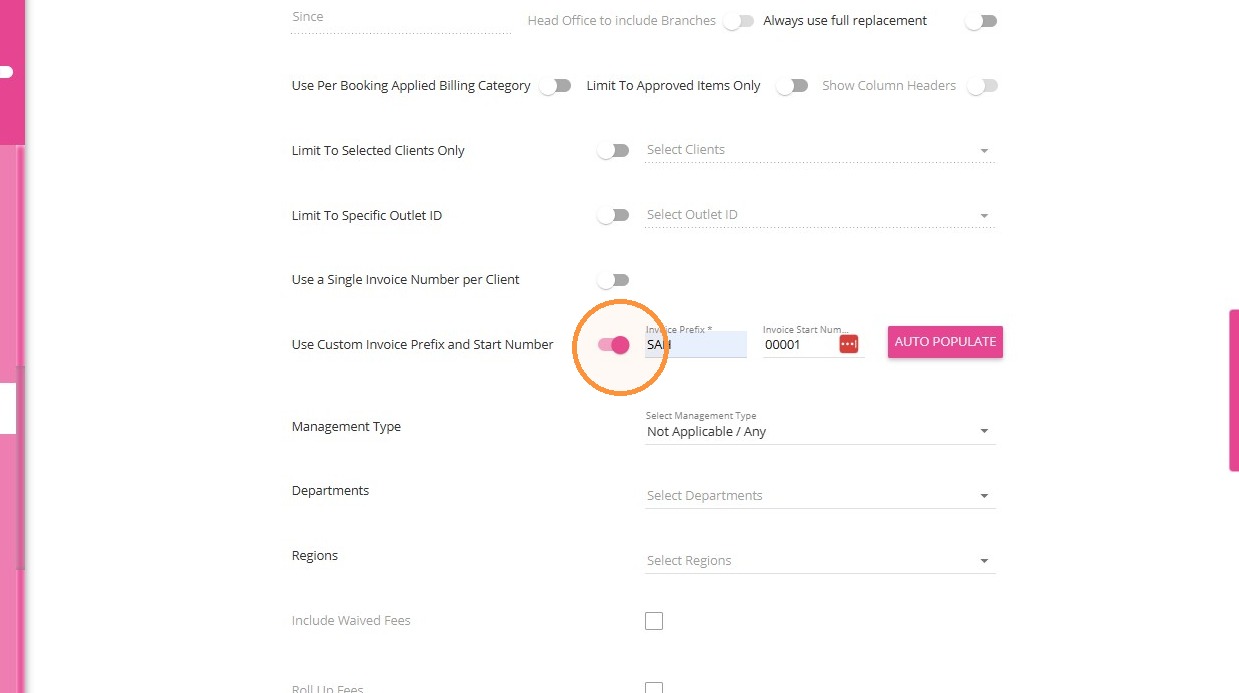
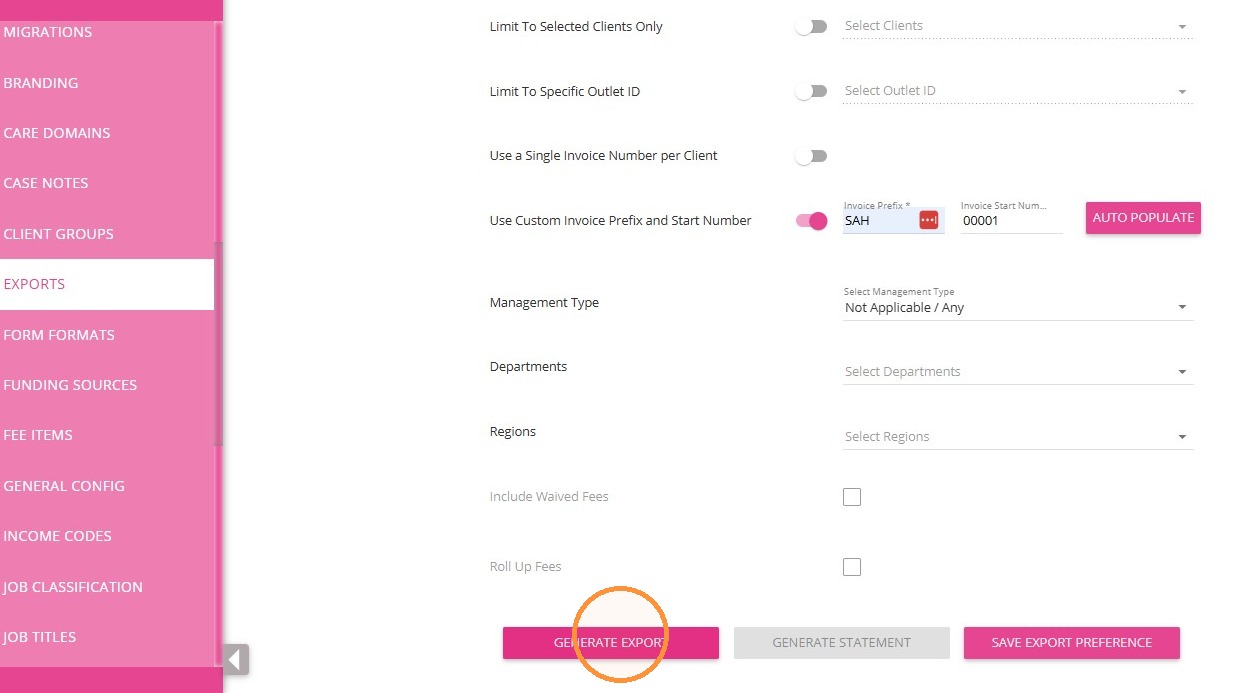
- You can turn on the Use Custom Invoice Prefix and Start Number toggle to automatically apply an invoice prefix. Once you turn this on, you need to enter a value in the Invoice Prefix field and specify the Invoice Start Number. Alternatively, you can click Auto Populate to have the system generate an Invoice Start Number automatically.
Note: To have bookings included in the export, make sure an Organisation Reference ID is set in the client’s profile.
3. Check the other fields and populate them based on your requirements, then click Generate Export.
Handling of Multi-Companies in Xero
Handling of Multi-Companies in Xero
If the head office of the organisation is integrated with a company in Xero and branch offices are integrated with a different company in Xero, you can only select branches based on the selected company in Xero.
If you select the main branch, you can only select branches that are integrated with the same company in Xero as the main branch. Branches integrated with a different company in Xero are disabled.
You will see an information message indicating that the branch is integrated with another company in Xero when a branch is disabled.
If a branch is not connected to any company in Xero, you will see a message indicating that the branch is not integrated with Xero.
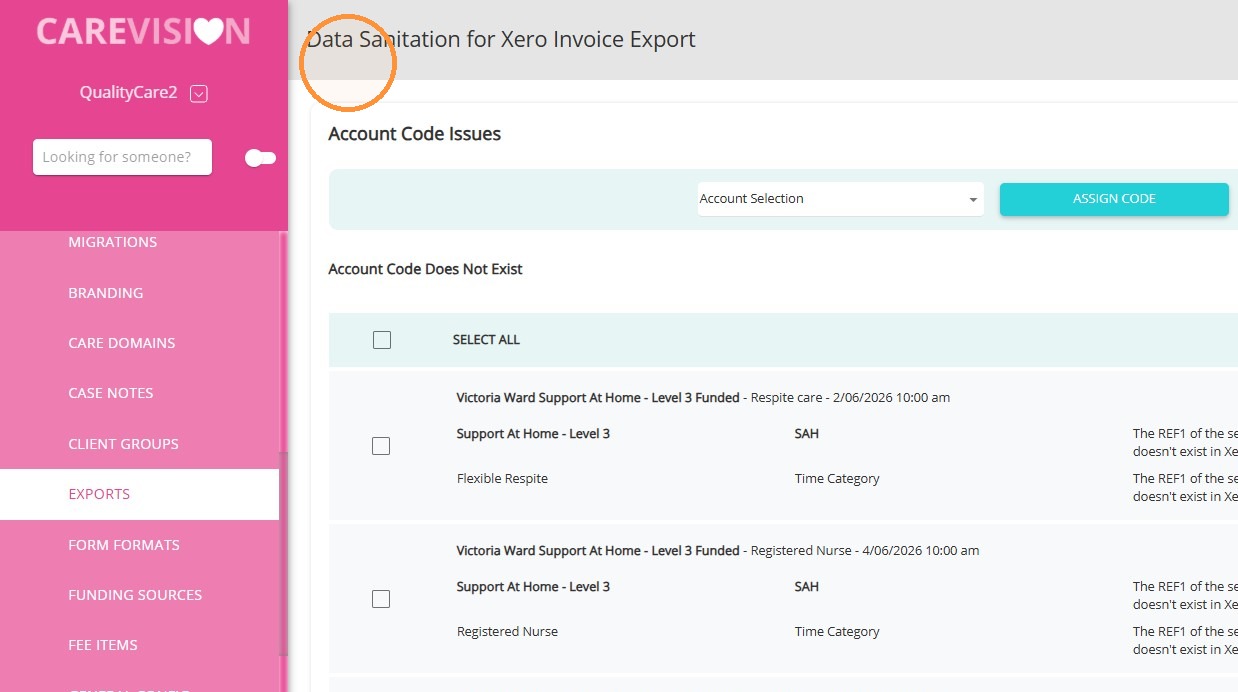
II. Data Sanitation for Xero Invoice Export
If account code issues are detected after generating an export, the Data Sanitation for Xero Invoice Export page will appear. This page allows you to review and resolve account code issues before proceeding.
A. Handling Missing Debtor Reference
Handling Missing Debtor Reference
- For missing debtor references, the system automatically resolves the issue for the organisation.
- No further action is required.
B. Handling No Matching Account Code from Xero
Handling No Matching Account Code from Xero
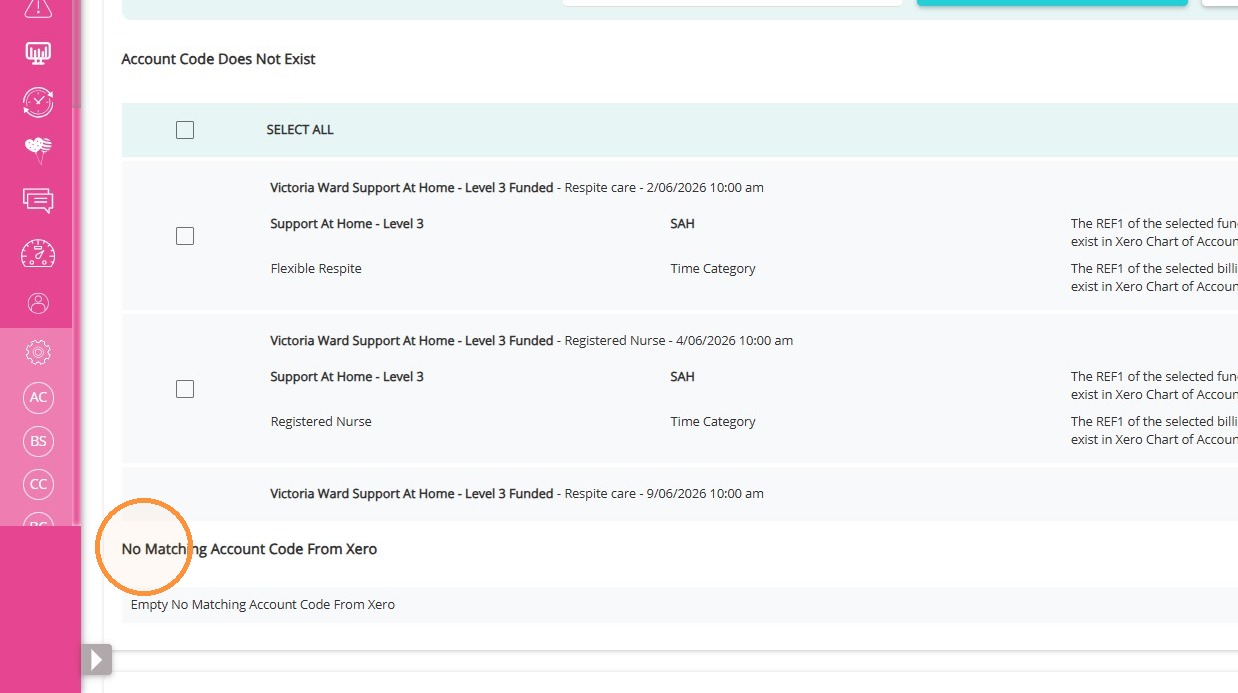
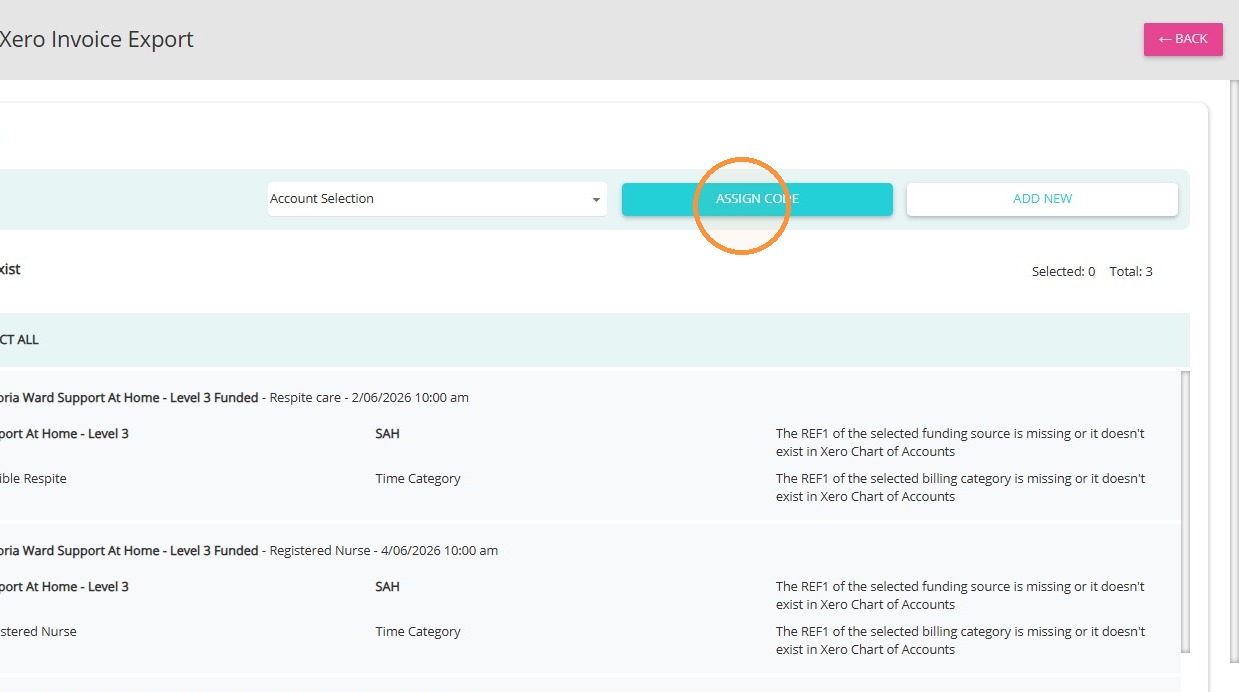
If booking line items appear under No Matching Account Code from Xero, you can update them as follows:
- Select the relevant line items.
- Choose the appropriate account code from the account selection.
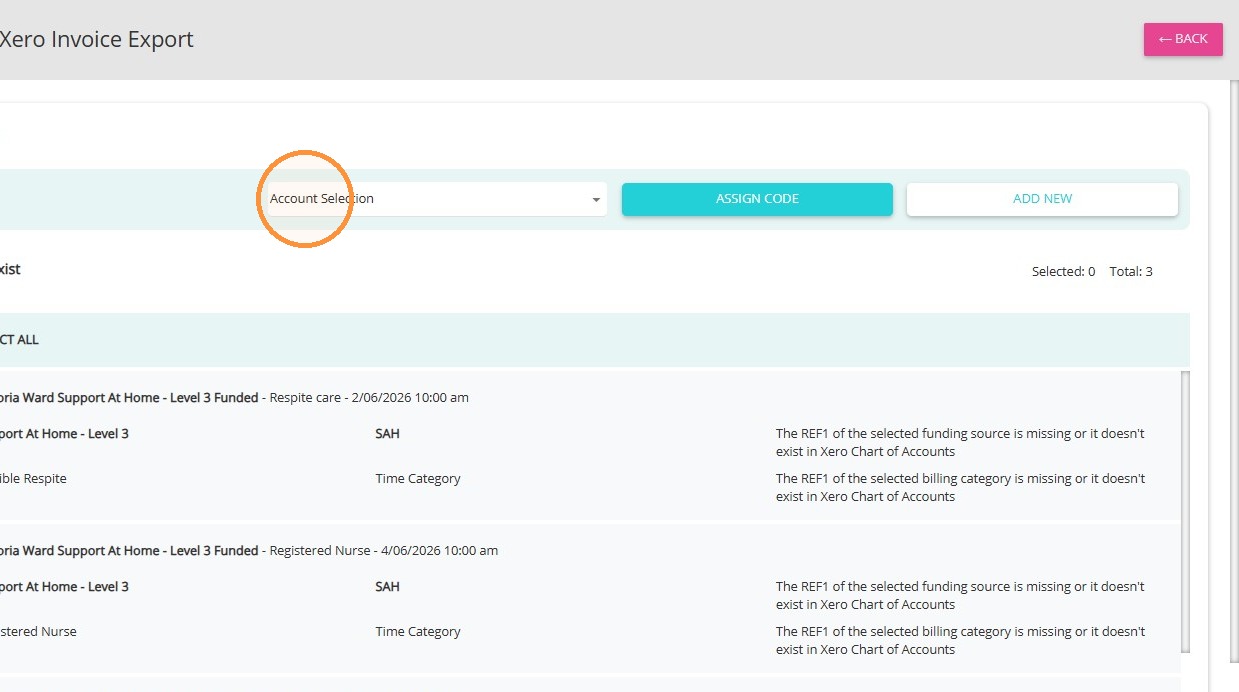
- Click Assign Code to apply the selected account code.
C. Data Sanitation Page Available Actions
- On the Data Sanitation page, you can:
- View a list of previously exported bookings.

- Select the bookings you want to re-export.
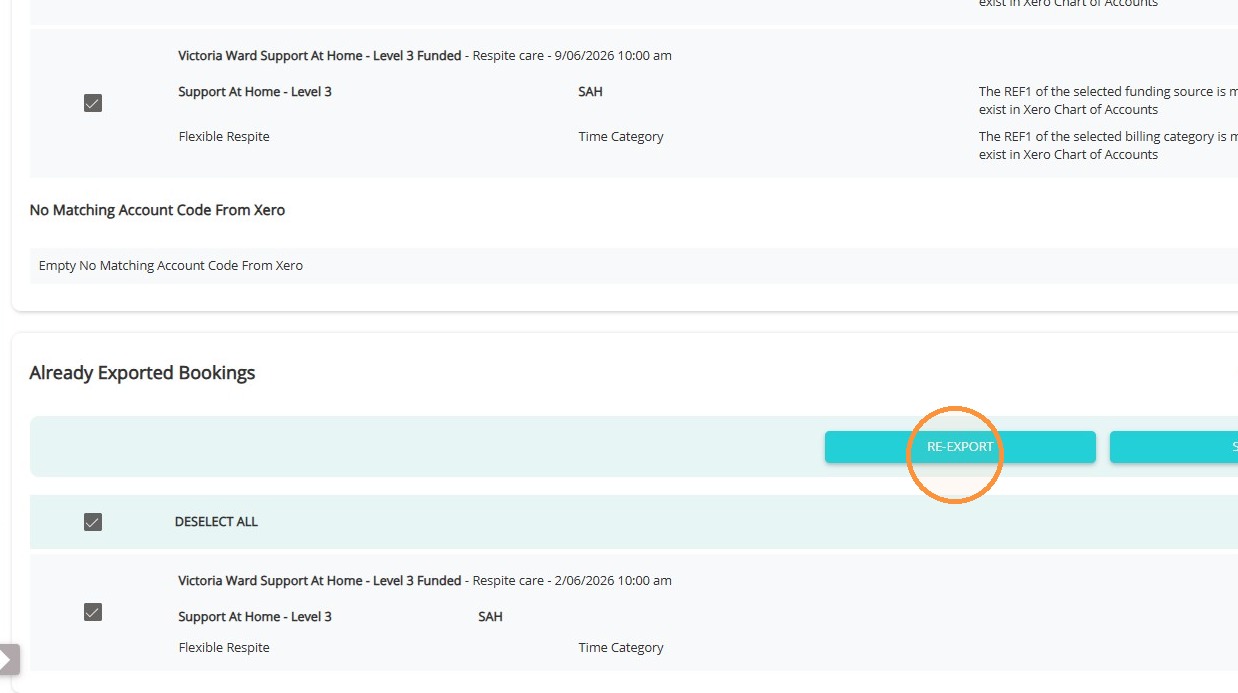
- Select the bookings you want to skip.
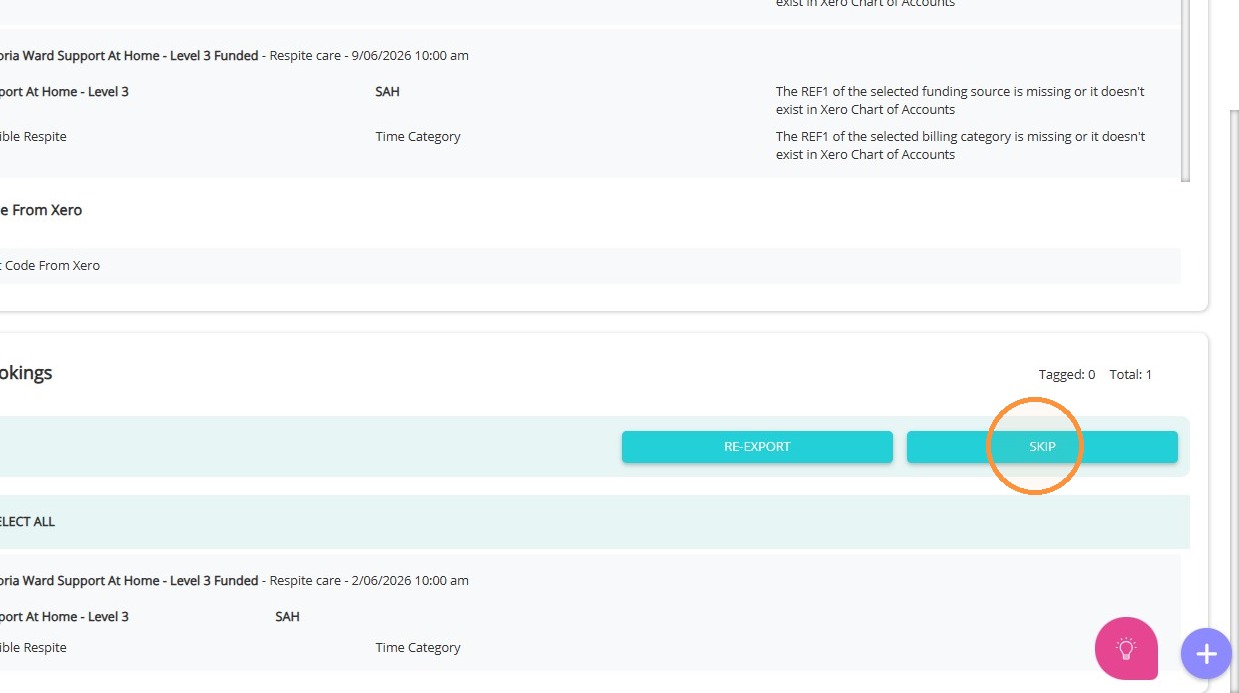
- Bookings marked for re-export are also visible on this page.
Note: For the reference name, if a client has a contact with the contact type Finance/Billing, the billing name will be used. Otherwise, the reference will remain blank.
D. Review Xero Invoices
If there are no issues with the account codes, the Review Xero Invoices page appears. It shows the invoice number, invoice date, reference, contact name, due date, and line items with their account codes.
After reviewing, click Confirm Export to proceed, or Cancel Export to stop.
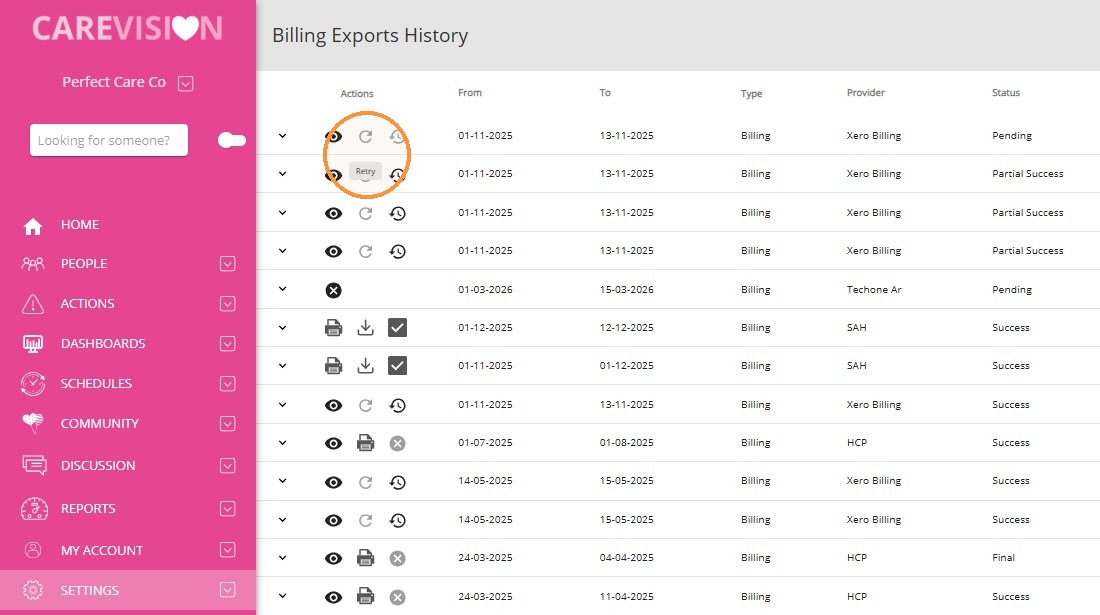
III. Xero Billing Exports History
All generated export records are listed in the Billing Exports History.
To access:
- Go to Settings > Exports.
- Click View Billing Exports History.
From this list, you can:
A. View Export Details
A. View Export Details
This action allows you to view detailed information about a specific export, including any errors encountered.
- Locate the export record.
- Click the eye icon.
You will be able to see the export details. If the export failed, the system will display error messages explaining the reason. Some of these errors may need to be resolved directly in your Xero account before you retry the export.

B. Retry Failed Exports
B. Retry Failed Exports
This action allows you to rerun an export that previously failed.
- Locate an export with a Failed status.
- Click the Retry button.
The system will attempt to process the export again. This option is only available for failed exports and is disabled for exports with Partial Success or Success status. If you select Retry on a successful export, any previously encountered errors will be displayed.
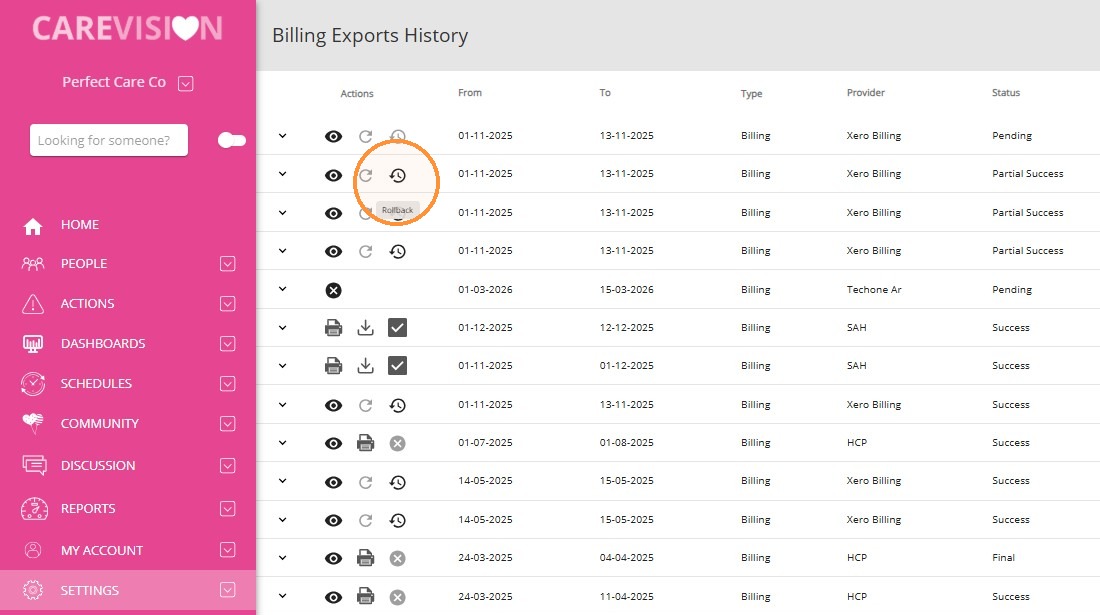
C. Roll Back Completed Exports
C. Roll Back Completed Exports
This action allows you to reverse a completed or partially completed export.
- Locate an export with Success or Partial Success status.
- Click the Rollback icon.
Once the rollback is completed, all related invoices will be deleted from Xero, and the export status will change to Rolled Back in the Billing Exports History. You can still view the details of the rolled-back export by clicking the eye icon.
Note: Canceled exports do not appear in Billing Exports History.
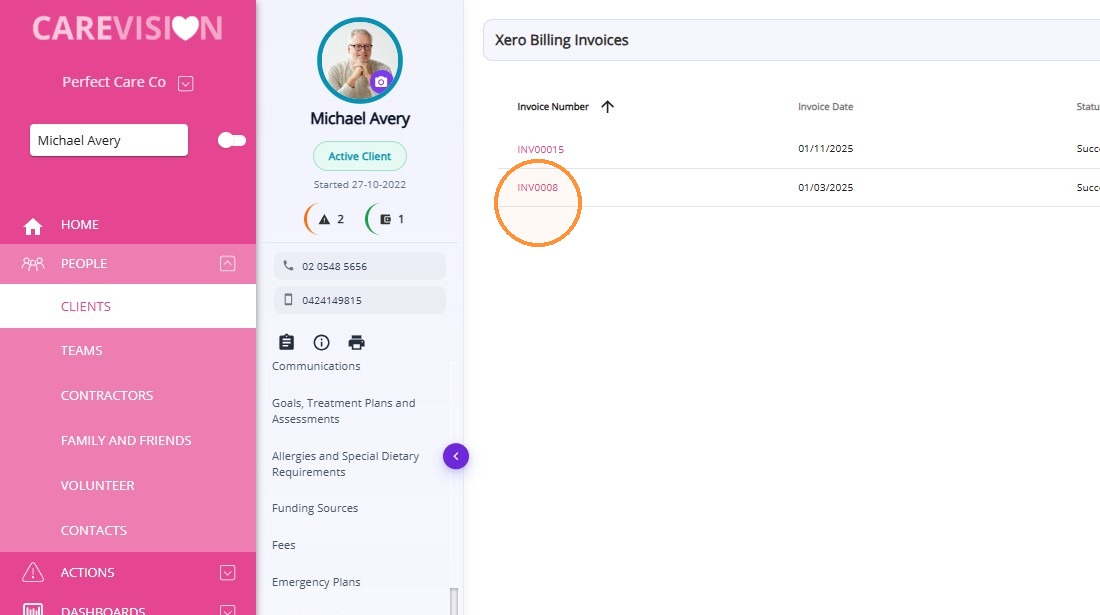
IV. Viewing Xero Billing Invoices of Clients
A. Viewing Xero Billing Invoices in the Client Profile
A. Viewing Xero Billing Invoices in the Client Profile
- Navigate to the client profile.
- If Xero billing invoices exist, they are displayed under Xero Billing Invoices.
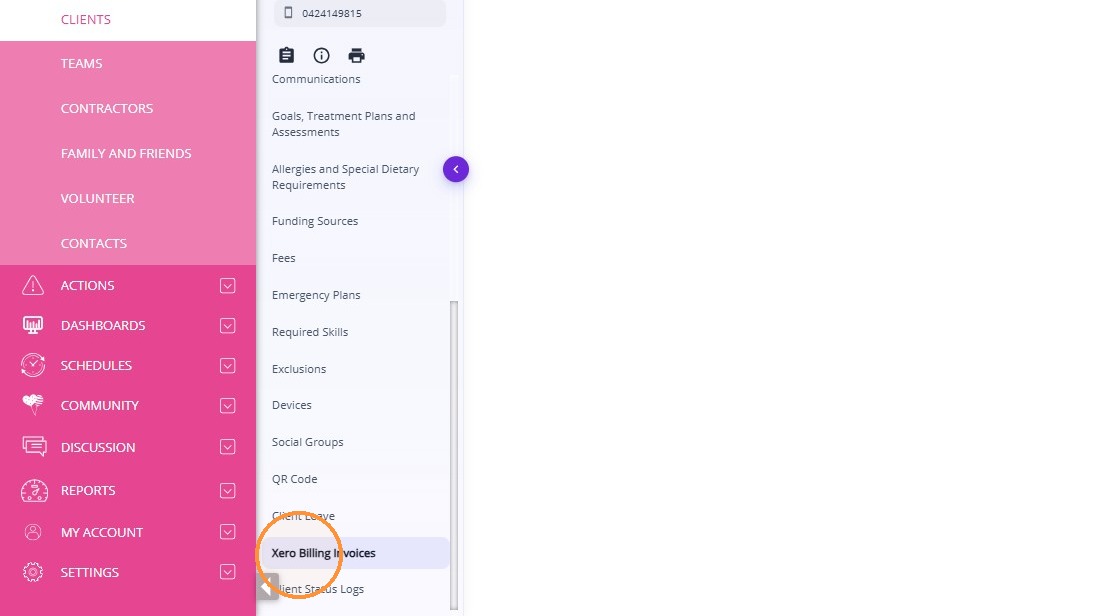
- Click the invoice number to view the invoice details. The invoice list displays the following details:
- Invoice number
- Invoice date
- Status
- Created date
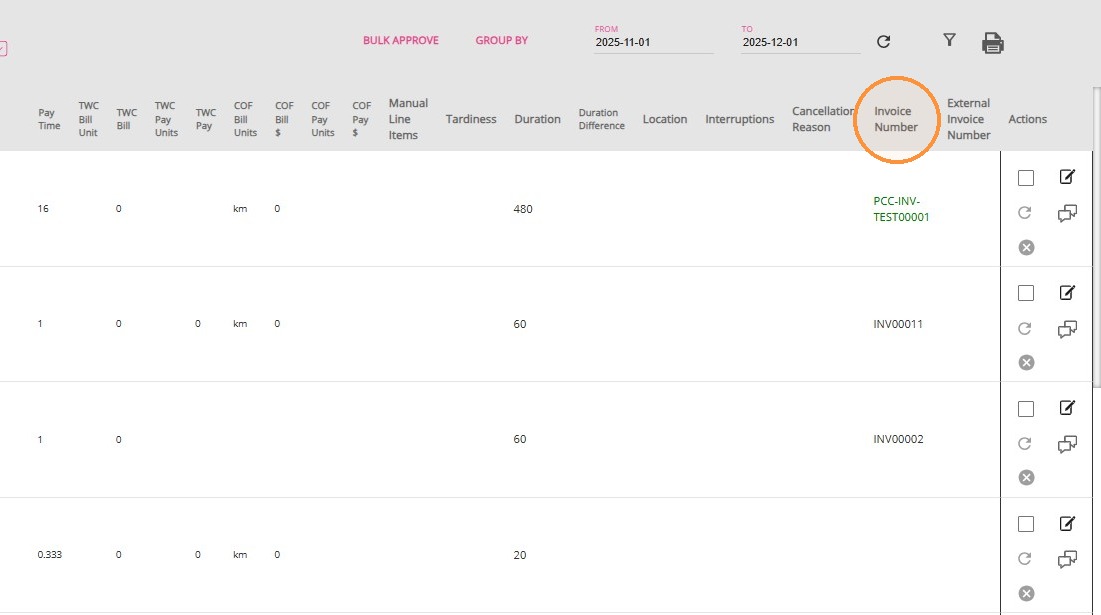
B. Viewing Invoice Details from the Service Review Board
B. Viewing Invoice Details from the Service Review Board
- In the left navigation pane of the portal, go to Actions > Service Review.
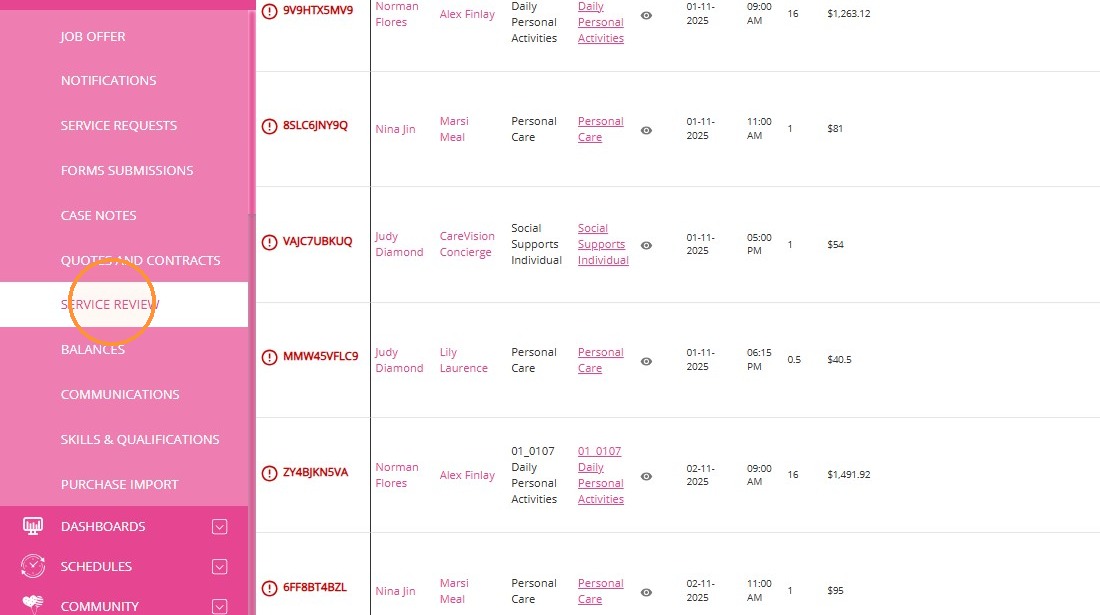
- Bookings display their associated invoice numbers.
This topic explained how to export Xero invoices, review export history, and view generated invoices. For more information about Xero invoice exports, contact the CareVision Support Team.
Related Articles
How to Set Up Your Organisation’s HACC Data
This topic describes the setup of your organisation’s Home and Community Care (HACC) data, including the process for creating Group Sets and Client Groups. Keywords: hacc data setup, client groups, group sets, hacc export, indigenous status, living ...Applying Modifications from Funding Source Templates to Client Funding Sources
This topic describes how to apply modifications from Funding Source Templates to Client Funding Sources using both single and bulk sync options. This way, if you want to make changes to a funding source template, you can quickly apply those ...What is the Locations Section in Settings?
The Location Management feature in Settings > Locations allows you to manage all locations within your organisation from a single screen. From here, you can view, create, search, and delete location records. Each organisation maintains its own set of ...How to Update Subsidy Rates
Subsidy rates must be updated to reflect the latest government-issued funding changes. As of 1 July 2026, new Support at Home rates apply. This topic outlines how to manually update your billing category rates in CareVision to maintain accurate rate ...How to Update Outlet IDs on Funding Source Templates
Outlet ID is a unique code that identifies and links specific transactions to a particular outlet location within your organization. Regularly updating your Outlet IDs in CareVision helps ensure that all client funding exports are accurate and ...
Request an Article or Guide
We are keen to know what you want to know more about? Let us know on chat or raise a ticket for an article or topic you would like covered in more detail. We have a team of technical writers and learning content creators keen for your suggestions.