Xero Billing
Terminologies
- Xero is a simple accounting package for SME organisations and offers an easy to use cloud financial package. This integration currently integrates to the Xero Payroll where we send across basic time worked for each payroll category for an employee in a period. This integration does not include any award interpretation capabilities and the responsibility for award interpretation and payroll accuracy is that of the organisation which uses this integration.
Initial Set Up
You should be able to see Xero Billing on the list of integrations. Click on the button with a label, Link My Account.

Connect your Xero Account. Follow the process instructed by Xero.


Once you have gone back to the Integrations Page, you should be able to see the Xero listed with a status Pending Activation. There are now two available buttons at the bottom. The button at the left should be able to disconnect your account. The right button should be able to allow you to set up Xero Billing.

Set Up Xero Billing
Changing the supported countries by selecting from the list of countries should automatically be saved.
The supported currencies are based on ISO 4217 Currency Codes. There is also an option to add currency. If you want to add a currency, select from the supported currencies. After confirming your change, click on the ADD CURRENCY button. Your changes should now be saved.
NOTE: Deletion of already added supported currencies are not allowed.
For the tax rates, only supported and non-system tax rates are editable. Only the name and tax rate can be changed.
For Australia, tax types of EXEMPTOUTPUT and OUTPUT are the ones that are editable. System-defined tax types like GSTONIMPORTS and EXEMPTEXPENSES are not editable. The unsupported ones will be displayed in italic.
Tax Rate names can also be ordered alphabetically by clicking on the column, Name. The arrow icon will indicate if it is in ascending or descending order.
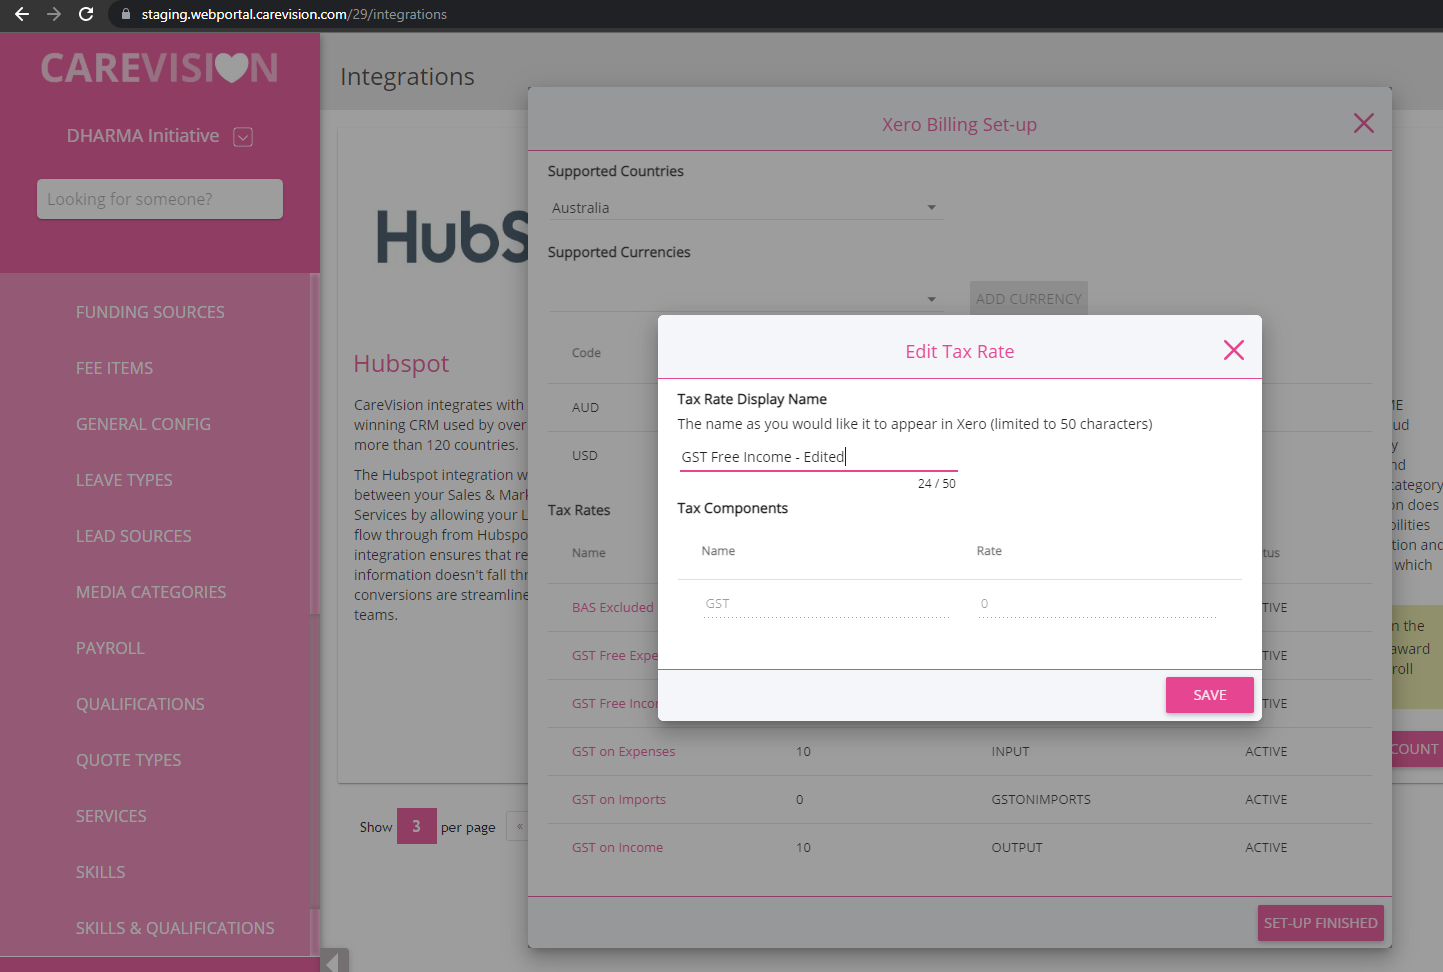

Click on SAVE to confirm your changes. After the update, the updated values should be displayed.
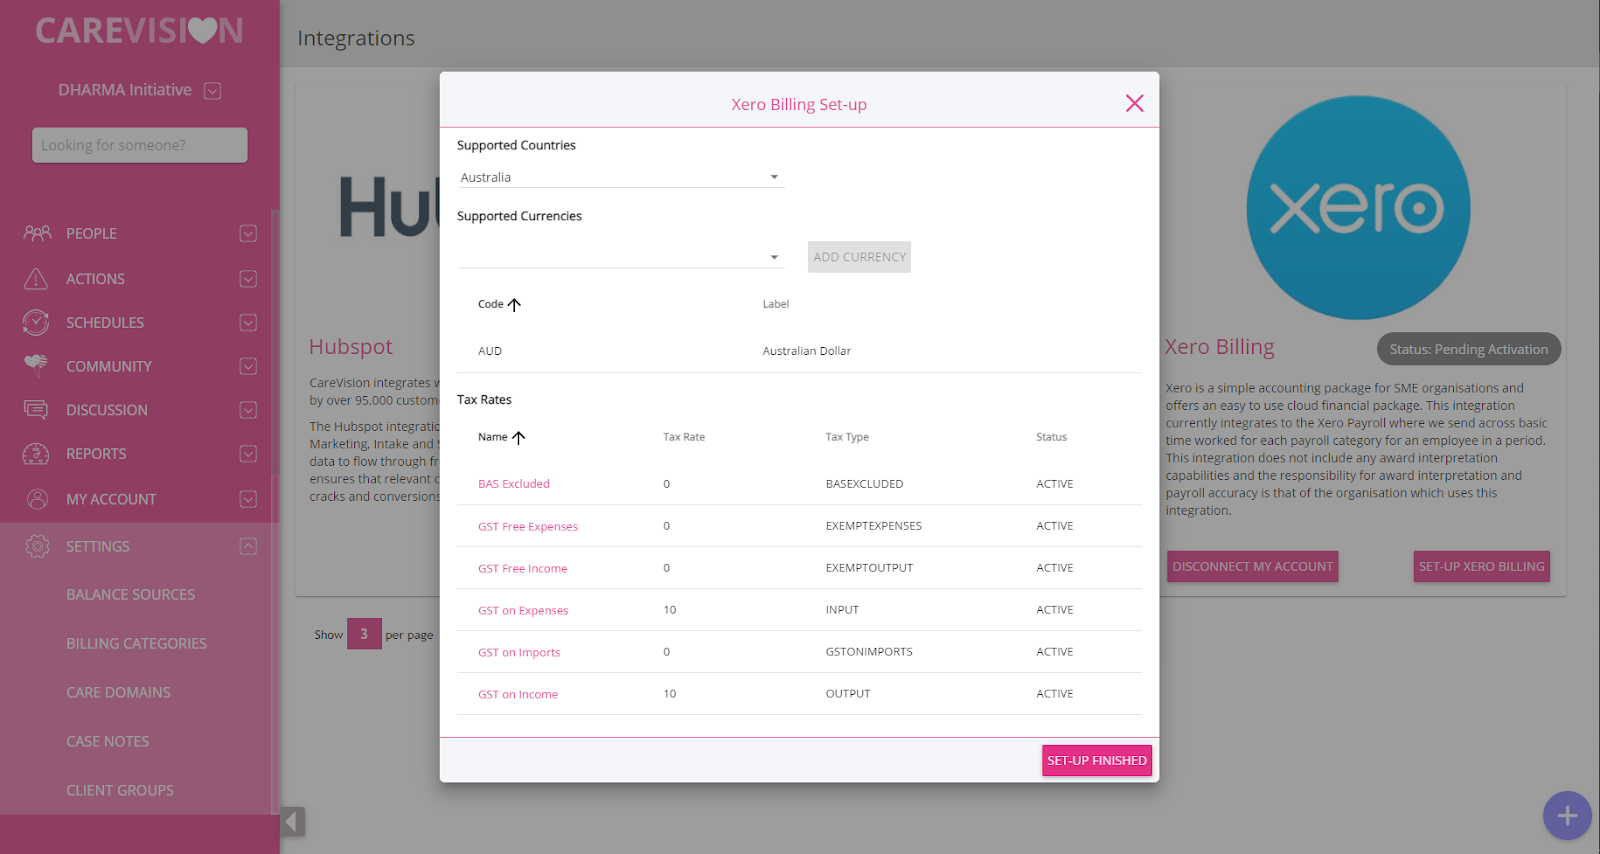
Once you have finished setting up, click on the button, SET UP FINISHED.
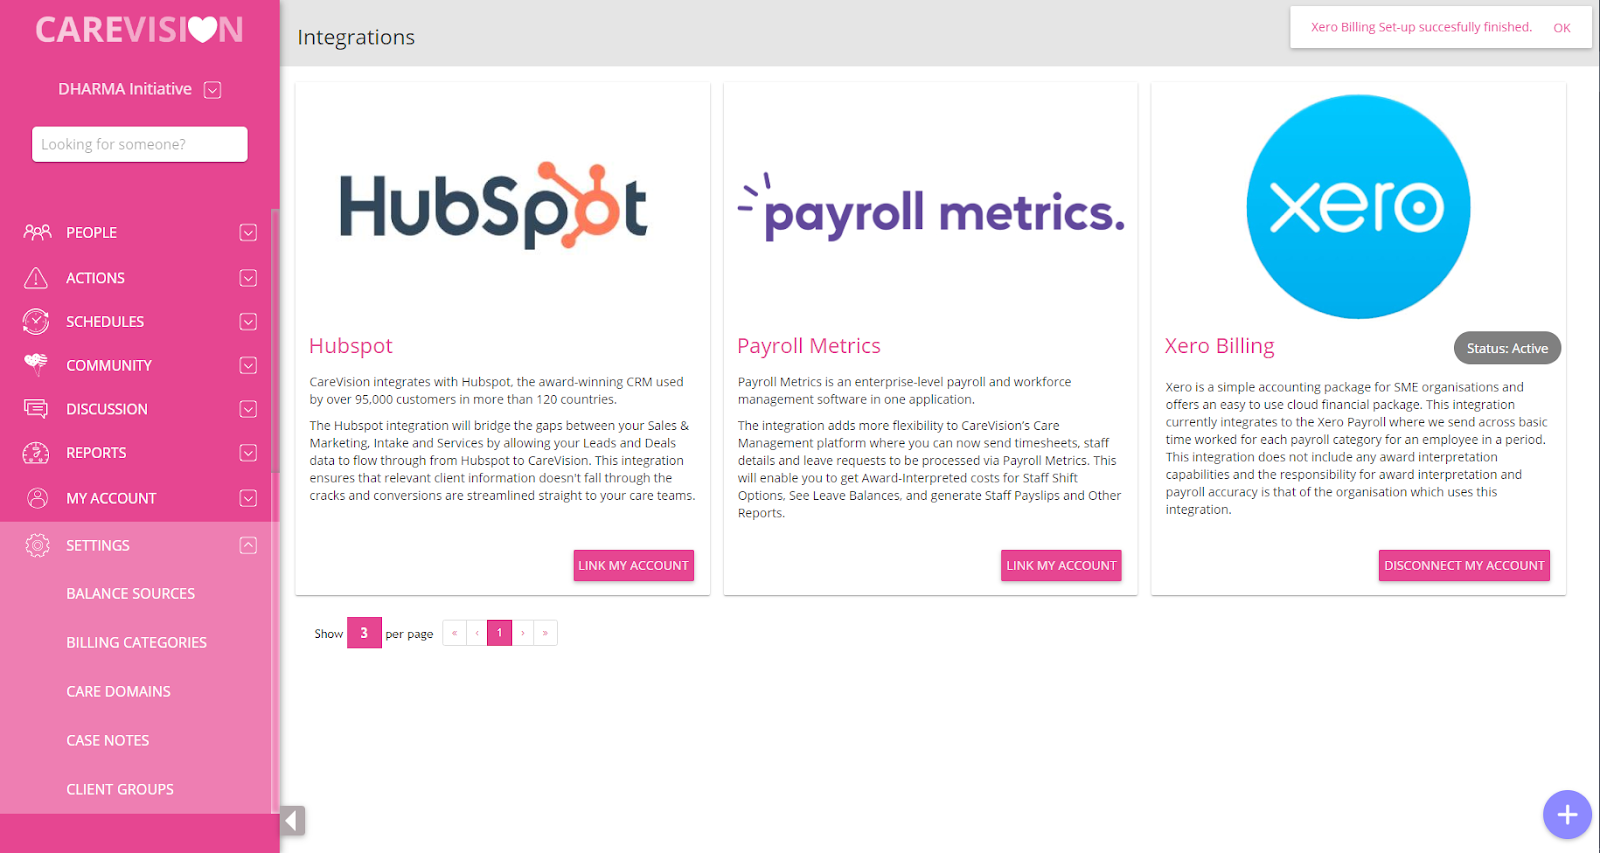
A success message will appear, Xero Billing Set up successfully finished. This will indicate that you have already finished setting up Xero in your organization.
Disconnecting Xero Account
Related Articles
FAQ: How to resolve "Invalid_Grant" error in Xero Billing (Direct Export)
Overview Xero Integration to the Care Vision Portal has token needed to be able to link them limited to 30 days when being inactive or not-in-use. Invalid_Grant error is encountered when the token needed for the integration of Xero Billing is already ...Support at Home Billing and Claiming Workflow
The Support at Home billing and claiming workflow in CareVision guides you through reviewing services, generating and checking your claim file, and submitting it to Services Australia. After you receive the Services Australia CSV payment statement, ...Billing Process for NDIS and HCP
The billing process begins as soon as you engage the client within CareVision. The quoting stage informs how the client is going to be billed. Aftert the quoting stage, the client is roster ready and should now start receiving the supports they are ...What are Fees, How can I use them, All the Options when Configure Fees Billing Categories and Fee Items
What are Fees? Fees is the amount being charged based on the services requested and availed by the client. These are being charged directly to the client or deducted on the funding available for the client. These costs varies depending on the ...Xero Payroll
Terminologies Xero is a simple accounting package for SME organisations and offers an easy to use cloud financial package. This integration currently integrates to the Xero Payroll where we send across basic time worked for each payroll category for ...