Inviting and Removing Participants from a Social Group
Invite Staff Members to Join a Social Group
There may be situations where field care professionals are scheduled to provide service for a social group event, and Coordinators have the access to invite one or more staff member to join a social group (on the portal).
1. Navigate to the Social Groups section underneath the COMMUNITY module
2. Click on any of the areas within the Social Group card to expand the details
3. The following page will be shown, with the Calendar section defaulted to automatically display
4. Click on  section to expand the list of staff member/s within the Social Group
5. Click on the 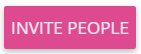 button to invite staff members to join the Social Group
6. Type the staff member's name, and a drop down list will appear according to the alphabets that you have entered
Each staff member that you have added will appear as a separate entity, where you are able to click on the x to remove if needed

If the list of staff members that you're inviting is the same as another Social Group, click on 'FROM DIFFERENT SOCIAL GROUP' to invite the same staff members from another social group. You are able to select the staff members from multiple Social Groups.
If the list of staff members that you're inviting is from a specific target list, click on 'FROM TARGET LIST' to invite the same participants from that target list.
7. Click on the  button at the bottom right corner to invite the staff members
8. The added staff members will be listed under the INVITED section within the Social Group
Viewing a Staff Member's Social Group/s
In addition to inviting a staff member to join a Social Group, coordinators have the access to view the Social Group/s that a particular team member belongs to.
1. Navigate to the staff member's profile
There are several areas within the system where you are able to navigate to a staff member's profile:
a. The Search bar at the top left section of the screen
b. The list of Active team members (PEOPLE > TEAMS)
c. The list of staff profiles on the Scheduling page (click on the blue silhouette icon to expand the staff details > black silhouette icon within the details)
2. Scroll to the bottom and click on SOCIAL GROUPS to expand the section
3. You are then able to view the Social Group/s that the particular staff member belongs to
4. Click on 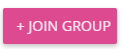 to add the staff member to additional Social Groups
5. Click on 'Invite to Group' at the top right corner of the Social Group to add the staff member to the group.
6. Once you have clicked on the button, the Social Group will disappear from the current window and appearing under the SOCIAL GROUP section on the staff profile
Removing Staff Members from a Social Group
The Coordinators are able to remove the staff members from a Social Group from the Community module, as well as from their staff profiles.

Scenario A: Removing staff members from the COMMUNITY module
1. 1. Navigate to the Social Groups section underneath the COMMUNITY module
2. Click on any of the areas within the Social Group card to expand the details
3. The following page will be shown, with the Calendar section defaulted to automatically display
4. Click on section to expand the list of staff member/s within the Social Group
5. A 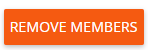 button will appear when you click on the checkbox in front of the staff member's name
6. Click on the 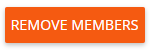 button to remove the specific staff member from the Social Group
7. A Leave Social Group window will appear, with a list of the event schedules that the particular staff member has RSVP-ed and/or planned to participate in
8. Click on the  button to proceed with removing the staff member from the Social Group
9. Click on the  button to confirm with removing the staff member from the Social Group
Scenario B: Removing staff members from their profiles
1. Navigate to the staff member's profile
There are several areas within the system where you are able to navigate to a staff member's profile:
a. The Search bar at the top left section of the screen
b. The list of Active team members (PEOPLE > TEAMS)
c. The list of staff profiles on the Scheduling page (click on the blue silhouette icon to expand the staff details > black silhouette icon within the details)
2. Scroll to the bottom and click on SOCIAL GROUPS to expand the section
3. You are then able to view the Social Group/s that the particular staff member belongs to
4. Click on 'Remove from this group' to remove the staff member from the Social Group
Invite Care Recipients to Join a Social Group
1. Navigate to the Social Groups section underneath the COMMUNITY module
2. Click on any of the areas within the Social Group card to expand the details
3. The following page will be shown, with the Calendar section defaulted to automatically display
4. Click on  section to expand the list of care recipients within the Social Group
5. Click on the  button to invite the care recipients to join the Social Group
6. An 'Add Circles' window will appear, where you are able to select one or multiple care recipients in the drop down list
7. Click on Add button at the bottom corner of the window to add the selected care recipients as the Social Group members
8. The added care recipients will be listed underneath the MEMBERS section within the Social Group
Viewing a Care Recipient's Social Group/s
In addition to adding the care recipients as members of a Social Group, Coordinators have the access to view the Social Group/s that a particular care recipient belongs to.
1. Navigate to the care recipient's profile
There are several areas within the system where you are able to navigate to a care recipient's profile:
a. The Search bar at the top left section of the screen
b. The list of Active Clients (PEOPLE > CLIENTS)
c. The client profiles within the booking details on the Scheduling page (click on the i icon to view the booking details > click on the care recipient's name on the top left corner of the window)
2. Scroll to the bottom and click on SOCIAL GROUPS to expand the section
3. You are then able to view the Social Group/s that the particular care recipient is a member of (please refer to the above screenshot)
4. Click into the Social Group to view the Social Group event schedule for the care recipient
Please view () article to create event schedule for the care recipient
Removing Care Recipients from a Social Group
Scenario A: Removing care recipients from the COMMUNITY module
1. Navigate to the Social Groups section underneath the COMMUNITY module
2. Click on any of the areas within the Social Group card to expand the details
3. The following page will be shown, with the Calendar section defaulted to automatically display
4. Click on  section to expand the list of care recipients within the Social Group
5. A button will appear when you click on the checkbox in front of the care recipient's name
6. Click on the button to remove the specific care recipient/s from the Social Group
7. A Leave Social Group window will appear, with a list of the event schedules that the particular care recipient has RSVP-ed and/or planned to participate in
8. Click on the button to proceed with removing the care recipient from the Social Group
9. Click on the button to confirm with removing the care recipient from the Social Group
Scenario B: Removing care recipients from their profiles
1. Navigate to the care recipient's profile
There are several areas within the system where you are able to navigate to a care recipient's profile:
a. The Search bar at the top left section of the screen
b. The list of Active Clients (PEOPLE > CLIENTS)
c. The client profiles within the booking details on the Scheduling page (click on the i icon to view the booking details > click on the care recipient's name on the top left corner of the window)
2. Scroll to the bottom and click on SOCIAL GROUPS to expand the section
3. You are then able to view the Social Group/s that the particular care recipient is a member of (please refer to the above screenshot)
4. Click into the Social Group to view the Social Group event schedule for the care recipient
5. A Leave Social Group window will appear, with a list of the event schedules that the particular care recipient has RSVP-ed and/or planned to participate in
6. Click on the button to proceed with removing the care recipient from the Social Group
7. Click on the button to confirm with removing the care recipient from the Social Group

Please note that there will be a pop up message at the top corner of the screen notifying that the member/s have been removed.
Related Articles
Getting Started with Social Groups
A social group is a feature that allows your organisation to bring together clients who share common interests or require similar services. These groups can be created for various purposes, such as organising activities, coordinating services, or ...Configuration Guide: Social Groups and Group Events
The Social Groups Feature allows organisations to deliver Group Programs/Day Programs. Each Social Group have their separate list of members and staff added as well as an event calendar to manage any activity, service or event for the Social Group. ...Use Bulk MPAS for Social Group Events
This topic explains how to use Bulk Member Planned Attendance Schedule (MPAS) to manage a client’s attendance across multiple social group events. Bulk MPAS allow you to assign multiple event attendances for a client in one process. Keywords: bulk ...Generate Meal and Transport Documents for Social Group Events
This topic explains how to generate the Meals Delivery and Transport Run documents for social group events. This helps support accurate meal preparation and transport coordination for social group events. Keywords: social group events, meal delivery ...Communicating with Group Members and Sharing Group Content
This article will cover the areas in maintaining and managing the Social Groups. Uploading photos to a social group Coordinators are able to upload photos to a Social Group. 1. Navigate to the COMMUNITY module 2. Click on SOCIAL GROUPS to view all ...
Request an Article or Guide
We are keen to know what you want to know more about? Let us know on chat or raise a ticket for an article or topic you would like covered in more detail. We have a team of technical writers and learning content creators keen for your suggestions.